Mobile Tooltips
Floating and anchored Tooltips: when to use each, how to style and place them.
Table of Contents
Mobile Tooltips draw a user's attention to a specific area of your app's screen. They're ideal for onboarding, feature announcements, and contextual walkthroughs. This article covers the two Tooltip types and how to configure them. To build a Tooltip Flow step by step, see Build a Tooltip Flow.
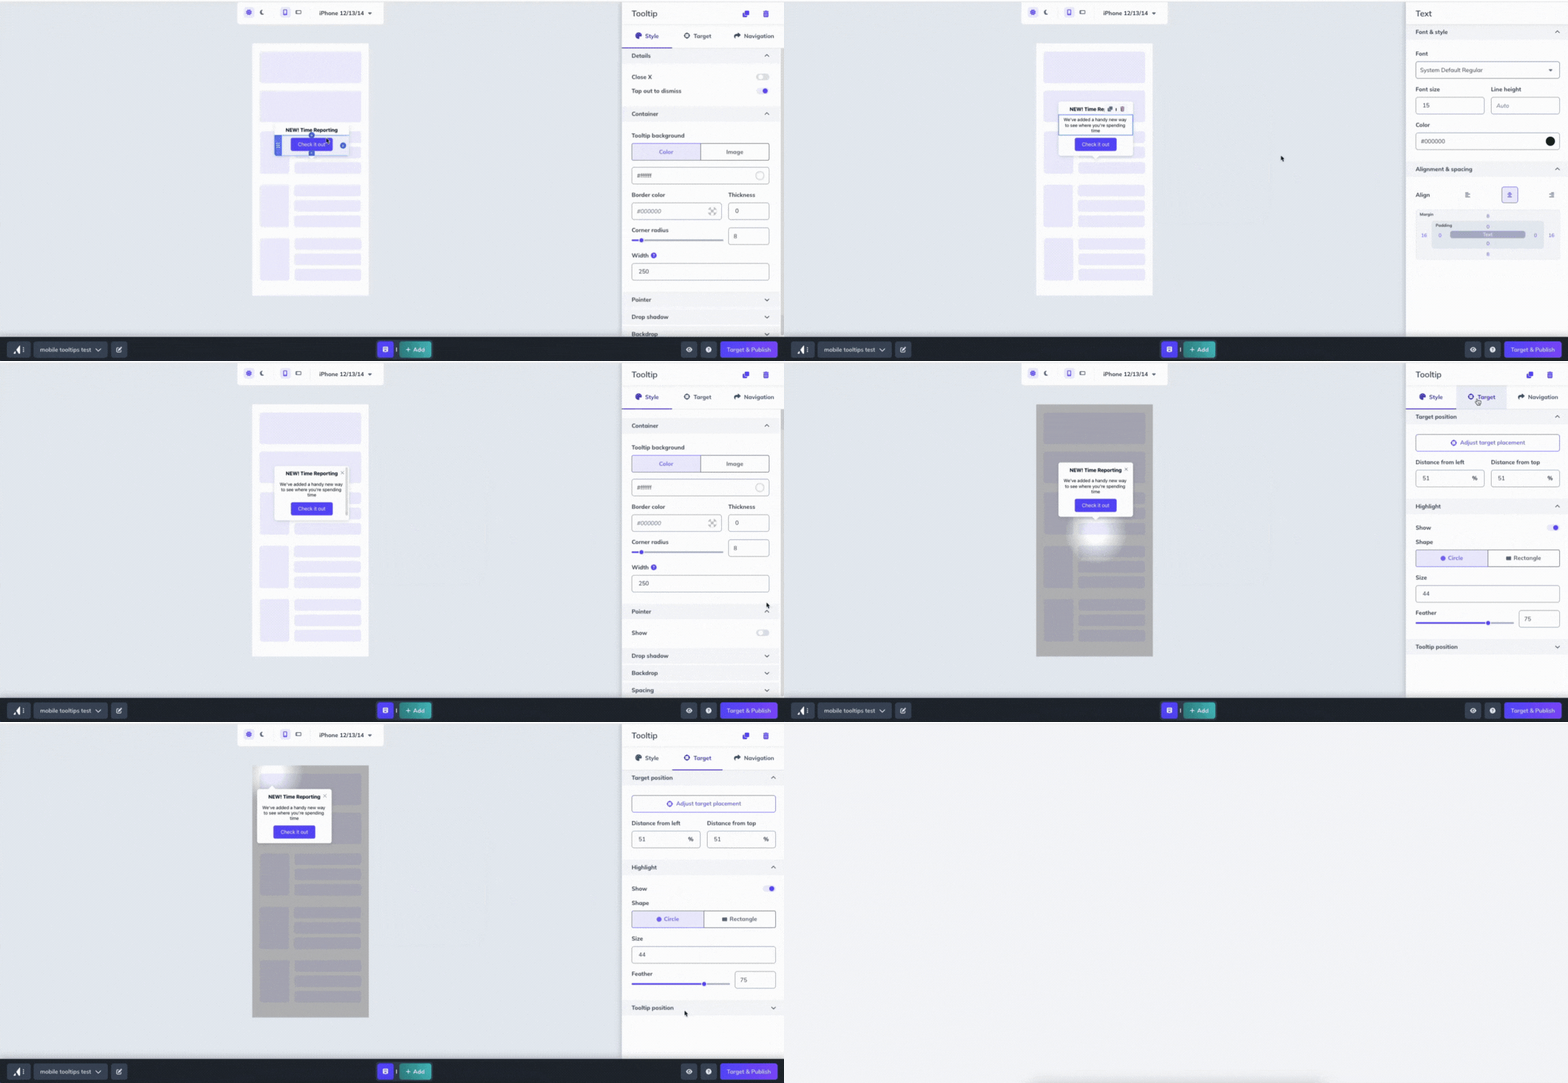
Floating Tooltips
Floating Tooltips target an area of the screen rather than a specific element. They work well for a static part of the screen, such as a navigation bar item. Floating Tooltips are supported on all app frameworks, so they're the option to use for Ionic apps, which don't support anchored Tooltips.
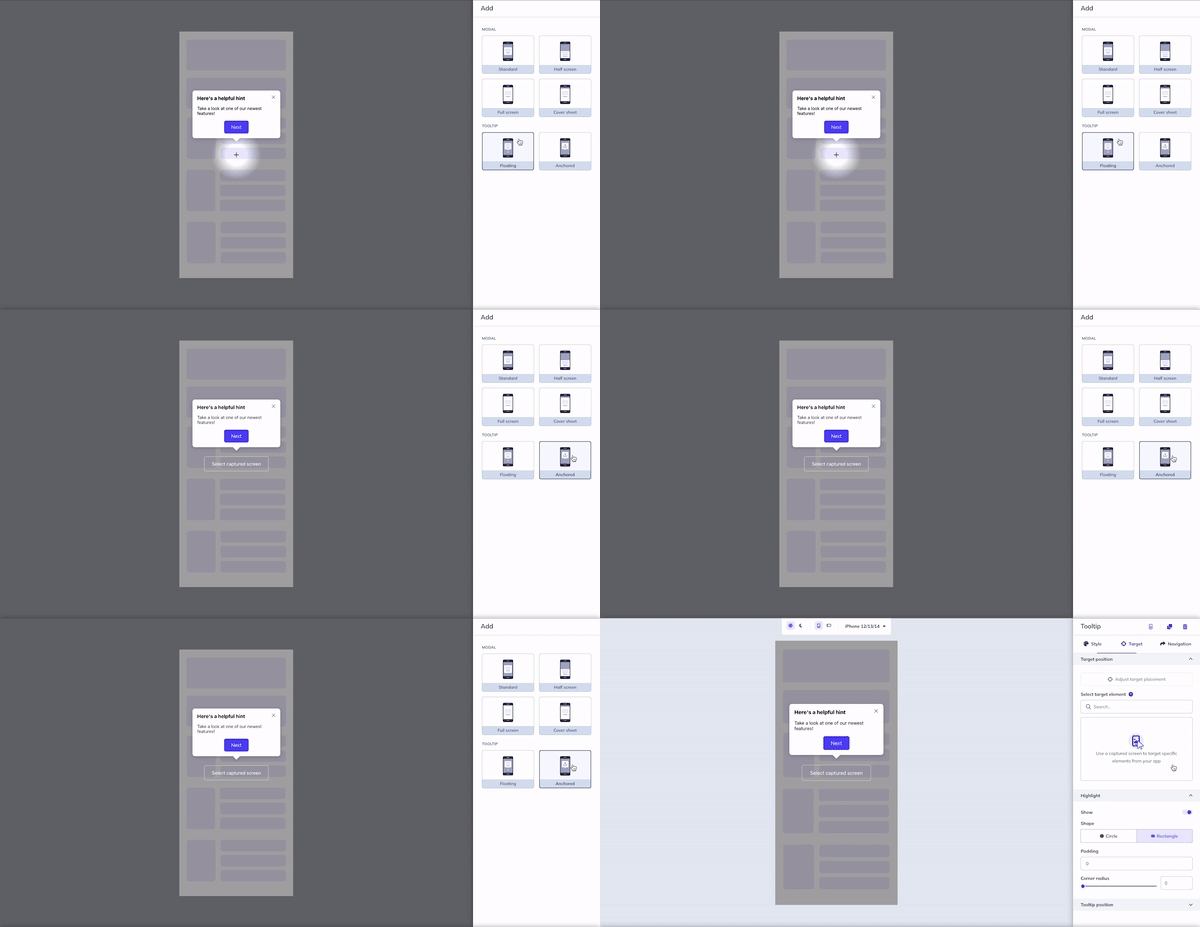
Anchored Tooltips
Anchored Tooltips target a specific element on the screen using a selector. They're available on Native iOS, Native Android, React Native, and Flutter, and on Ionic apps through the Appcues Capacitor Plugin (v5.0.0 or later).
Anchored Tooltips in webviews
Anchored Tooltips can also target elements rendered inside a webview — HTML content loaded in your app — not just native UI. Webview targeting is supported on iOS, Android, React Native, and Flutter, and on Ionic through the Appcues Capacitor Plugin.
Requires Mobile SDK v5.0.0 on the device. Webview targeting works once the user is on SDK v5.0.0 or later. See Installing Appcues in Mobile Applications.
Your developers instrument the webview so its elements are selectable: any visible element with an id or data-appcues-id attribute can be targeted. The setup is in the Instrumenting Web Views section of your framework's anchored Tooltip developer docs, linked in the Troubleshooting section below.
Content blocks
Both floating and anchored Tooltips support a subset of the mobile content blocks: Text, Image/GIF, Hero/Header, Icon with Text, Emoji, and Button. Video and survey blocks aren’t available in Tooltips. See Mobile content blocks for the full reference, including how to add, reorder, and style each block.
Target actions
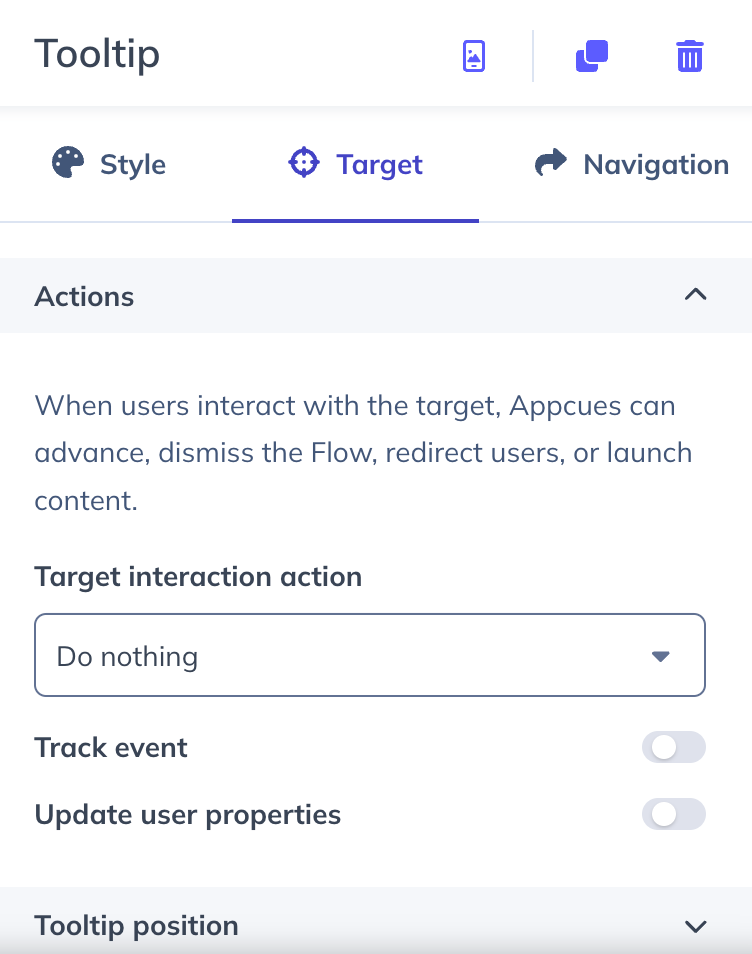
By default, the Tooltip target area is set to Do nothing — tapping it has no effect. You can set the target interaction to any of the following:
- Do nothing
- Next step
- Go to link
- Trigger flow
- Dismiss flow
- Go to custom step
The target area can also Track event or Update user properties when tapped.
Styling options
Both Tooltip types share these styling options:
- Backdrop — darkens the app screen behind the Tooltip to draw attention to the area it calls out.
- Drop shadow — adds a shadow behind the Tooltip for depth against the screen.
- Highlight — adds a "keyhole" effect around the targeted area or element. You control the size and feathering.
- Pointer — turns the pointer on or off and adjusts its dimensions.
Place a floating Tooltip
- On the styling sidebar, click the Target tab.
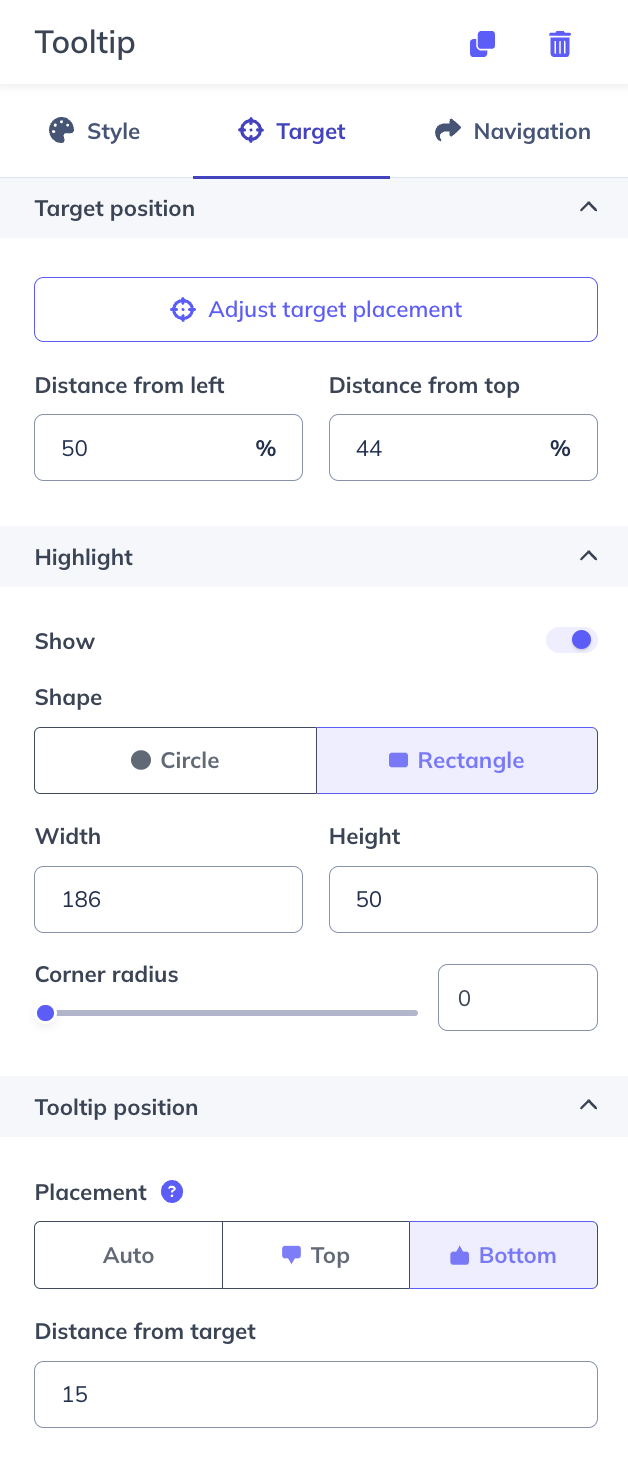
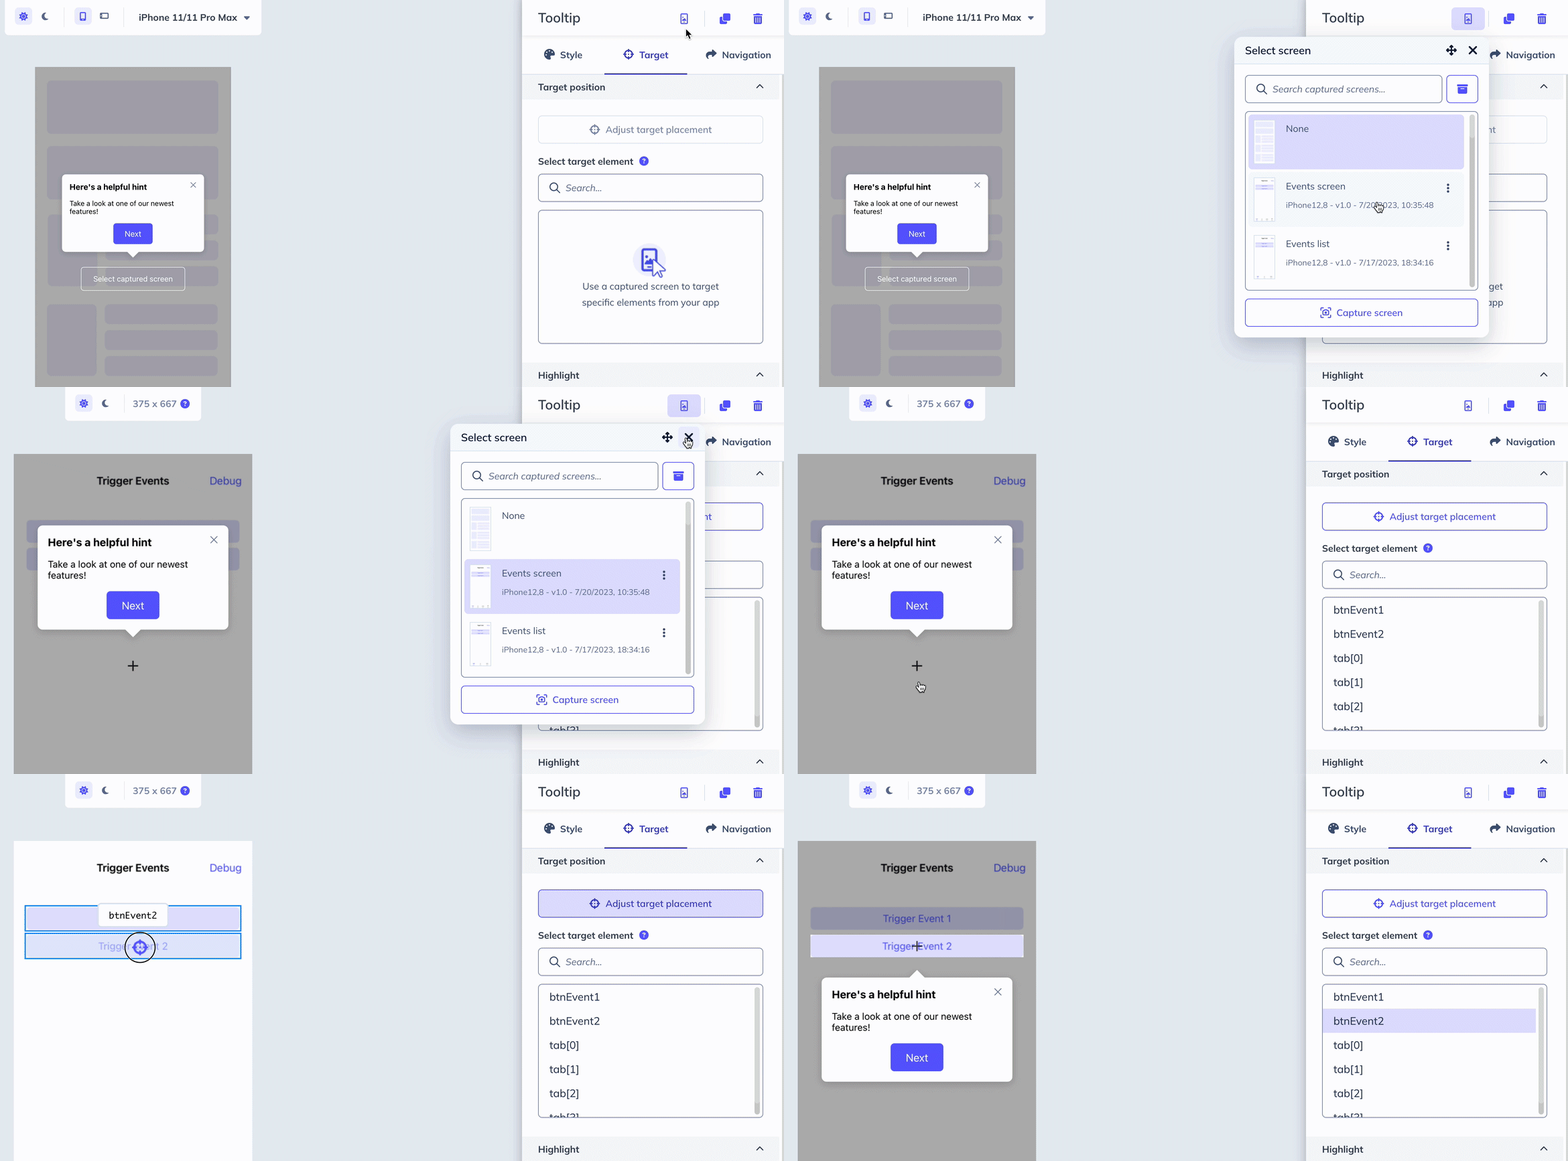
- Set the position using the relative position percentages, or click Adjust target placement to drop the target on the preview pane with a cross-hair pointer.
- Choose a preferred placement — top, bottom, or auto. If you choose bottom but the target is already at the bottom, the Tooltip moves to the top so it fits on screen.
- Optionally, set the distance from target.
Place an anchored Tooltip
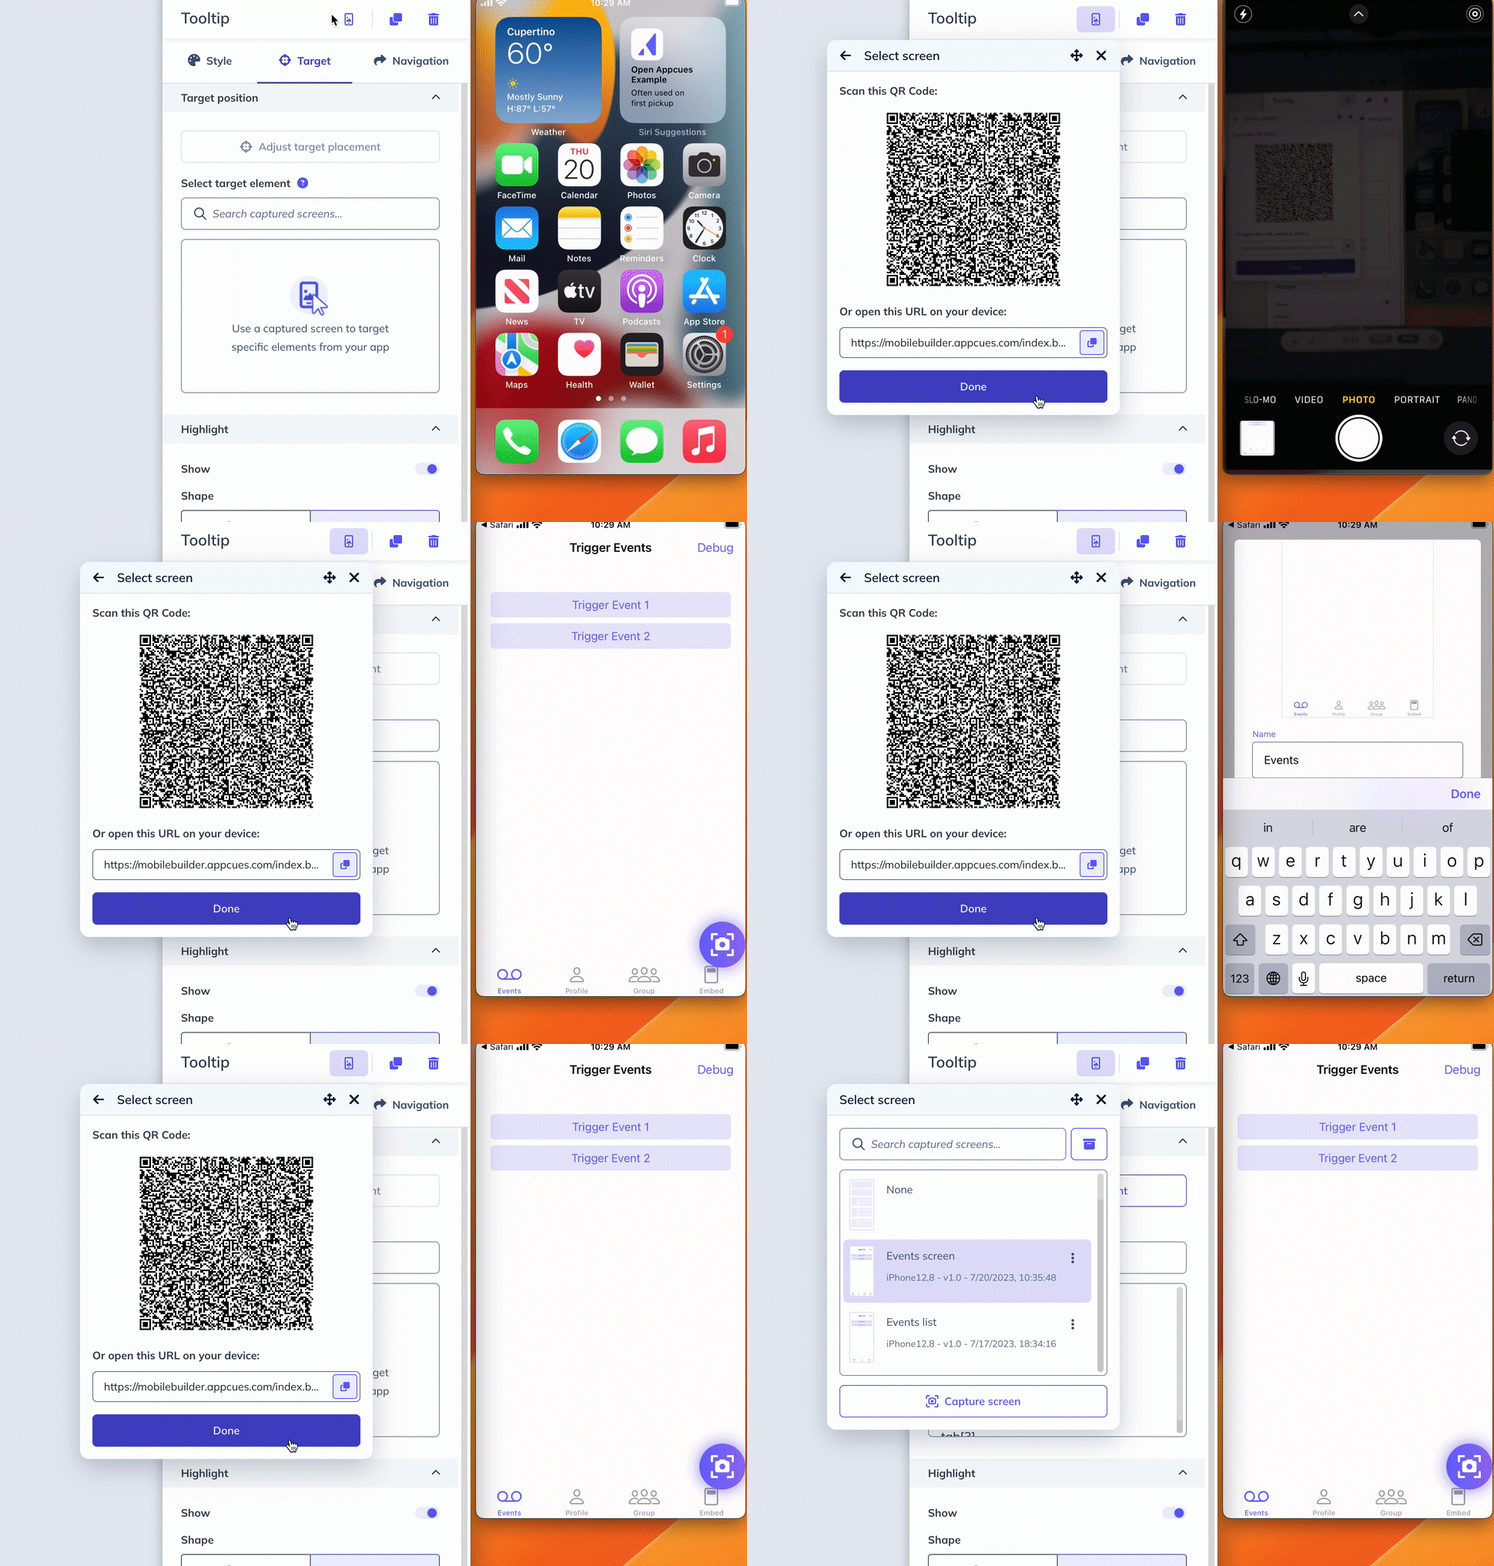
Anchored Tooltips need a screen capture — a screenshot of the target screen taken from your device — so the builder can list the elements you can target. See Mobile Screen Capture to capture and manage one.
- Click Select capture screen on the preview pane, or use the screen capture icon at the top of the sidebar.
- Select a targetable element from the preview or from the target tab's list.
- Choose a preferred placement — top, bottom, or auto — the same way you do for floating Tooltips.
Deep links required for QR code screen capture. To use the QR code screen capture for anchored Tooltips, configure deep linking first. See Configure Mobile Deep Links
Common questions
Can an end user tap an element to progress the Flow?
Yes. Set the target interaction action to Next step and the Flow advances when the user taps the target area.
Can an end user interact with the screen while a Tooltip is showing?
No — the app isn't interactive while a Tooltip is displayed. You can enable tap out to dismiss so the Flow dismisses when the user taps outside the Tooltip.
Are previous-step button actions supported?
Yes.
Are navigation steps supported?
Yes. See Build a mobile Flow across screens.
Can I anchor an element that's off-screen?
No. Targeting an element the user has to scroll to isn't supported, and users can't scroll while a Tooltip is showing.
Troubleshooting
My screen capture isn't populating targetable elements
Your developers need to set up the app so common elements are identifiable. Point them to the relevant SDK documentation: