Testing Flows
Learn more about the different methods you can use to thoroughly test your content before releasing it to your audiences.
Table of Contents
We built Appcues to help you produce native content - experiences you build using the platform should feel like your product. With that in mind, there are tools designed for you to review and share your flows with others on your team before your end-users can see them.
This article is specifically for testing web flows. If you're working with mobile flows, check out our mobile documentation center here.
Preview (Appcues Builder)
Preview mode is a tool in the Appcues Builder for reviewing content while in the building process. It's great for quickly walking through the flow as an end-user would.
What you can do with Preview mode:
- Quickly review what a single flow will look like on your site
- Interact with your page to:
- Find and view hotspots/tooltips that are built on dynamic elements
- Preview tooltips
- Interact with form fields or embedded content
To enter Preview mode, find the preview button (it looks like an 👁️) inside the Appcues Builder.

Notes on Preview mode
- Preview mode requires the Appcues Builder to be installed. For allowing teammates to review flows that don't have the Appcues Builder (or access to your account), see Test mode.
- Preview mode won't show how flows link together. To review a set of connected flows, see publishing to a staging / internal environment.
- Preview mode also won't fill in user properties for content personalization. Both Test mode and restrictive publishing are better options for that.
- In some cases, adjustments in Themes won’t always be fully reflected in Preview mode. In any case, the best way to test flows is by publishing it live and targeting it to your testers.
Test mode (Appcues Studio)
Test mode is for allowing teammates to review your flows in a live environment, without requiring them to log in to Appcues or install the Appcues Builder.
What you can do with Test mode
- Review how your flows will look and behave in a live environment by sharing the link with teammates, outside the Appcues Builder.
- Endlessly review a flow intended for only certain users and to only be shown a limited number of times.
- Test your page targeting, to ensure your flow will work across URLs, including dynamic pages.
To launch Test mode, click the 'Test' button on the flow's settings page.

This will open a modal with a link to your test. The link provided can be shared with teammates as well.

Notes on Test mode:
- Test mode will manually trigger the flow when used.
- Appcues will need to be fully implemented within your application in order to utilize test mode. For details on installation please refer to this document.
- Audience targeting, frequency targeting, and trigger are ignored in Test mode. This is so you can test the flow as many times as you'd like, and don't have to get your user in the right state to see the flow.
- Analytics are also ignored in Test mode - so flows being tested won't show up in flow performance numbers (same with any forms submitted, etc.)
Publish to a staging environment
Publishing is the best way to test how flows interact with other flows, and to make sure it obeys user and frequency targeting. If you have a staging/internal environment that you can use, then you can publish the flow in that environment.
What you can do with publishing to an internal environment
- Test whether user properties and events are working correctly.
- See how multiple live flows will interact live.
- Test user and frequency targeting - e.g. the flow only shows once, and for brand new users.
To publish to an internal environment:
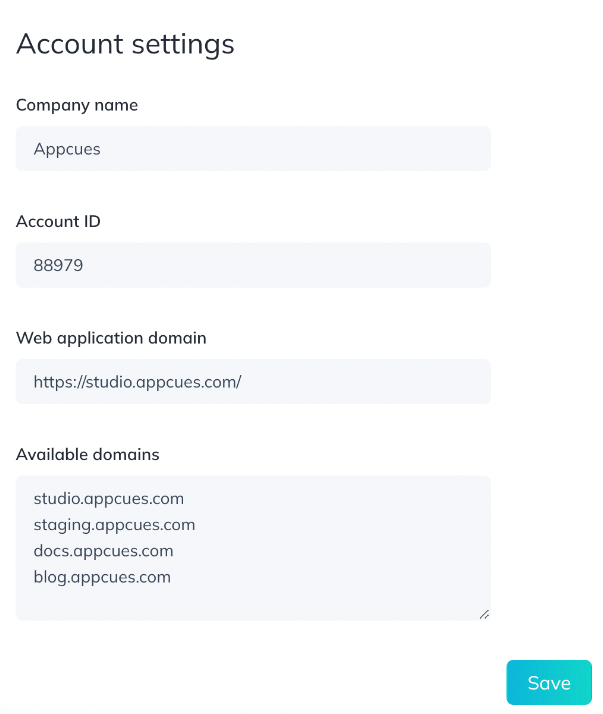
First, add your staging environment to the Available Domains list in your settings (must be admin).

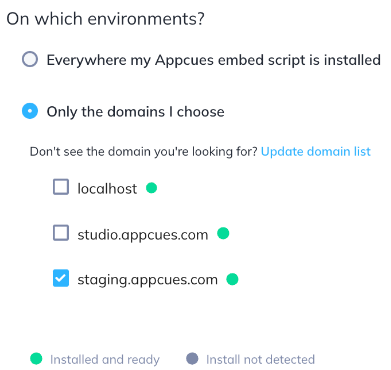
Then, in your ‘Page targeting’ settings for your flow, choose your internal or staging environment from the domains list:

After that, you can then publish your flow! Doing so will publish the flow safely to just the internal environment, where your end-users won’t be able to see.
This approach does put the flow live, but it requires you to have a safe internal environment. If this doesn't exist, there is another approach that consists of testing it live for yourself or creating a segment for your testers. We'll cover that below.
Publish to internal testers or yourself (Restrictive Publishing)
If you're lacking an internal/staging environment, another approach that will still allow you to test flows live is by creating a segment containing your internal testers and then publishing a flow targeted only for that group. (See our Segments Overview guide for more info on segments.)
What you can do with restrictive publishing
- See how the flow runs live into your application.
- Allow only your team or yourself to see the flow.
- Test if the flow runs correctly with your Page Targeting criteria and flow conditions.
To target the flow to your internal testers:
You can either create a Segment or use the ' Audience' targeting criteria of a flow to adjust how you'd like to define your internal testers. Here's an example using specific email addresses your testers might have:

You could also target with "Email || contains || @yourcompanynamehere.com", or target just their User IDs in your system, all depending on which property you’d like to use.
Once you’ve created a Segment, you can then set the Audience targeting settings for your flow’s settings page to target the flow to users in that segment.
To target the flow to yourself:
If you'd like to exclusively see how the flow runs live in your application, you can use any unique property you have as a condition for your ' Audience' targeting settings. In this case, we can use the property 'User ID' which is unique to your account.

From the example above, ‘1234’ would be an example of your User ID. You can find your User ID if you open the Appcues debugger on any page in your application where Appcues is installed. You can learn more about the Appcues Debugger and how to open it in this article.
Reset Flow history for repeated testing
This functionality allows you to reset your flow history in order to continually test the same flow with the same user.
This option only applies to flows that are set to "Show Once". All other targeting conditions won't be reset if you do this.
- Go to the Users list page
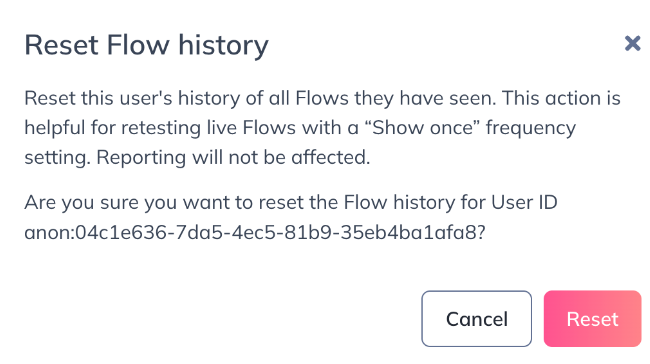
- Find the user you want to reset. Navigate to the user's profile, and then select"Reset Flow history".

You will receive a confirmation message. If you want to proceed, click "Reset".

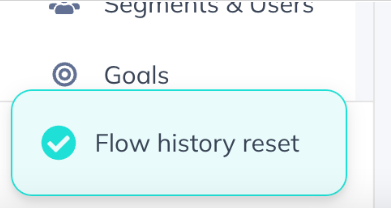
If the user's history was successfully cleared, you will see a "Flow history reset" popup on the left side of the page. That user will then be eligible to see any Flow with "Show once" settings that they've already seen.

Delete a user profile to reset all experiences
If you need to completely clear a user profile you can do so using our Public API. The delete user profile endpoint will delete the user and therefore reset all flows, experiences, and tracked events for the removed user. The next time the user logs in or is processed with an identify(); call, their profile will be automatically recreated in an empty state ready for testing!
With tools like Postman, you can also automate the deletion of users. This is great for scheduled deletion events for test users.
For more information on our Public API, you can check out this document.
Troubleshooting flows during testing
If, during testing, your flows aren't appearing as you would expect, open the Appcues debugger to see if there are errors and check out our Diagnostics Tool to double-check your targeting configuration.
Check out these articles for more info: