Manage experiences
Publish, unpublish, clone, rename, organize, and archive your Flows, Pins, Banners, Checklists, NPS surveys, and Launchpads from the Studio dashboard.
Table of Contents
Publish and unpublish
Publish
After configuring an experience's settings (targeting, audience, frequency), click Publish on the settings page. The experience goes live immediately for qualifying users.
If you've made changes to an already-published experience, click Push Changes to update the live version.
Editing and republishing a live experience does not reset eligibility. Users who already saw it won't see it again unless you change the frequency setting or clone the experience. A clone is treated as a new experience.
Unpublish
- Open the experience's settings page.
- Click Unpublish in the top-right corner.
If you have unpublished changes pending, click the green down arrow next to Push Changes and select Unpublish.
Clone an experience
Create a duplicate with all content and steps intact.
- Go to the experience list in Studio (for example, Experiences > Flows).
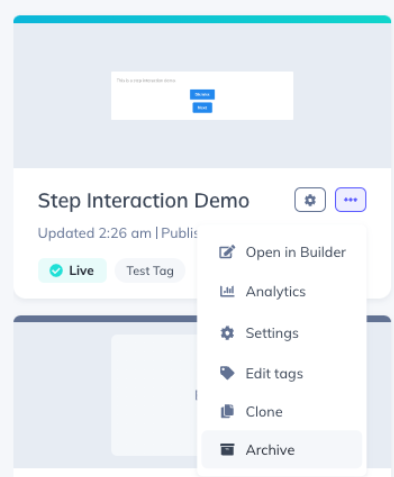
- Click the ... menu on the experience card and select Clone.
The clone is created as a new, unpublished experience with its own ID. Users who saw the original can see the clone.
Find the experience ID
You may need the ID to trigger an experience via the JavaScript API, build a permalink, or contact support.
From the URL: Open the experience's settings or analytics page. The ID is in the URL — for example, studio.appcues.com/flows/{flow-id}/settings.
From the Builder (Flows, Pins): Click the pencil icon next to the experience name in the Builder toolbar. The ID appears in the details modal.
Rename an experience
From the settings page: Click the experience name at the top of the settings page, edit it, and click Save.
From the Builder (Flows, Pins): Click the pencil icon next to the name, edit the name field, and click Save.
Change the Build URL
The Build URL is the page where the Builder opens when you edit an experience. If your app's URL structure changes, update it so the Builder loads on the correct page.
- In the Builder: Click the pencil icon next to the experience name and update the Build URL field.
- On the settings page: Edit the Build URL field directly.
If you also changed the URL where the experience should appear live, update the Page Targeting conditions on the settings page to match.
If the experience is set to Show once, updating page targeting won't re-show it to users who already saw it. To re-show, clone the experience and publish the clone.
If the old Build URL no longer exists, navigate to the new URL in the same browser tab, then open the Builder from the Chrome Extension.
Organize with folders
Drag experiences from the main list into folders in the sidebar. See Experience folders for details on creating and managing folders.

Organize with tags
Tags let you label experiences for filtering and sorting — by audience, language, team, feature area, or any category that fits your workflow.
Create a tag
On the experience list page, click the ... menu in the top-right and select Manage tags.
Click Create Tag, enter a name, and click the green checkmark.
Add or remove tags
Click the ... menu on an experience card, select or deselect tags from the dropdown, and save.
Delete a tag
Open Manage tags, find the tag, and click the delete icon (trash can). If the tag is in use, a confirmation prompt appears.
Filter and search
Use any combination of filters on the experience list page:
- Status — draft, published, or archived
- Tag — any tag you've created
- Segment — experiences targeting a specific segment
- Teammate — experiences created by a specific team member
- Search — find by name or keyword
- Sort — recently updated, recently created, or name (A–Z)
Archive, restore, and delete
Archive
Archiving unpublishes the experience (if live) and moves it out of the main dashboard.
- Click the ... menu on the experience card and select Archive.
Restore
- Filter the dashboard by Archived status.
- Click the ... menu on the archived experience and select Restore.

Delete
Deleting permanently removes the experience and all its analytics data.
- Filter the dashboard by Archived status.
- Click the ... menu and click the Delete icon.
You must archive an experience before you can delete it. Deletion is permanent and cannot be undone.
