Use Appcues and Zapier
Connect Appcues and Zapier to automate tasks and trigger actions in your other tools.
Table of Contents
Zapier is an automation platform that makes connecting the different products you use easy. Use Zapier to automate repetitive tasks, or to trigger changes in one platform based on new information in another.
Configure Appcues with Zapier
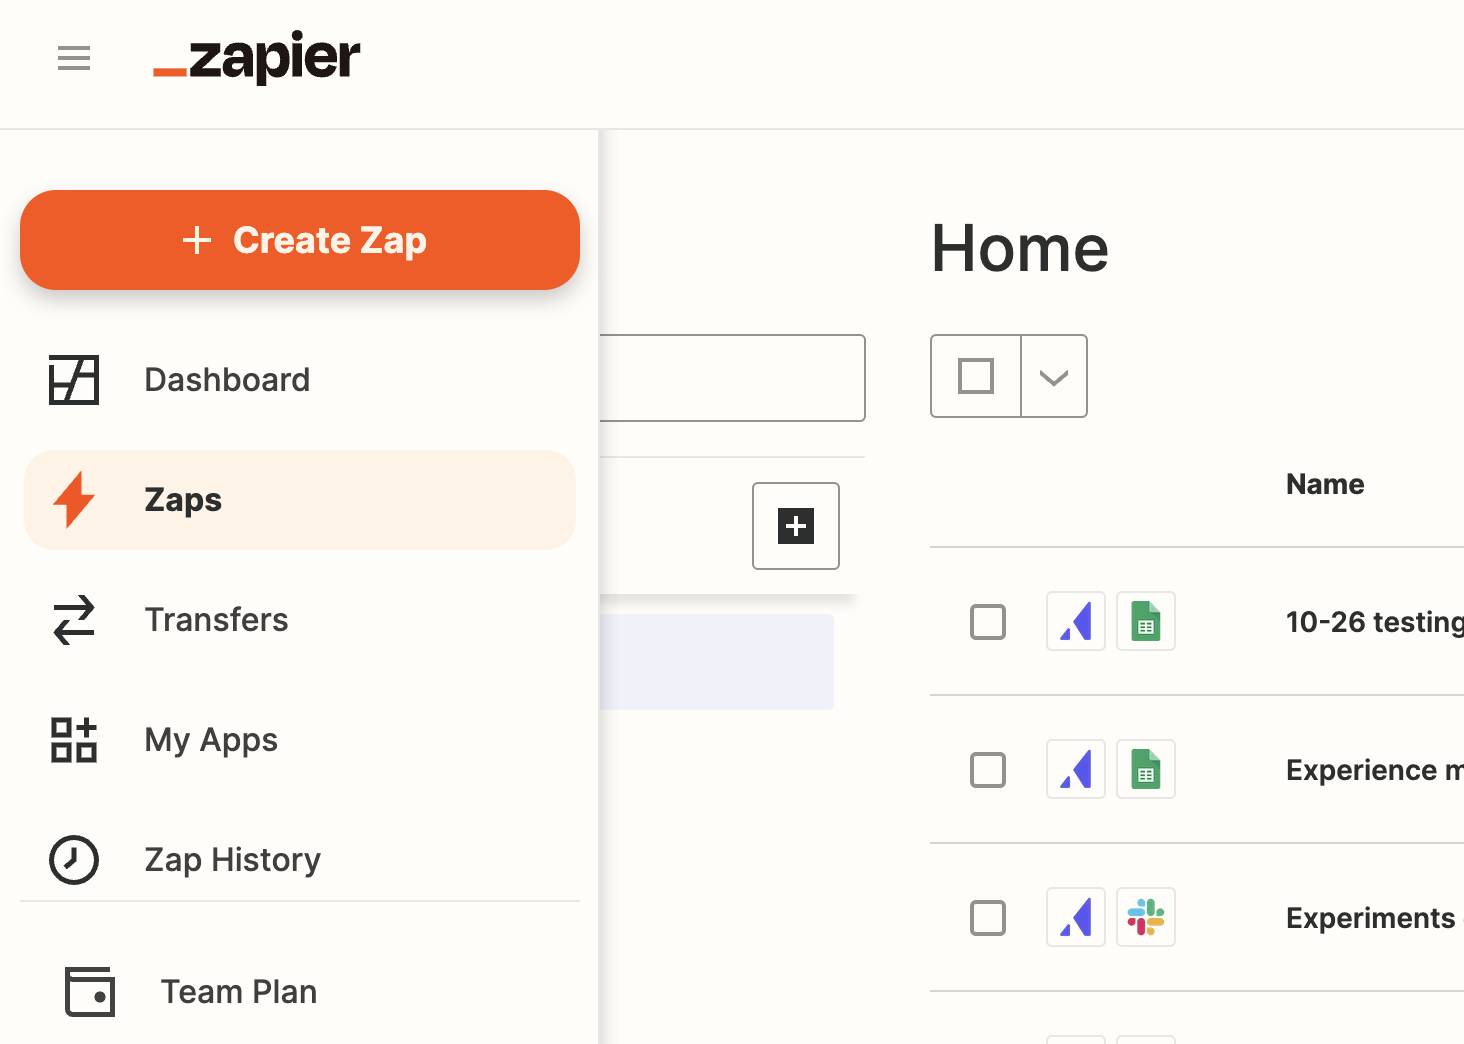
- Log in to your Zapier account or create a new one.
- Navigate to "My Apps" in the menu bar.
- Enter "Appcues" in the search bar, then select it to start the connection process.
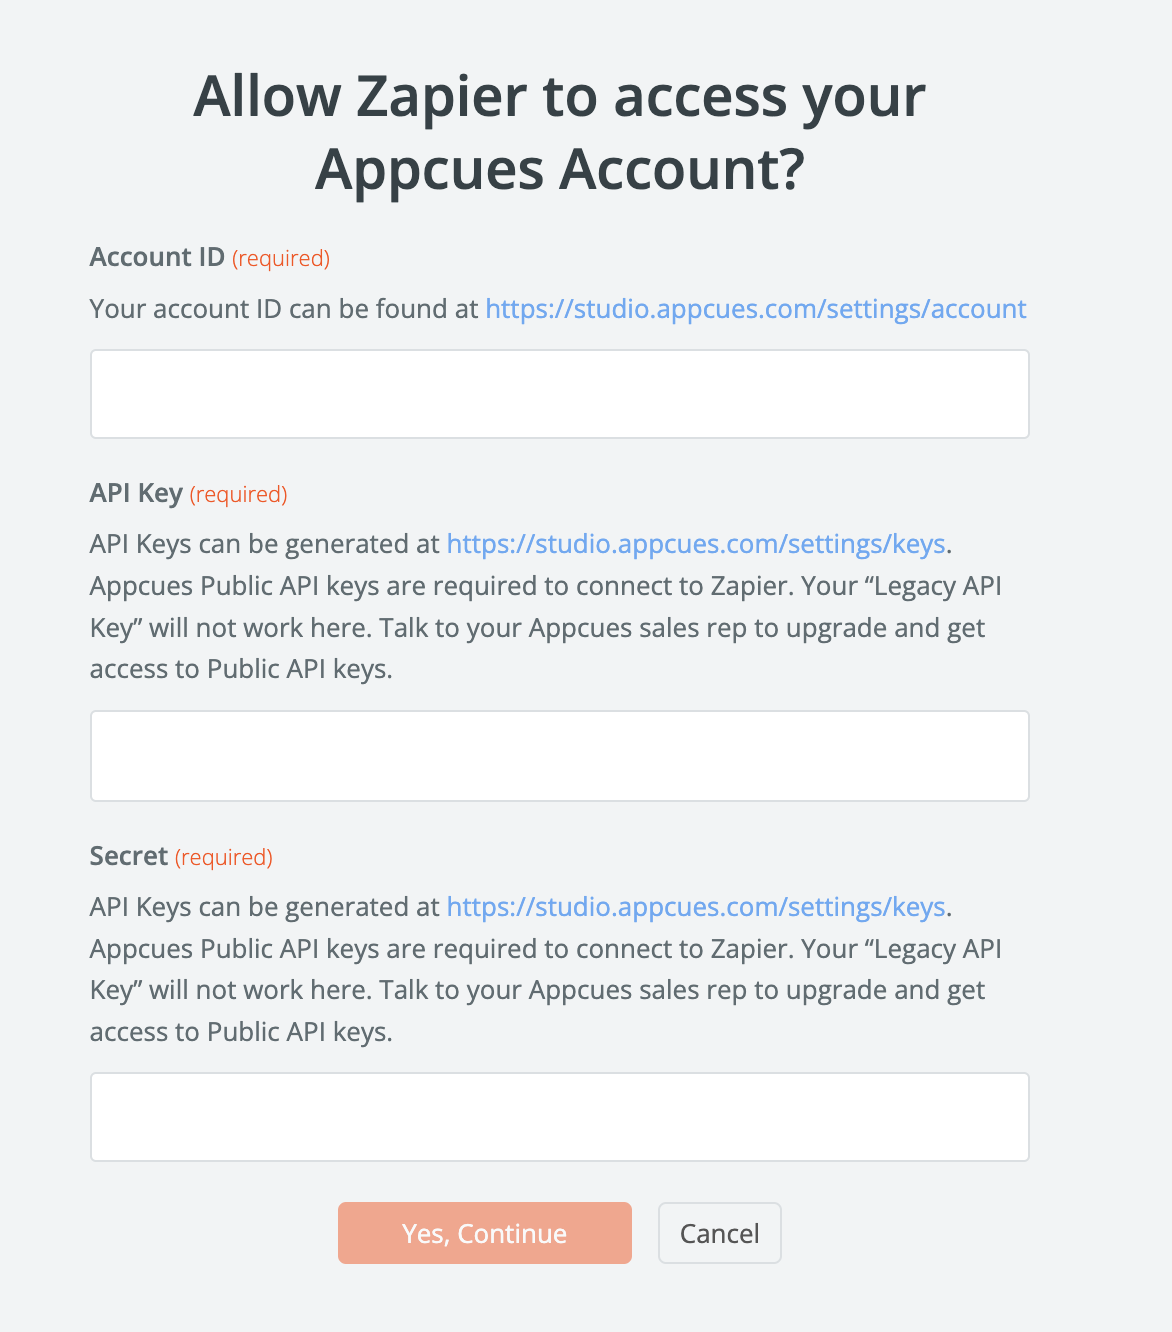
- Use your credentials to connect your Appcues account to Zapier.
- Your Appcues account ID can be found within Appcues Studio Account Settings.
- You will also need to create a new API Key and Secret from the API Keys page. At a minimum, you'll need to select Editor Permissions for that API Key. Note that your “Legacy API Key” will not work here. Talk to your Appcues sales rep to upgrade and get access to Public API keys.
- Once that's done you can start creating an automation! Use a pre-made Zap or create your own with the Zap Editor. Creating a Zap requires no coding knowledge and you'll be walked step-by-step through the setup.
Note that if you try to create a new Appcues-based Zap before you're connected to your account, you'll be sent through this same connection process while creating the
Use Appcues with Zapier
Once you're set up, you can use Appcues as a trigger or an action.
- Triggers are what starts the workflow (for example, when a new NPS survey is submitted).
- Actions are what completes the workflow (for example, update a user property when the user opens an email).
To use Appcues as a trigger
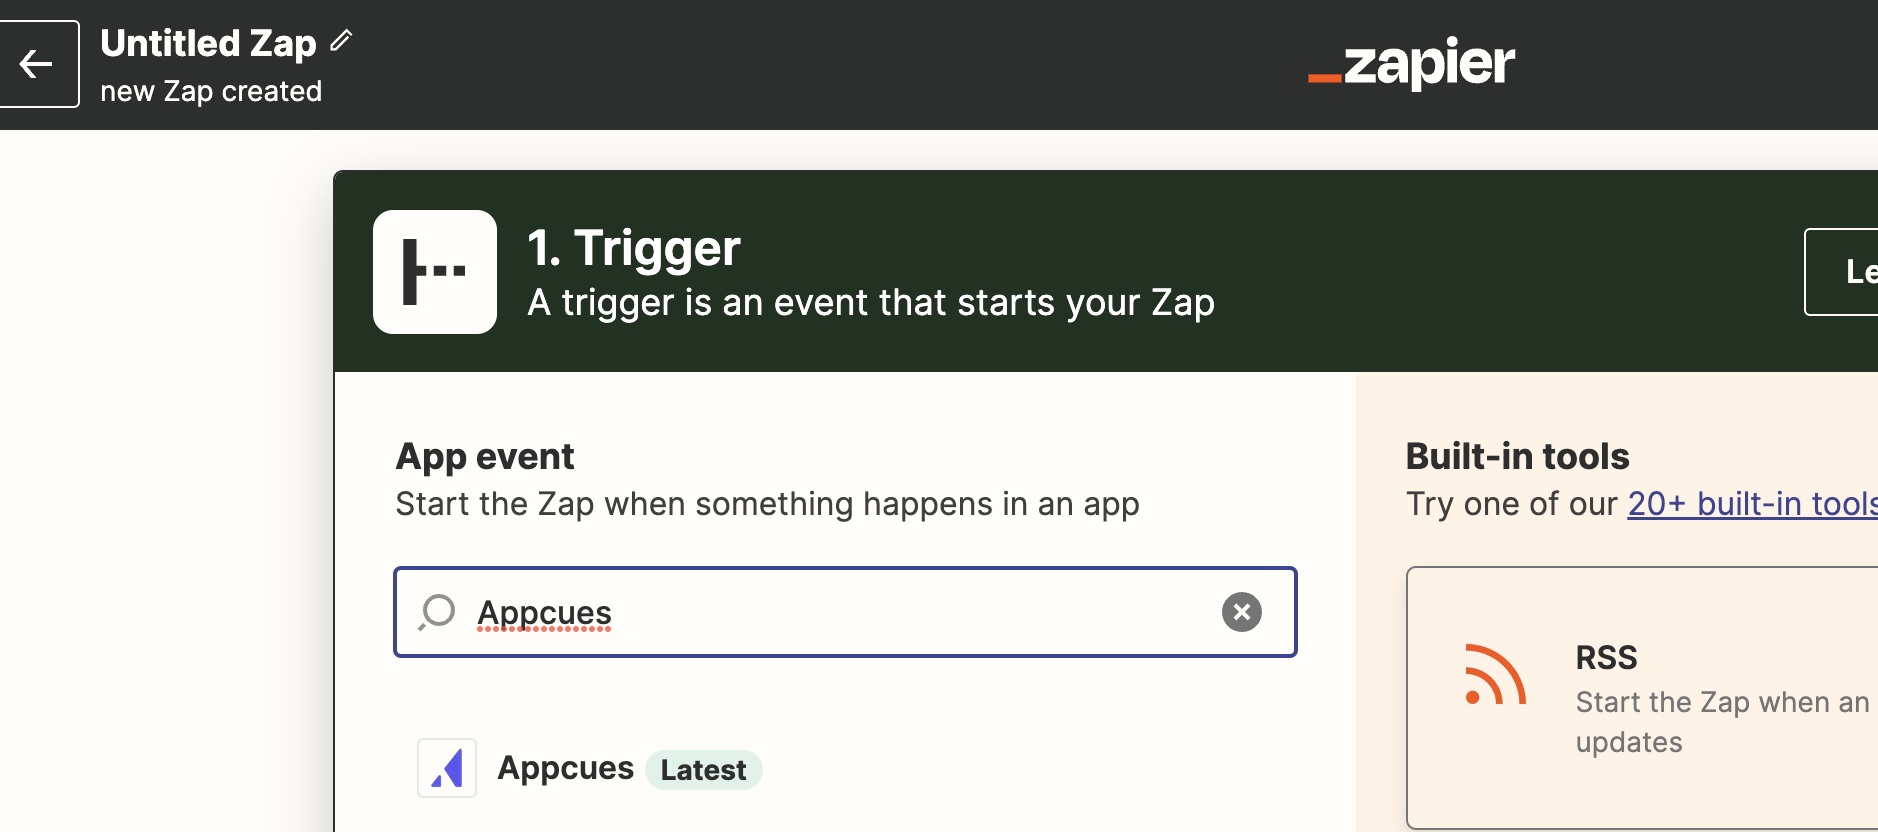
It's really easy to get started. First, create a new Zap.
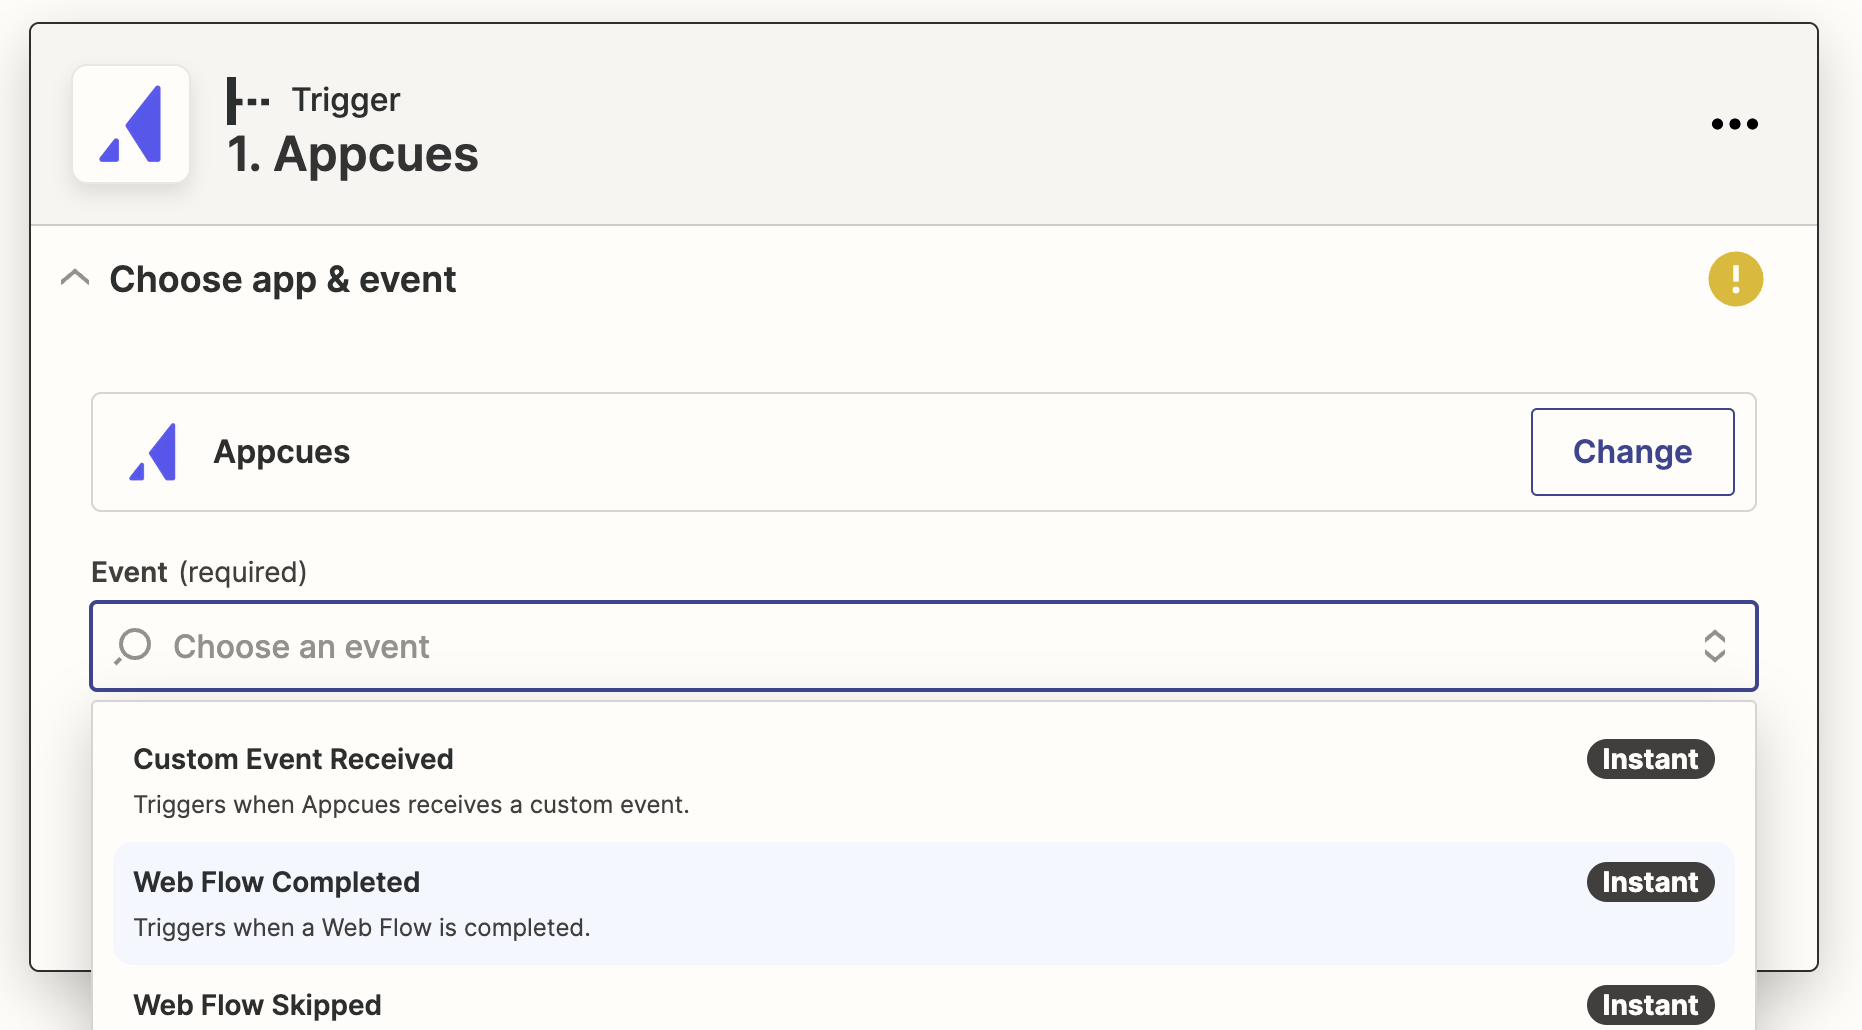
Next, select Appcues from the Trigger list.
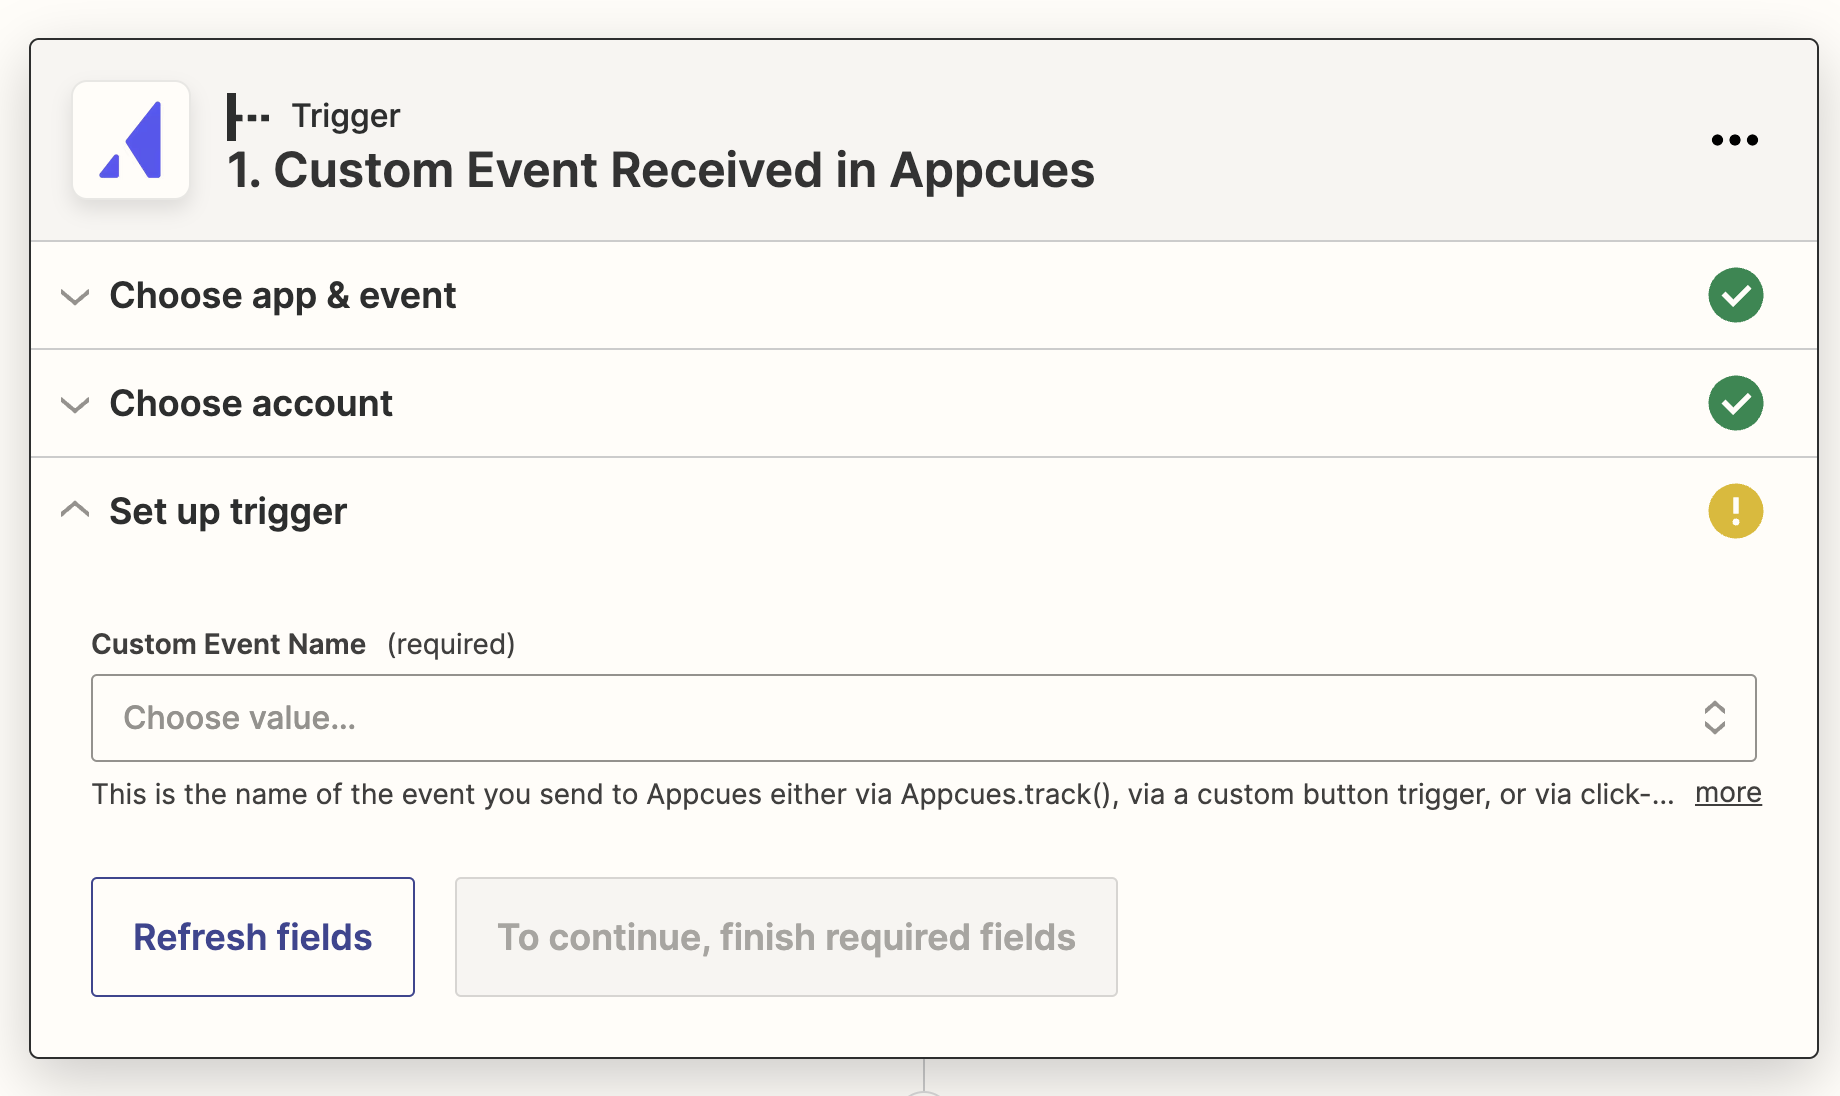
Select the type of event on which you'd like to trigger, for example "Web Flow Completed".
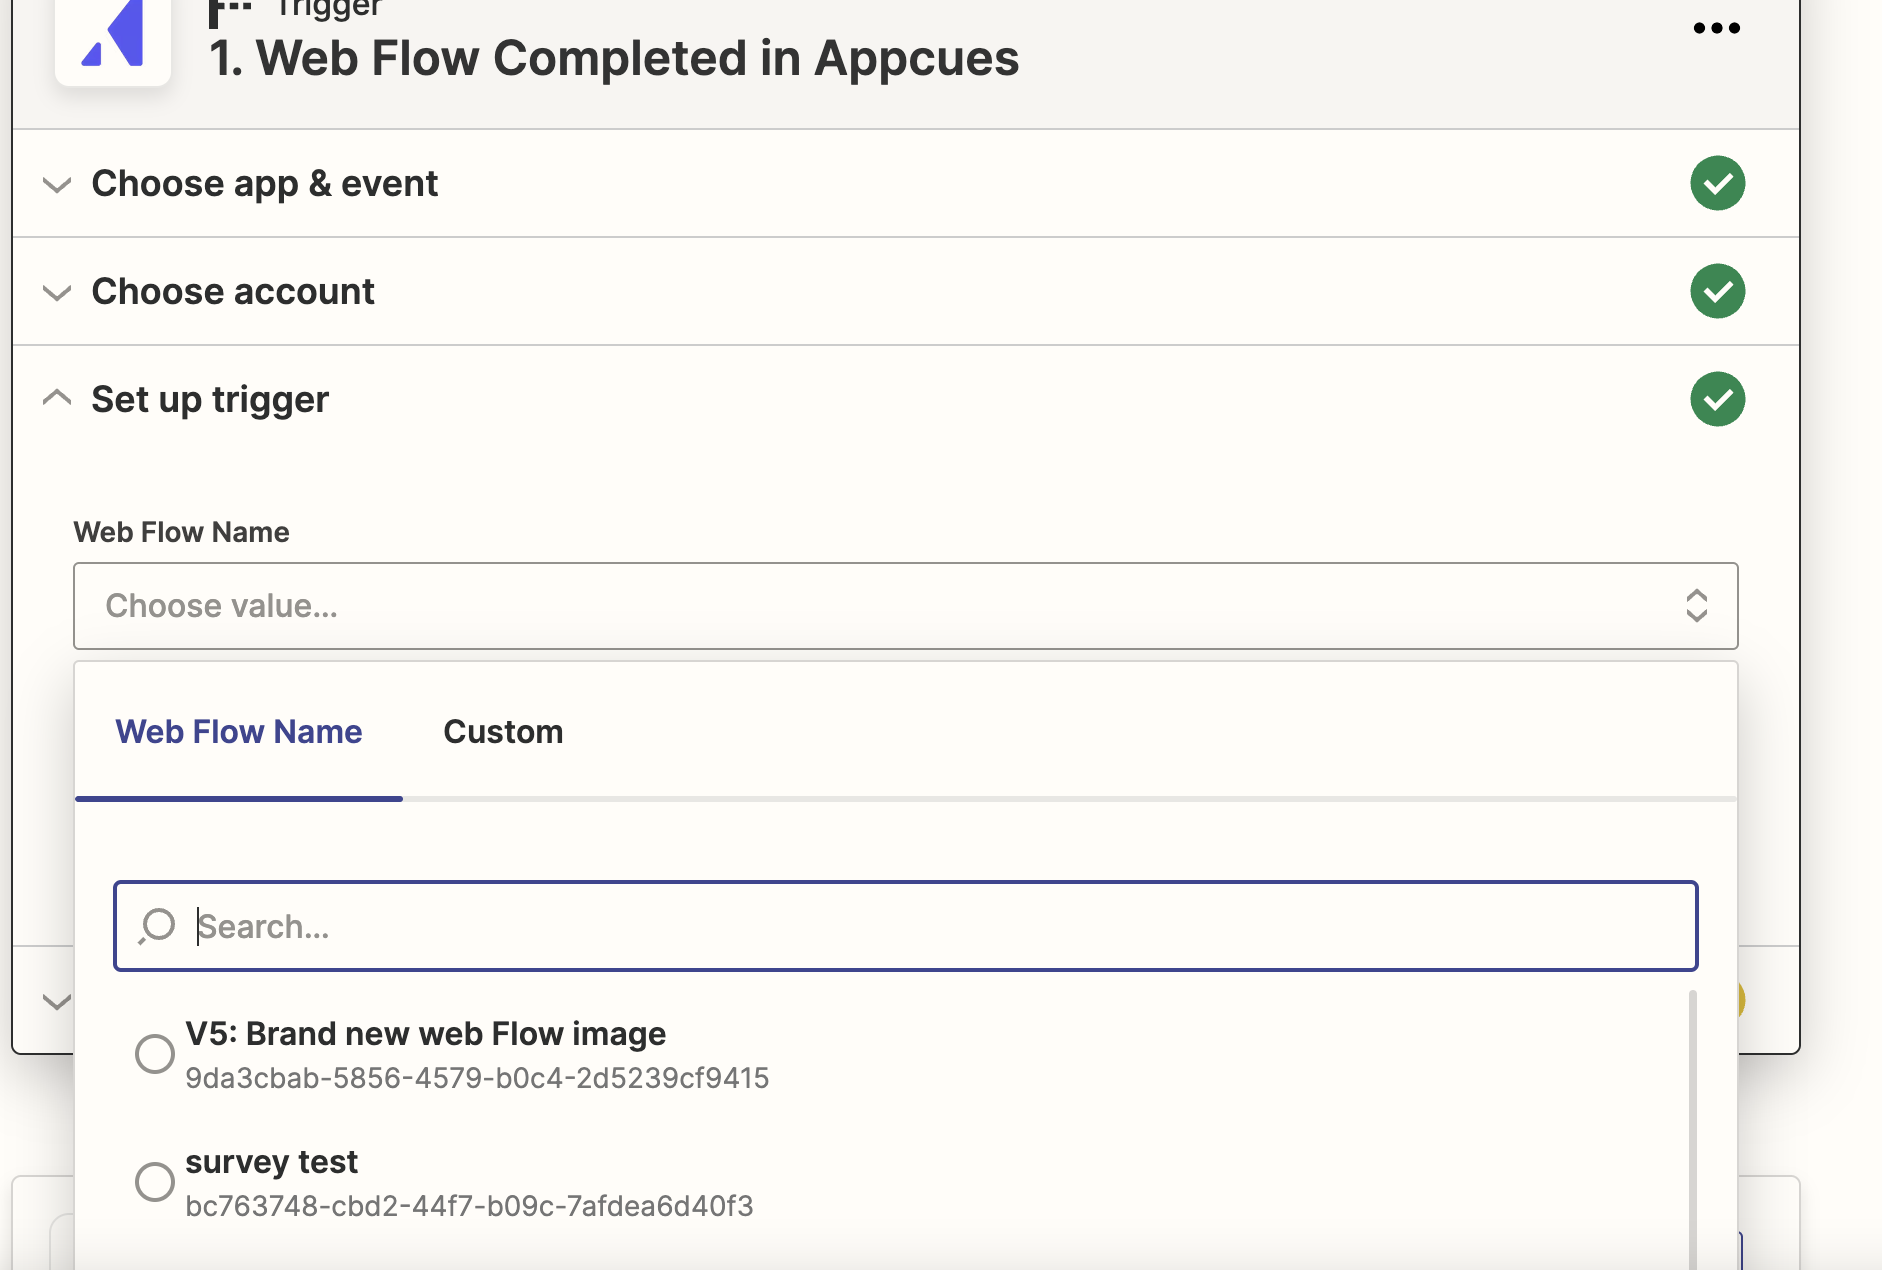
In the "Set up trigger" section, you'll be able to select the specific Flow, Checklist, etc. for which you want the Zap to fire. If you don't make a selection, the Zap will fire for all experiences related to that trigger.
In the "Test trigger" section, Zapier will attempt to pull in a recent example of the event that the trigger listening for. You'll be able to use this example to configure your Action step. If a recent event can't be found, you can click "Skip test" and default test date will be used.

That's it! From there, you can set up your Action step, where you can tell Zapier of your other apps should receive the information triggered by Appcues.
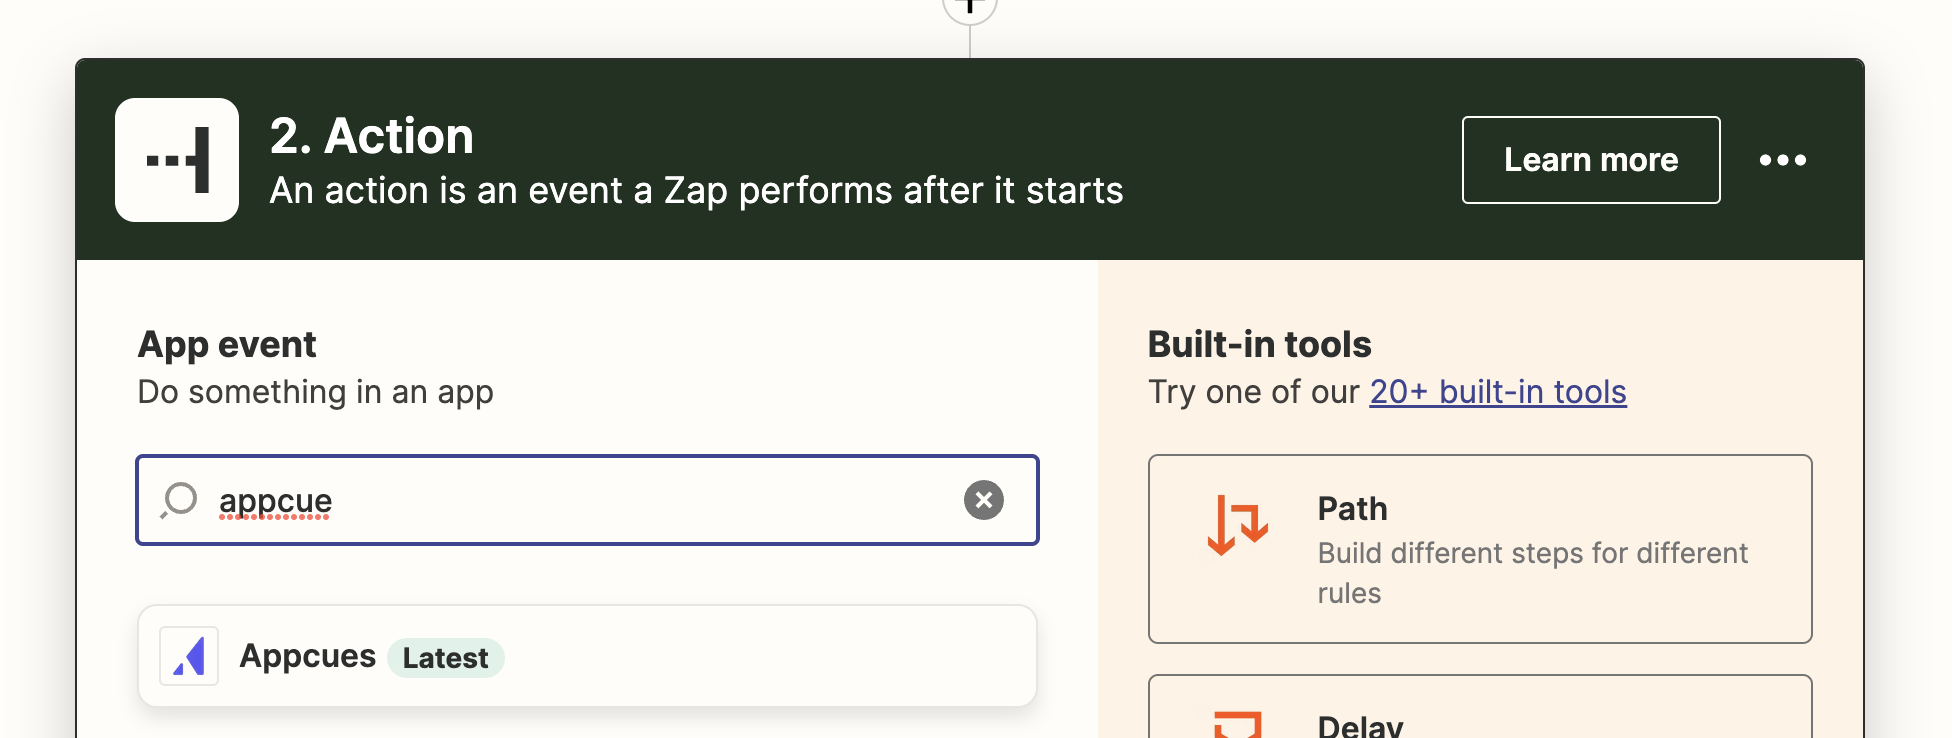
To use Appcues as an action
Within an existing zap that includes information you want to pass to Appcues, add a new action step, and select Appcues from the list.
What's supported in the integration
We currently support the following actions:
Triggers
- NPS Submitted: fires when a user submits a new NPS score or feedback (will show as separate events).
- Web Flow Started: fires when a user starts a Web Flow
- Web Flow Skipped: fires when a user skips a Web Flow
- Web Flow Completed: fires when a user completes a Web Flow
- Mobile Flow Started: fires when a user starts a Mobile Flow
- Mobile Flow Skipped: fires when a user skips a Mobile Flow
- Mobile Flow Completed: fires when a user completes a Mobile Flow
- Checklist Started: Fires whenever a user is presented with a Checklist
- Checklist Skipped: Fires when a user skips an uncompleted Checklist
- Checklist Completed: Fires when a user completes a Checklist
- Checklist Dismissed: Fires when a user closes a Checklist that has been completed
- Pin Interaction: Fires when a user opens a Pin contents (by clicking or hovering)
- Segment Entered: Fires when a user becomes a member of a Segment
- Form submitted: Fires when a user responds to a form survey question within a Web Flow
- Custom Event Received: a catch-all for any Appcues event. Will only work for click-to-track events if your account is enabled for the Appcues Events Broadcaster add-on
Actions
- Send event: send a custom event into Appcues with user data.
- Update group profile: update a specific group profile with new attributes.
- Update user profile: update a specific user profile with new attributes.
Use case inspiration
Zapier is an exciting platform to partner with, because it opens the door for connecting Appcues data to over 1,500 apps! Here's some of the use cases customers are already using:
 |
Pass NPS responses from Appcues to Airtable records Airtable + Appcues |
Use this Zap |
 |
Update contacts in HubSpot with newly-completed Appcues flows Appcues + HubSpot |
Use this Zap |
 |
Create feedback notes in ProductBoard with Appcues surveys Appcues + Productboard |
Use this Zap |
 |
Add details to Google Sheets rows for new Appcues survey responses Appcues + Google Sheets |
Use this Zap |
 |
Send Appcues NPS Submissions to Slack Channels Appcues + Slack |
Use this Zap |
More Use Case Examples:
Not seeing what you're looking for?
Create from scratch or learn more
And here's a few more:
- Push NPS data into Slack, so the whole team can ride the emotional rollercoaster of customer feedback.
- Push NPS scores and feedback into Airtable, so you can manipulate the data.
- Push Typeform response into Appcues user properties.
- Create new cards on Trello board with responses to Appcues form.
- Send an email through Mailchimp, HubSpot, Customer.io, and many other platforms to follow up on NPS feedback.
- Update a record in HubSpot CRM when a user completes a flow.
Here are two ways our team uses Appcues and Zapier together to automate key workflows:
- Put Appcues Form Data into Google Sheets: Collect your form data in an organized, digestible way.
- Send NPS Scores into Customer.io: Send follow up emails to customers after submitting a score.
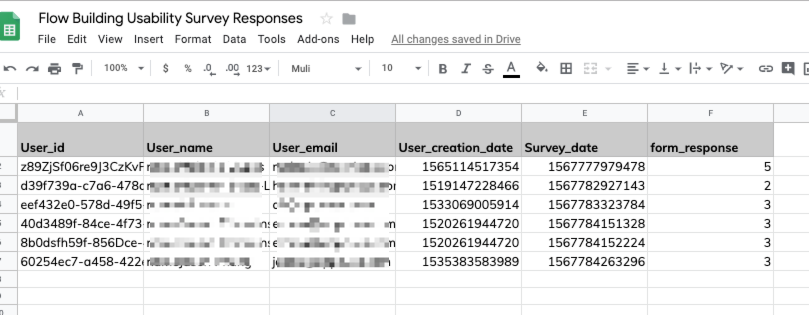
Appcues Form Data --> Google Sheets
We're big fans of feedback here at Appcues, and never skip the opportunity to hear from our customers about what's working and what's not. Something we're currently focused on is usability, so we survey customers at different moments in the product asking, "How easy was that to do?". In order to seamlessly collect, analyze and share that data out, we Zap that data over to GoogleSheets. Here's how we do it:
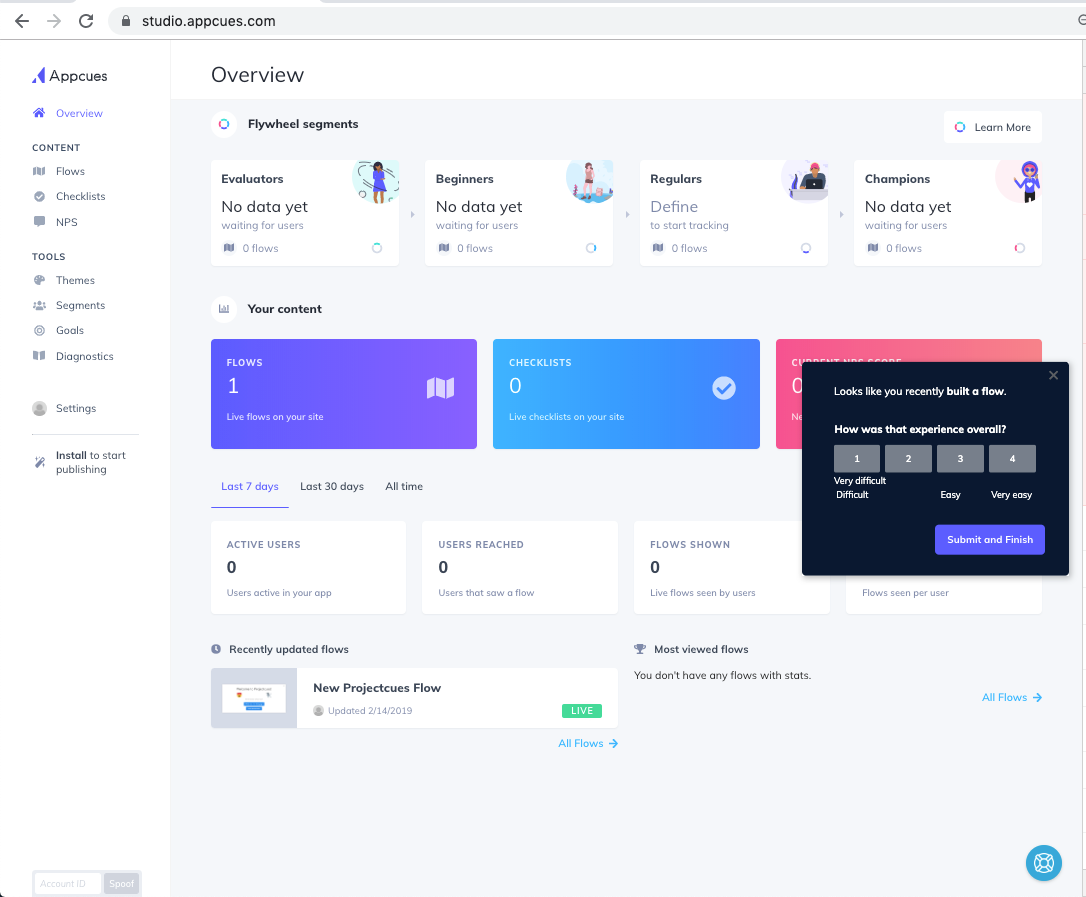
Step One: Create a really good lookin' flow.
Thanks to Appcues, we make that pretty easy ;)
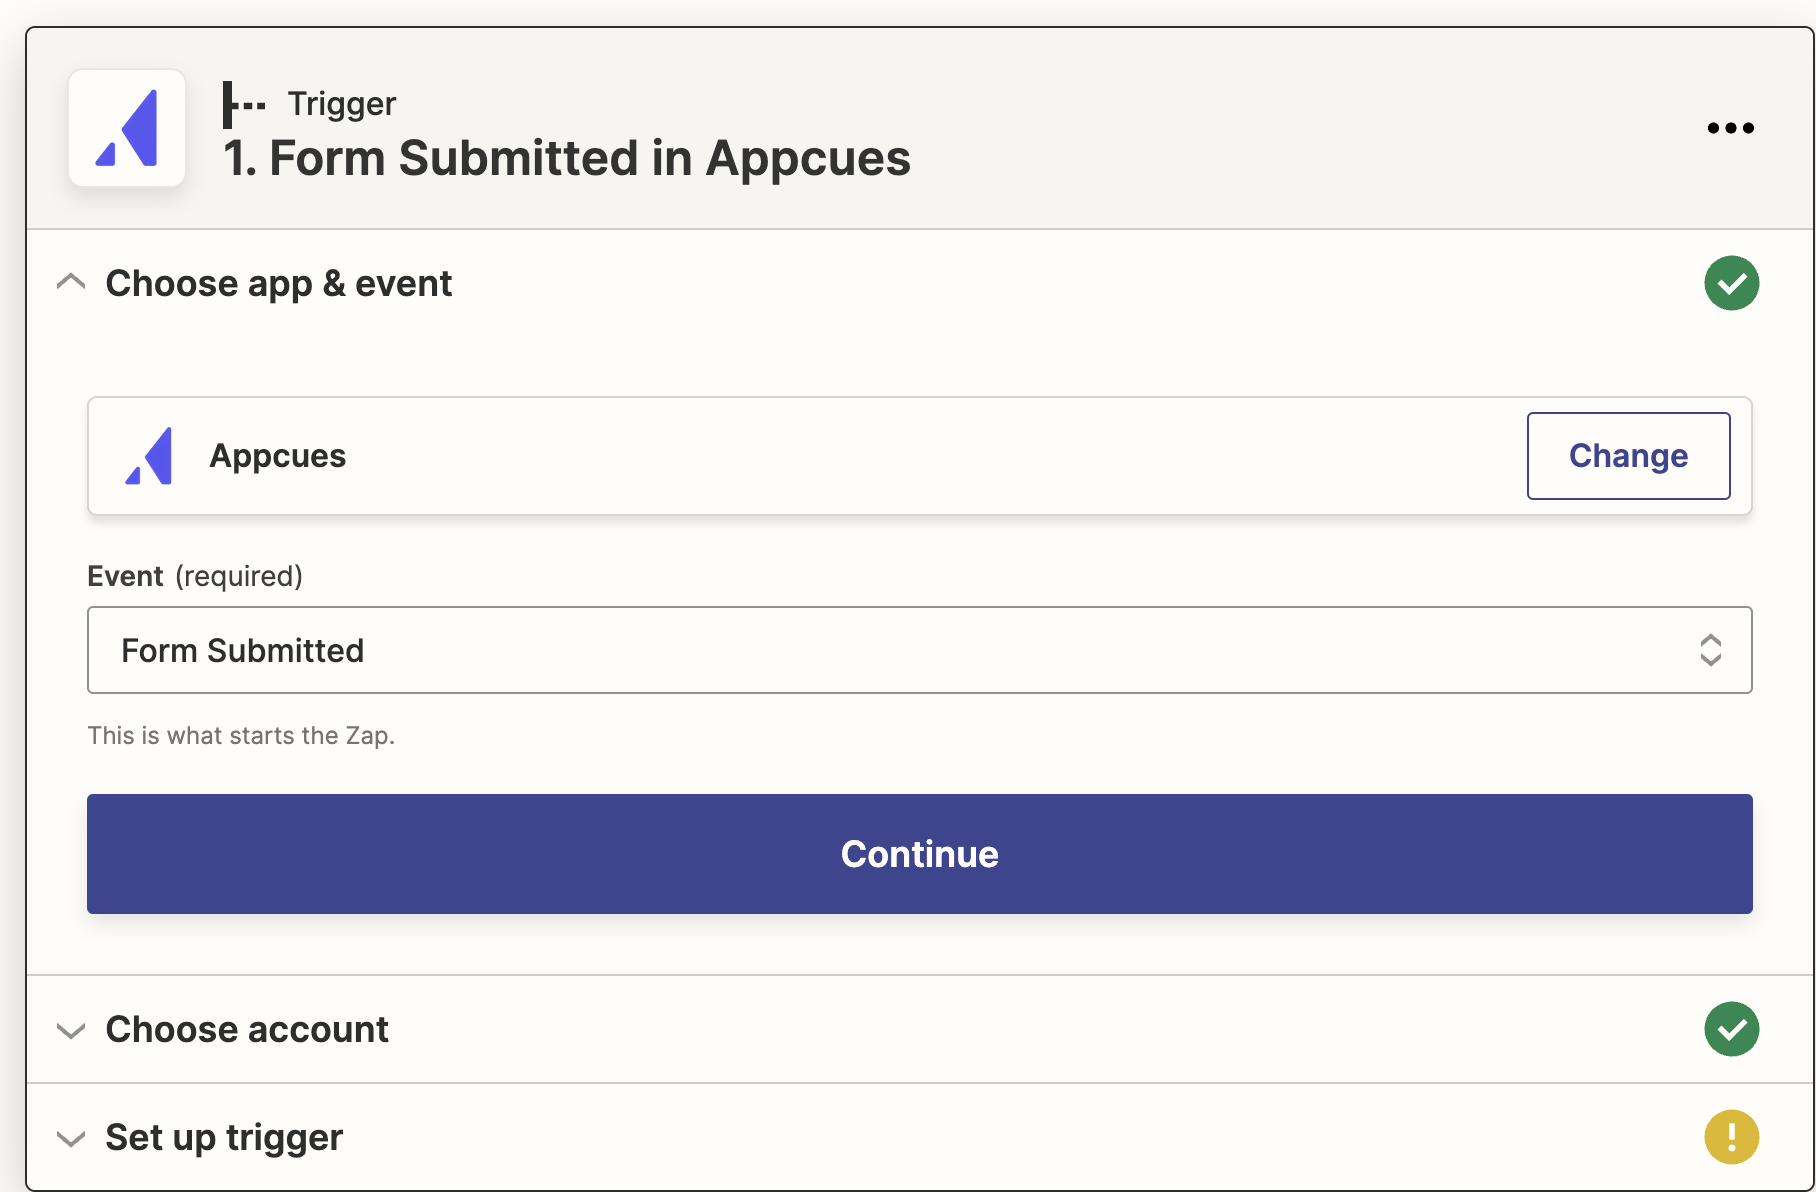
Step Two: Build your Zap!
Make sure to select the most recent version of Appcues and the correct trigger event. Our survey flow is a form, so we've selected "Form Submitted" as our trigger.
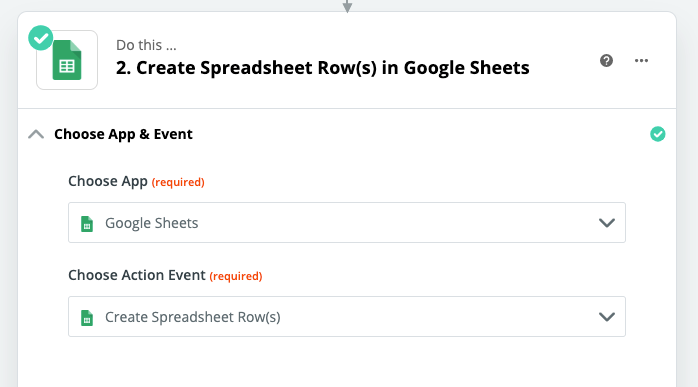
Step Three: Connect to Google Sheets!
Depending on how you plan to collect your data, you can select a number of different actions (create a worksheet, update a worksheet, create a column, etc). Since we've already created our collection spreadsheet, we're going to have our Zap create new rows of data.
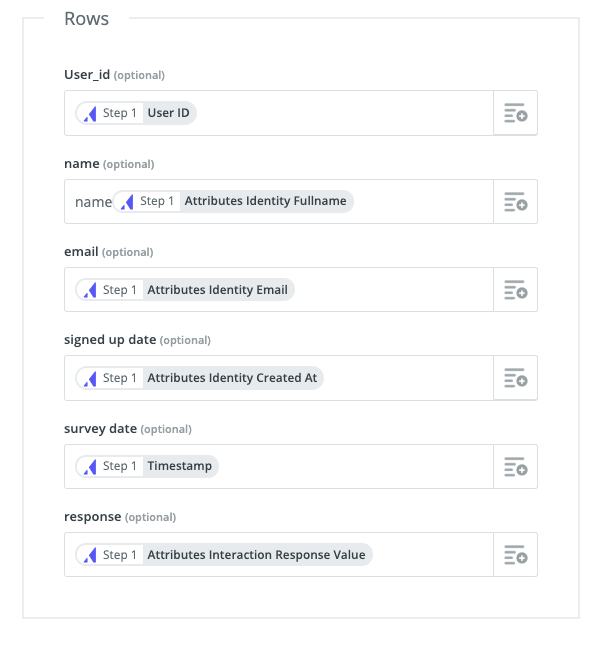
Step Four: Map that data!
Zapier makes it so easy to map the data you want, and skip out on the data you don't need. In our Zap, we're pulling in pertinent info like email, account creation date and form response, but skipping over a lot, since it doesn't pertain to our project.
Step Five: Test!
Once you've connected all the pieces, you can test out your zap and see the magic happen!
Note: If you have multiple survey questions in a single step in a flow, the Form Submitted event will include all the questions and answers in a single field. If you would like to parse this single response to update individual fields in another destination, you can do this by first formatting the response using Zapier's native utility tools. It's important to note that this method involves creating a Zap with more than one action, which means you will need a paid Zapier plan. Here's a video walking through how to set this up in Zapier:
Appcues NPS Scores --> Customer.io
Collecting feedback from your customers is invaluable, but acting on it can be even more impactful! Take a moment to thank your promoters that gave you that 10! Or, automatically ask what would we need to change for your detractors to change their score to a 10?
Here's how you can do this:
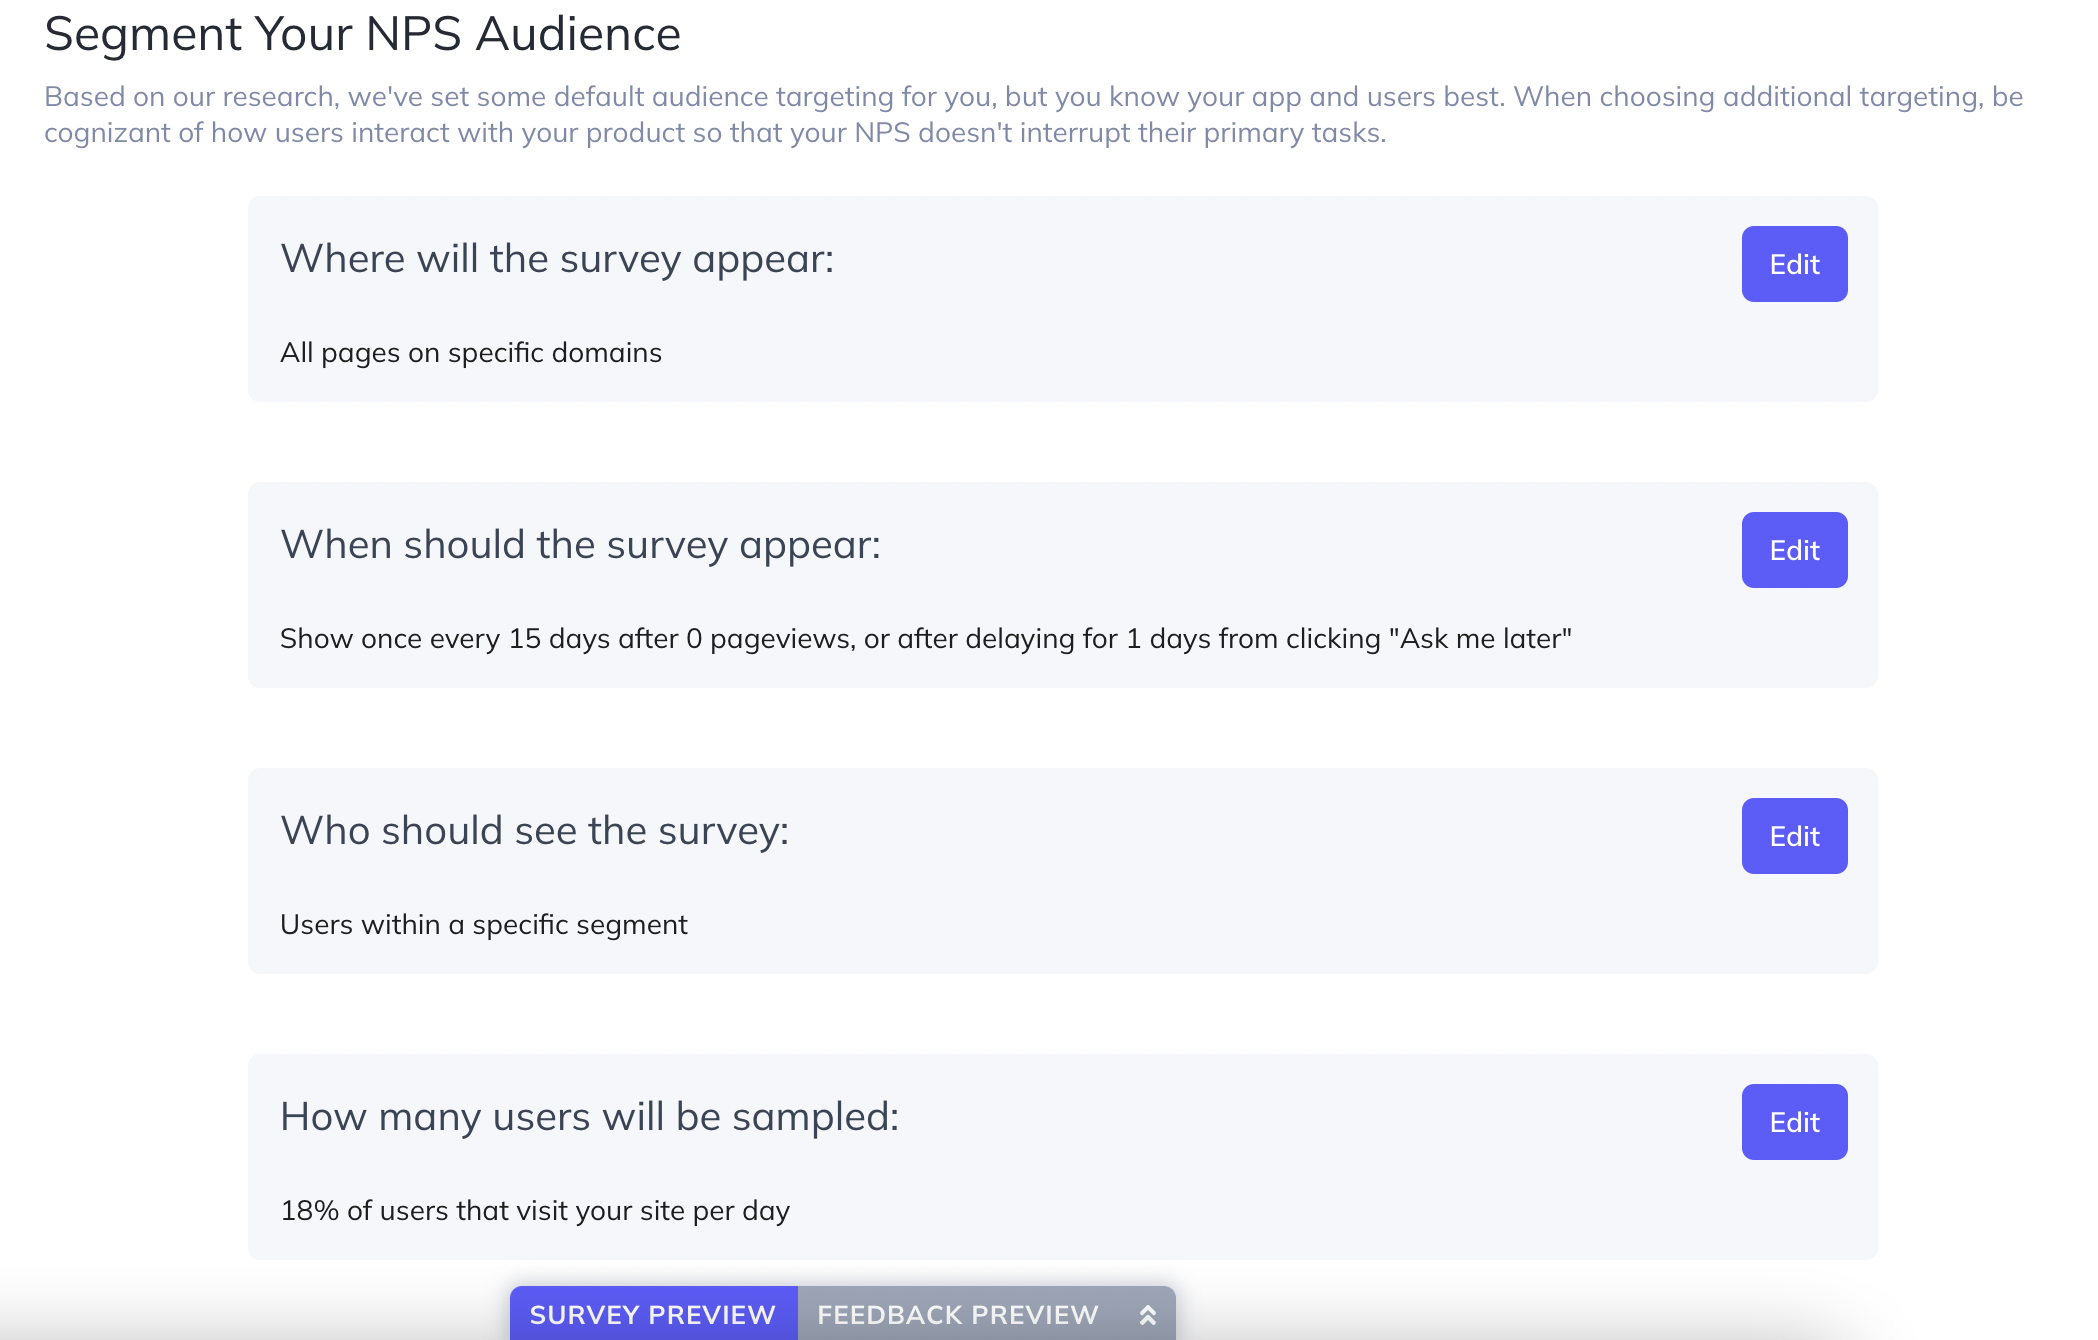
Step One: Enable your Appcues NPS Survey
Start by heading over to your NPS tab in your Appcues studio. Define your audience and start collecting NPS responses from your users.
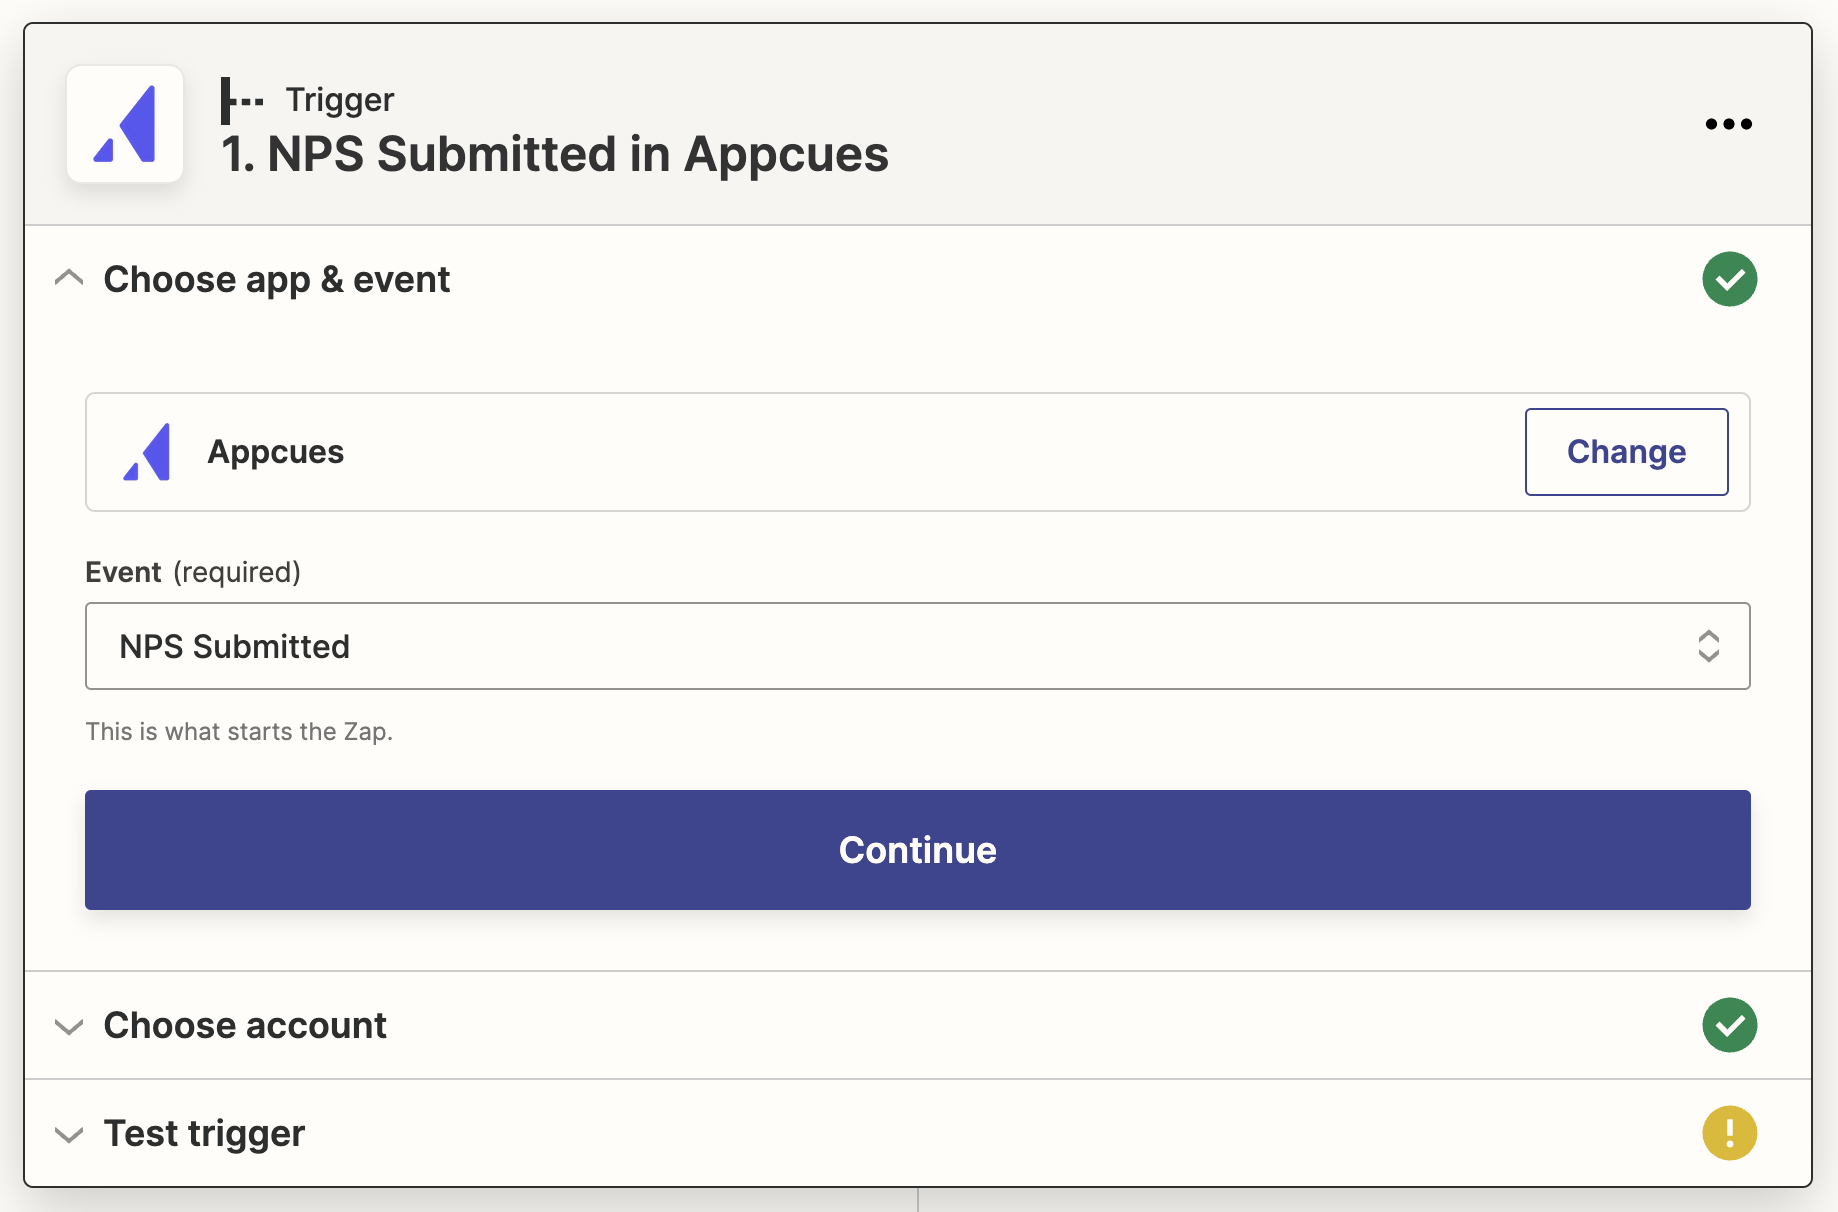
Step Two: Build your Zap!
Make sure to select the most recent version of Appcues and the correct trigger event. We're looking to create an action in Customer.io when we receive an NPS response, so we've selected "NPS Submitted" as our trigger.
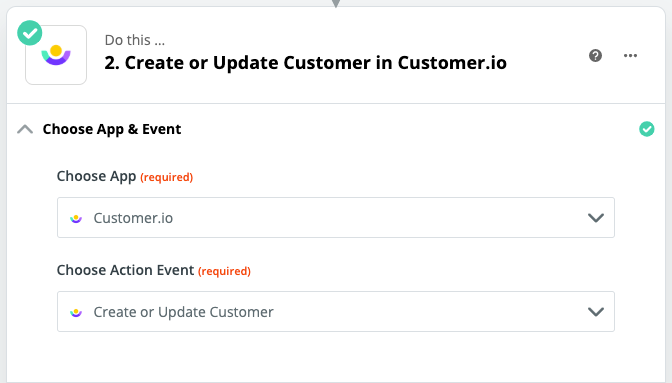
Step Three: Connect to Customer.io
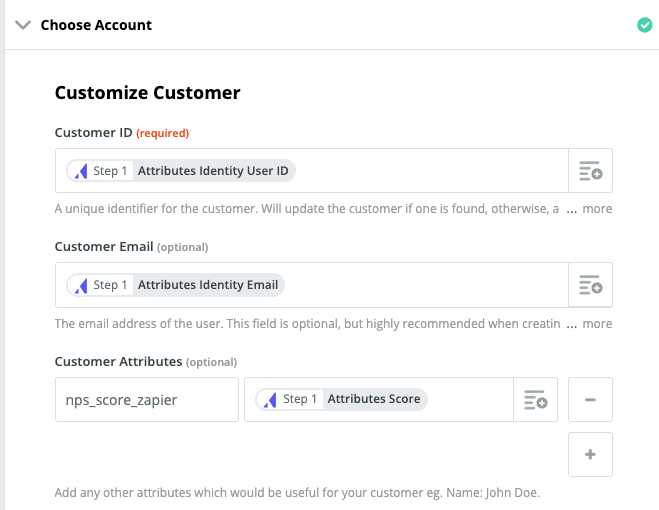
Select Create or Update Customer in Customer.io when an NPS score is submitted
Now you can choose the unique identifier to determine which customer account in Customer.io will be updated. You'll want to name your Customer Attribute something easy to identify when you're creating a segment, such as nps_score. Assign the Attributes Score to the Customer Attributes field to update the customer's account within Customer.io with the latest NPS score.
Step Four: Create a Segment in Customer.io
It's time to identify which users will see the feedback campaign you will launch in Customer.io! Do this by creating a segment and setting the condition to match the attribute that you defined in Step 3. In this example, we are looking to target our NPS promoters, or customers who's nps_score_zapier attribute we created is greater than an 8.

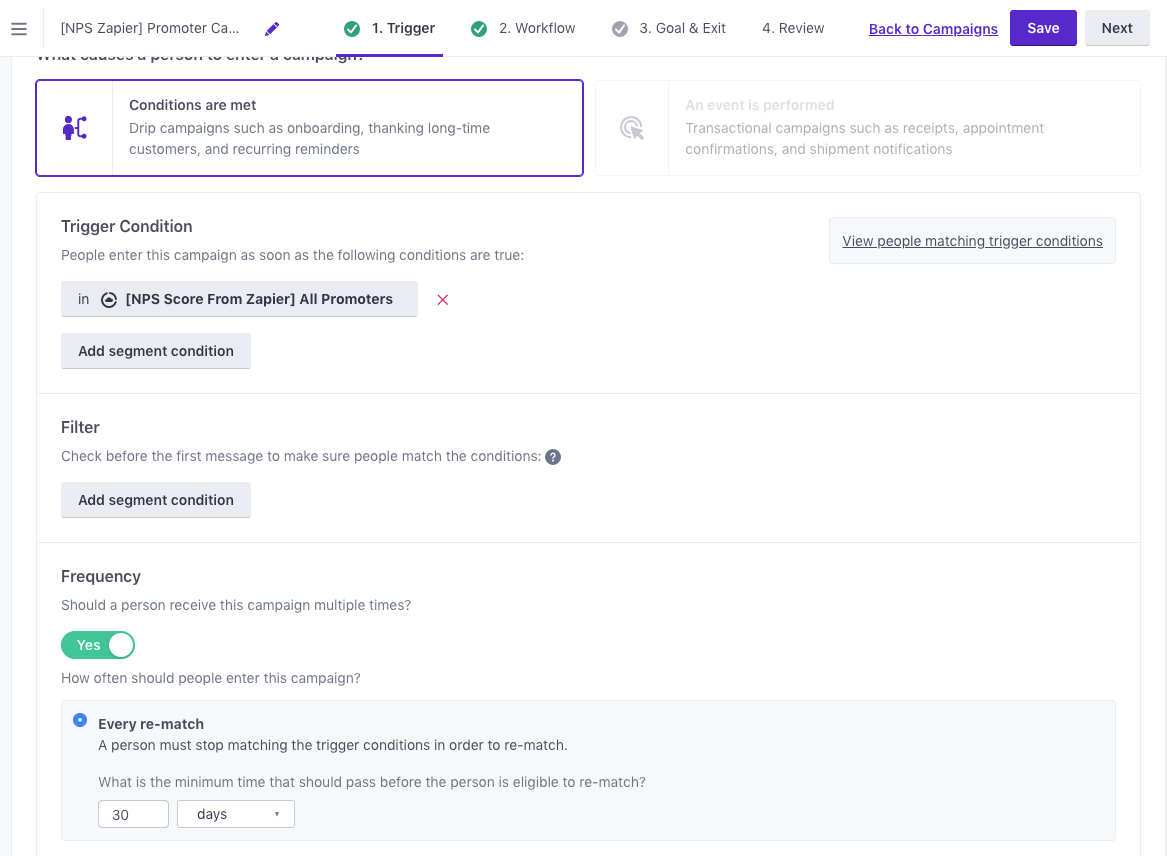
Step Five: Create your Campaign in Customer.io!
Create your message to your users by first setting a trigger for the e-mail. In this case, our trigger will be if the customer falls into the new segment we created.
Map out your workflow and create your e-mail template. Here's what that could look like (In our example, we're choosing to wait 10 minutes before sending that follow-up):
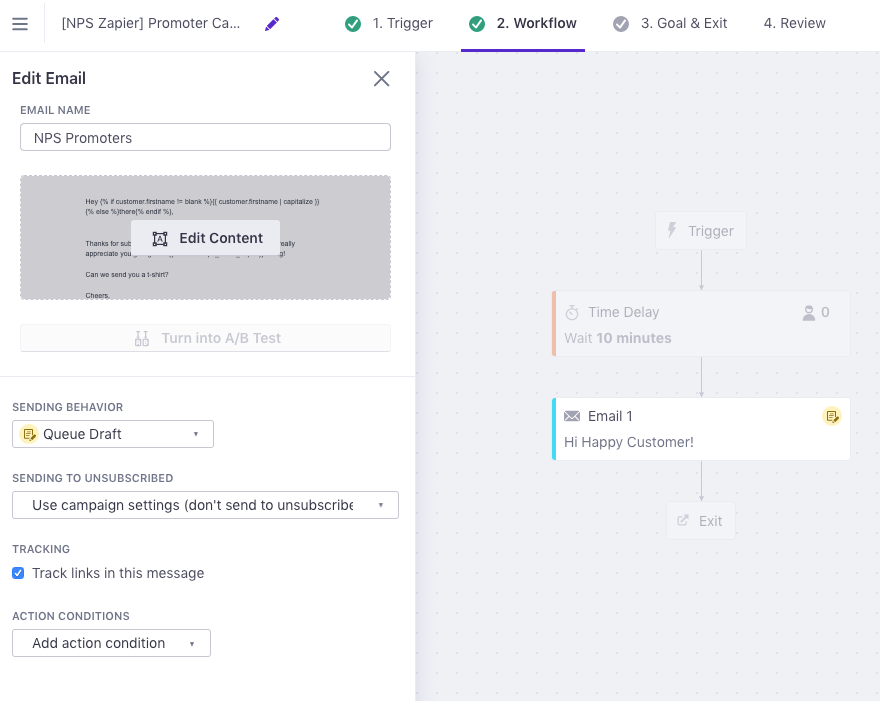
Note: It's a nice touch to pull in the new property you are passing to Customer.io from Appcues to personalize the response.
Don't forget to send yourself a test to double check that everything was set up properly. Congratulations! You've just made it that much easier to thank your users and collect some valuable feedback.
Appcues Custom Button Information
Yes! You can use custom button events from Appcues into other tools! You'll just need to use this Custom Event Trigger: