Build a Flow Across Pages
Learn how to add navigation steps in your Flows.
Table of Contents
There are a few things to keep in mind when building a flow that goes across different pages (or if the URL changes as users navigate through the flow):
- How to change pages when building a flow
- How to choose the right settings for every page change
- How to handle dynamic URLs
Navigate to Change the Page
When you're ready to add steps on a new page, click on Navigate in the lower left of the builder next to the flow's name. This will allow you to navigate as though the builder is closed. Go to the next page as your user would and to continue building, click Switch back to Build mode at the bottom of the screen.


In the example above, a redirect step was automatically added, but you might need something different according to your case.
Note: it is not recommended to begin a flow with a navigation step. Aside from it potentially creating a confusing experience for your users by redirecting them to another page without any action explicitly taken by them, the flow will also not generate the correct events. This means that while the flow may show to your users, we would not expect flow reporting and analytics to work correctly. A better solution is to first send your users via user action—such as from the Launchpad, a button in another flow, or a navigation item in your application—to the page where you would like the flow to begin before launching the flow.
Choose the Right Settings
There are 2 types of navigation steps:
- Redirect - the user is taken automatically to a URL. Redirects are used when the user is clicking a button inside the step, for example, a "Next" button in a modal or tooltip.
- Let Them Navigate - the user navigates autonomously to the URL. This option is used when the users need to interact with your app to move to the next step of the flow.
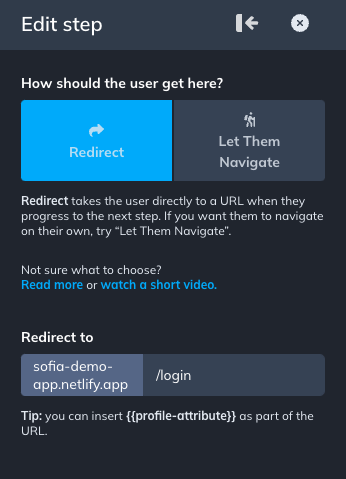
Redirect
Redirect steps are used when the previous step is asking users to progress by clicking on a button. When the users click on the button, they are automatically taken to the following page.
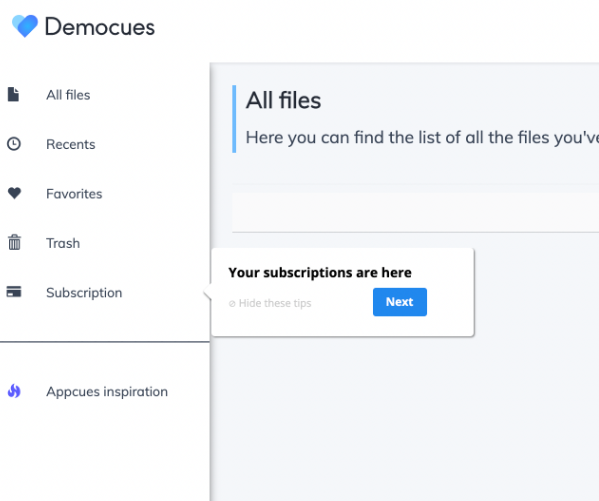
In the example below, the user is taken to the subscription page by clicking ‘next’.
In the Appcues Builder, you would edit that navigation step as shown below.
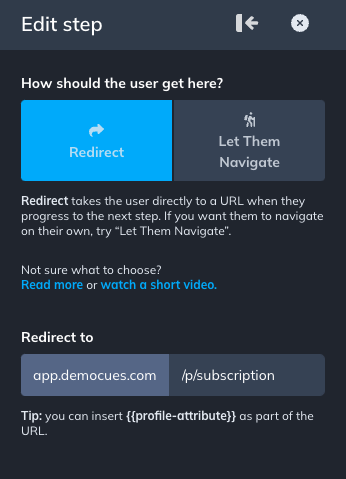
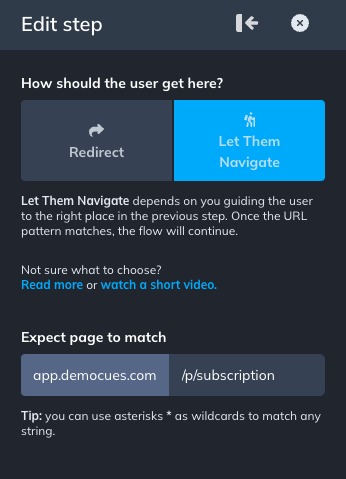
Let Them Navigate
Let them navigate steps are used when the user needs to interact with the page in order to continue the flow (and there is no button). When users click the element the tooltip is pointing to, they are taken to the following page.
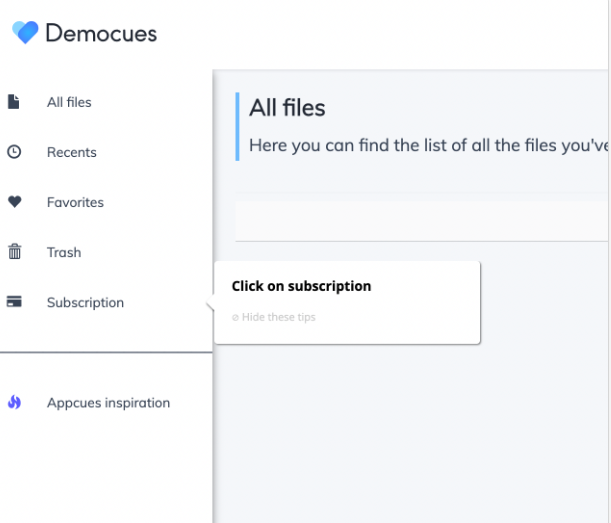
In the example below, the user is taken to the subscription page by clicking on ‘Subscription’.
In the Appcues Builder, you would edit that navigation step as shown below.

If a tooltip step does not have a “Next step” button action, clicking the target element where the tooltip is anchored to will progress the step to the “Let them navigate” step.
Navigate Across Dynamic URLs
In some cases, the URLs on your site will be personalized for every user; for instance, the URL contains account or user-specific information that will change from user to user.
In that case, there are two options:
- Use Wildcards (*)
- Use Custom User Properties
Wildcards
You can use a Wildcard in the form of an Asterisk (*) to replace the dynamic path of the URL to let Appcues know what kind of URL structure the user will land on.
Imagine you have the following URL you want to take your users to:
https://app.democues.com/p/all-files/5e0df/file/3dfe08
There are two parts of the URL that are dynamic. With wildcards to match the dynamic strings, you could do something like this:
https://app.democues.com/p/all-files/*/file/*
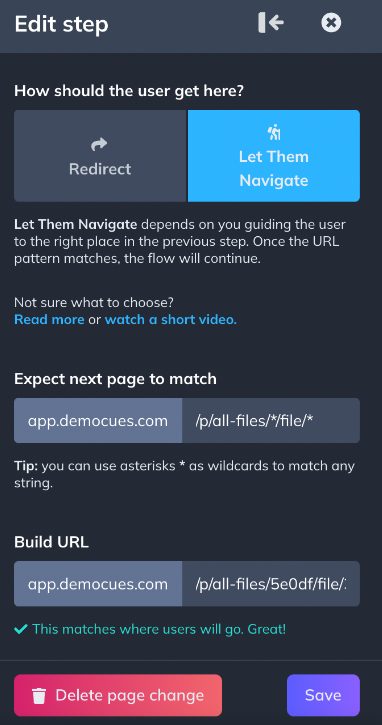
In the settings of the navigation step, add the Wildcards to the section 'Expect next page to match'.
In the 'Build URL' include the real URL where you're building the flow - don't add wildcards here. We need a real URL in order to be able to open the flow in the Builder.
Note: Wildcards can only be used with Let Them Navigate.
The wildcard format works by checking a specific URL (where the user actually navigates to) against itself to see if it matches. The wildcard cannot be used to Redirect a user automatically because a user's browser will not know what specific characters it should use to replace the *.
How this works:
- If a user navigates to https://app.democues.com/p/all-files/5e0df/file/3dfe08 the Let them navigate step will see that it matches the wildcard criteria and will complete.
- Likewise, if a different user navigates to another URL, like https://app.democues.com/p/all-files/4d7nj/file/5yhi62, the Let them navigate step will also complete, even though the URL is different.
Custom Properties
You can use Custom Properties to replace the dynamic path of the URL to take the user automatically to the correct and unique URL. For this, you need to pass the dynamic attributes of the URL as a Custom User Property. This only works if the user property already exists on Appcues (either via your installation or an integration). If you don't know how to send user properties, check out our article about User Properties.
Once the custom property exists in Appcues, you can find it in your settings here (custom properties tab).

Imagine you have the following URL you want to take your users to:
https://app.democues.com/p/all-files/5e0df/file/3dfe08
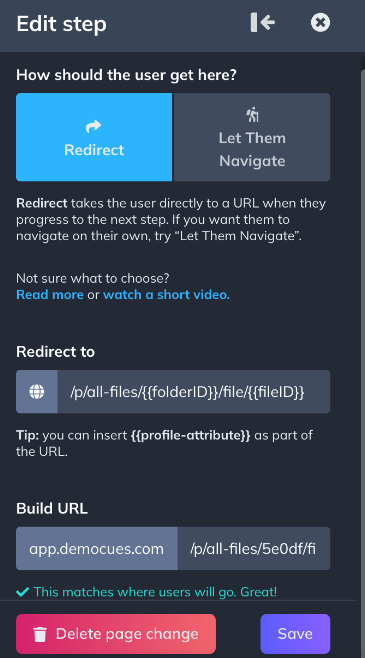
There are two parts of the URL that are dynamic. Insert the custom property name inside two curly braces, and the property will function as a variable. Ex: {{YourProperty}}.
https://app.democues.com/p/all-files/{{folderID}}/file/{{fileID}}
Please note that these properties are case-sensitive. You should follow the same exact syntax that can be found in the Property Name column.

Note: You can use custom properties in both your Redirect Automatically and Let Them Navigate page changes.
Appcues need to know the specific URL to send a user to so using wildcards and regex are not allowed in Redirect steps.
Important: Custom property values will not show up in Preview mode. In order to test, use the test mode or publish your flow (Testing Flows).
If you have any questions about the above, feel free to reach out to us at support@appcues.com and we'd be happy to assist!