Configure email settings
Set up your sending domain, physical address, senders, and sending behavior before sending emails from Workflows
Table of Contents
Before you can add Email nodes to a Workflow, your account needs a verified sending domain, at least one confirmed sender, and a physical address on file. After you complete setup, the Appcues Support team verifies your configuration — this can take up to 48 business hours. Contact support@appcues.com to expedite the process.
Go to Settings > Emails > Senders to access all email configuration.
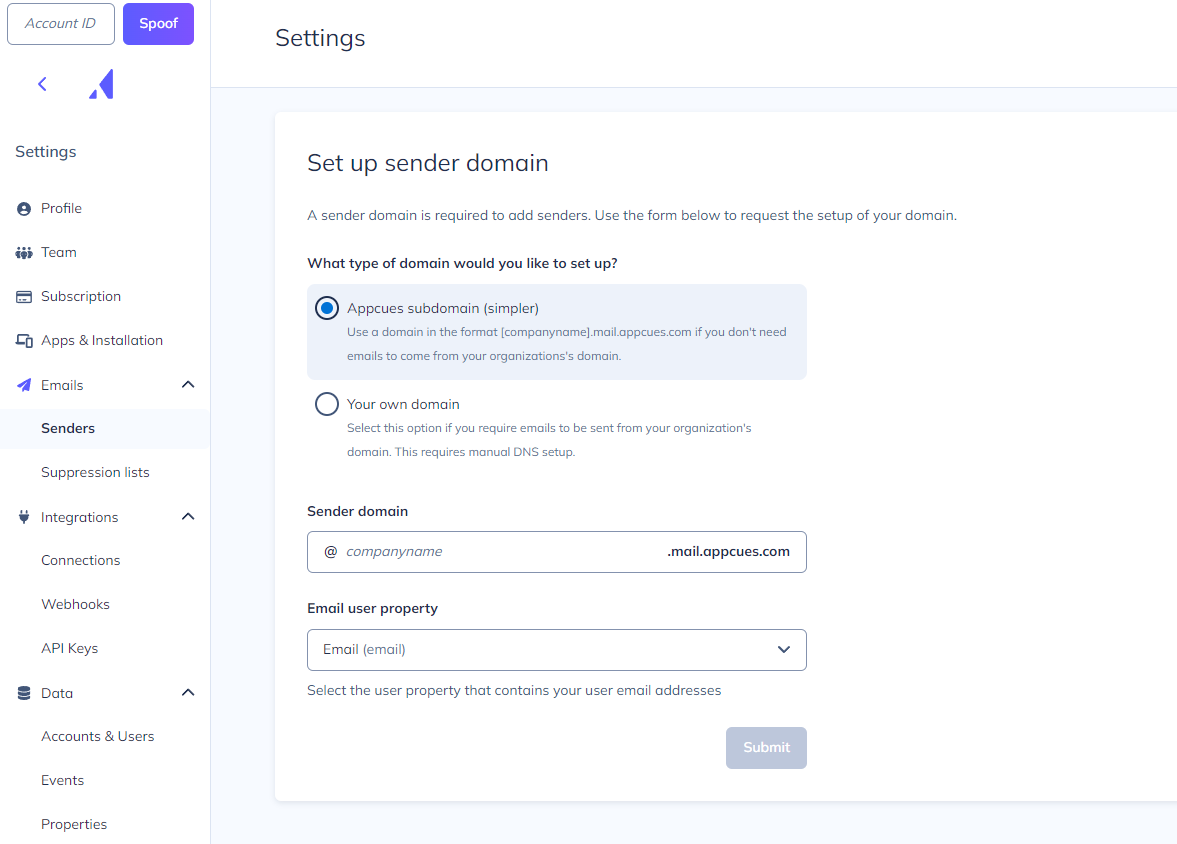
Domain setup
Choose how the "from" address on your emails will look.
Appcues subdomain
Your emails send from an address like you@your-company.mail.appcues.com. You choose the subdomain name. No DNS changes are required — Appcues manages the subdomain entirely.
Custom domain
Your emails send from a domain you own and manage, like you@your-company.com. This requires your team to add DNS records.
After Appcues verifies your custom domain request, four CNAME entries appear on the email senders page. All four must be added to your DNS and verified before you can send or test emails. Click Refresh status to check whether the records have propagated.
SPF record
In addition to the four CNAME entries, your root domain's SPF record must authorize Appcues' email provider to send on its behalf. Check your domain's existing TXT record for SPF (it starts with v=spf1) and add include:mailgun.org to it.
For example, if your current SPF record is:
v=spf1 include:_spf.example.com ~all
Update it to:
v=spf1 include:_spf.example.com include:mailgun.org ~all
DNS allows only one SPF TXT record per domain. Don't create a second one — merge the include:mailgun.org into the existing record.

Domain still showing "Pending" after adding CNAME records? Verify that your root domain's SPF TXT record includes
include:mailgun.org. You can check your current record with a tool like MXToolbox SPF Lookup. If the SPF entry is missing or was added as a second TXT record instead of merged into the existing one, domain verification will stay in a pending state.
Email user property
Appcues needs to know which user property holds each user's email address. The email must be present as a profile attribute on your users.
If you're not currently passing an email property, see the Identify users and groups or the user properties overview. Contact support@appcues.com if you need help modifying your implementation.
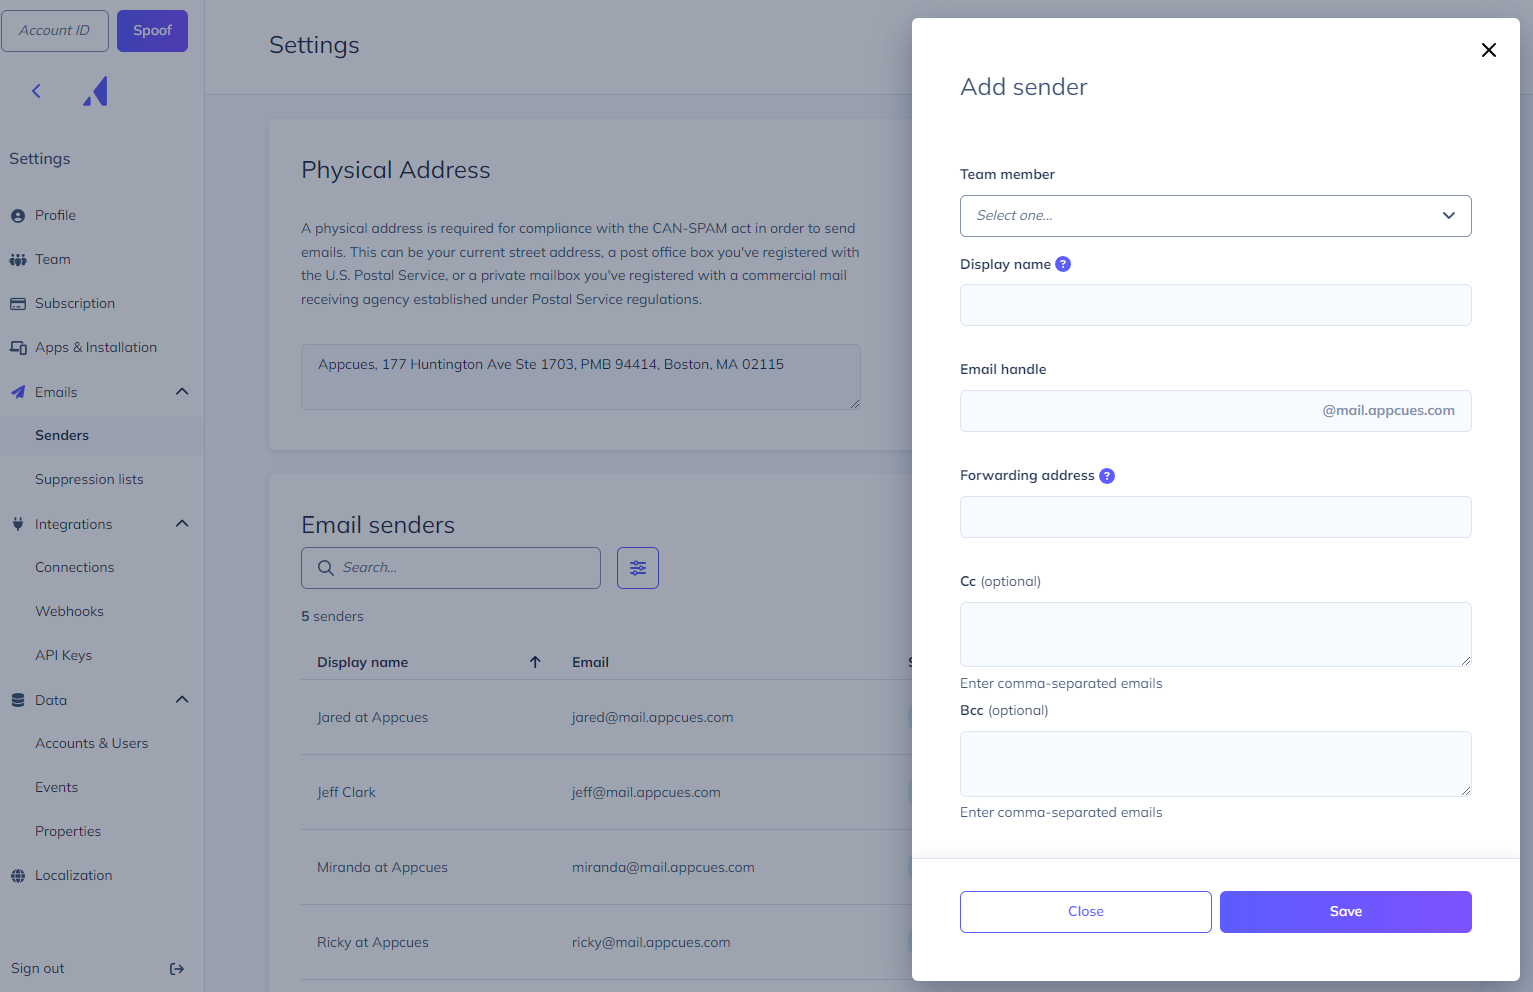
Physical address
A physical business address is required on all emails to comply with the CAN-SPAM Act. Add yours in the Physical Address section on the Senders page.
You must set this before publishing any Workflow that contains an Email node.
Email senders
Senders are the "from" and "reply-to" addresses on your emails. At least one sender must be added and confirmed before you can build an email.
Add a sender
- Click + Add Sender on the email senders panel.
- Select a Team Member from the dropdown. This makes the sender the default for Workflows created by that team member. You can assign multiple senders to the same team member.
- Configure the sender fields. The Display name, Email handle, and Forwarding address auto-populate from the selected team member but can be changed.
- Display Name — The name recipients see in their inbox.
- Email Handle — The "from" email address.
- Forwarding Address — Where replies go. If someone replies to the Email Handle address, the reply forwards here so you can respond from your normal inbox. This only applies when using an Appcues subdomain. With a custom domain, replies go to the Email Handle directly.
- CC — Addresses to CC on every email from this sender.
- BCC — Addresses to BCC on every email from this sender. This is useful for logging emails in tools like Salesforce. If using BCC for Salesforce, add the sender email to your allowed senders list in Salesforce under Profile Settings > My Email to Salesforce.
- Appcues sends a confirmation email to the new sender. The sender must verify it before they can be used.
Edit a sender
Click the vertical ellipsis (⋮) next to the sender and select Edit.
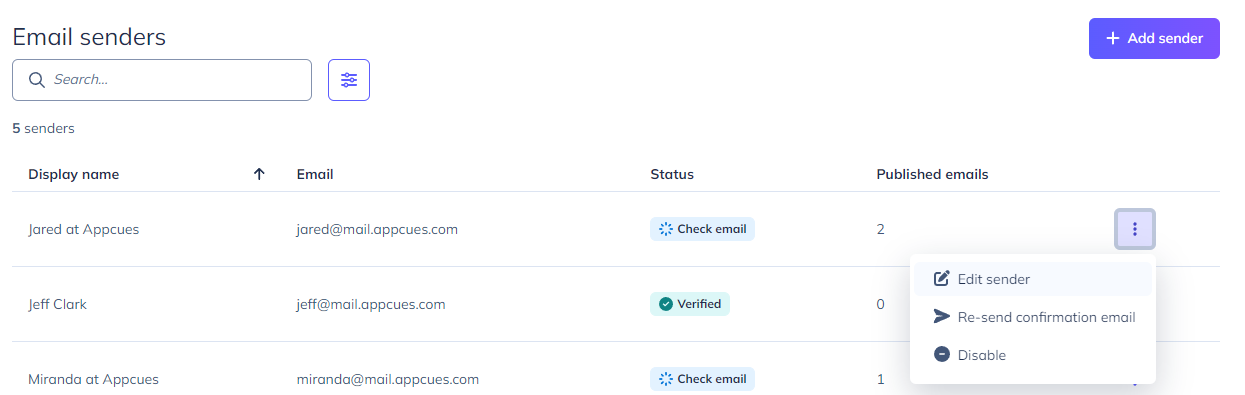
Resend a confirmation email
Click the vertical ellipsis (⋮) next to the sender and select Resend confirmation.
Disable or re-enable a sender
Click the vertical ellipsis (⋮) next to the sender. Select Disable to deactivate, or Enable to reactivate. Disabled senders can't be used in new emails but existing emails that reference them are unaffected until republished.

Sending behavior
Go to Settings > Emails > Sending Behavior to configure account-level defaults that apply to all Email nodes unless overridden.
Default sending window
By default, emails send whenever a user qualifies. Set a default window here to restrict delivery to specific days and times across your account. Individual Email nodes in a Workflow can override this window — see Add an Email node.

Email frequency limit
Control how often each user can receive an email. When enabled, if a user has already received the maximum number of emails in the selected time period, additional emails are delayed until the period elapses. Individual emails can be excluded from this limit in their node settings.
Sending window and other restrictions still apply when a delayed email becomes eligible.

Dedupe by email address
By default, Appcues uses the User ID to determine whether a user has already received a specific email and to count against frequency limits. If you have multiple users with the same email address, enable deduplication by email address instead. This ensures each email address only receives a given email once, regardless of how many User IDs share it.
This is an account-level setting. To enable it, contact your CSM or email support@appcues.com.