Set up Segments
Create reusable groups of users to target experiences, filter analytics, and manage audiences from one place.
Table of Contents
What are segments?
Segments let you save a set of targeting conditions as a reusable group. Instead of rebuilding the same rules on every experience, create a segment once and apply it wherever you need it.
Advantages over one-off audience conditions:
- Reusability. Apply the same segment across Flows, Checklists, NPS, Banners, and Workflows.
- Central management. Update the rules in one place and every connected experience updates automatically.
- Collaboration. People who understand the data can create segments for others to use.
Create a segment
- Go to Audiences > Segments and click Create a Segment.
- Name the segment and set your targeting conditions. The conditions work exactly like audience targeting on an experience.
- As you edit conditions, the matching user count updates in real time.
- Click Save.

You can also create a segment directly from a Flow's settings page. Under Audience > Specific users, click Save as Segment to save the current rules as a reusable segment.
Segments can also be created via the Public API.
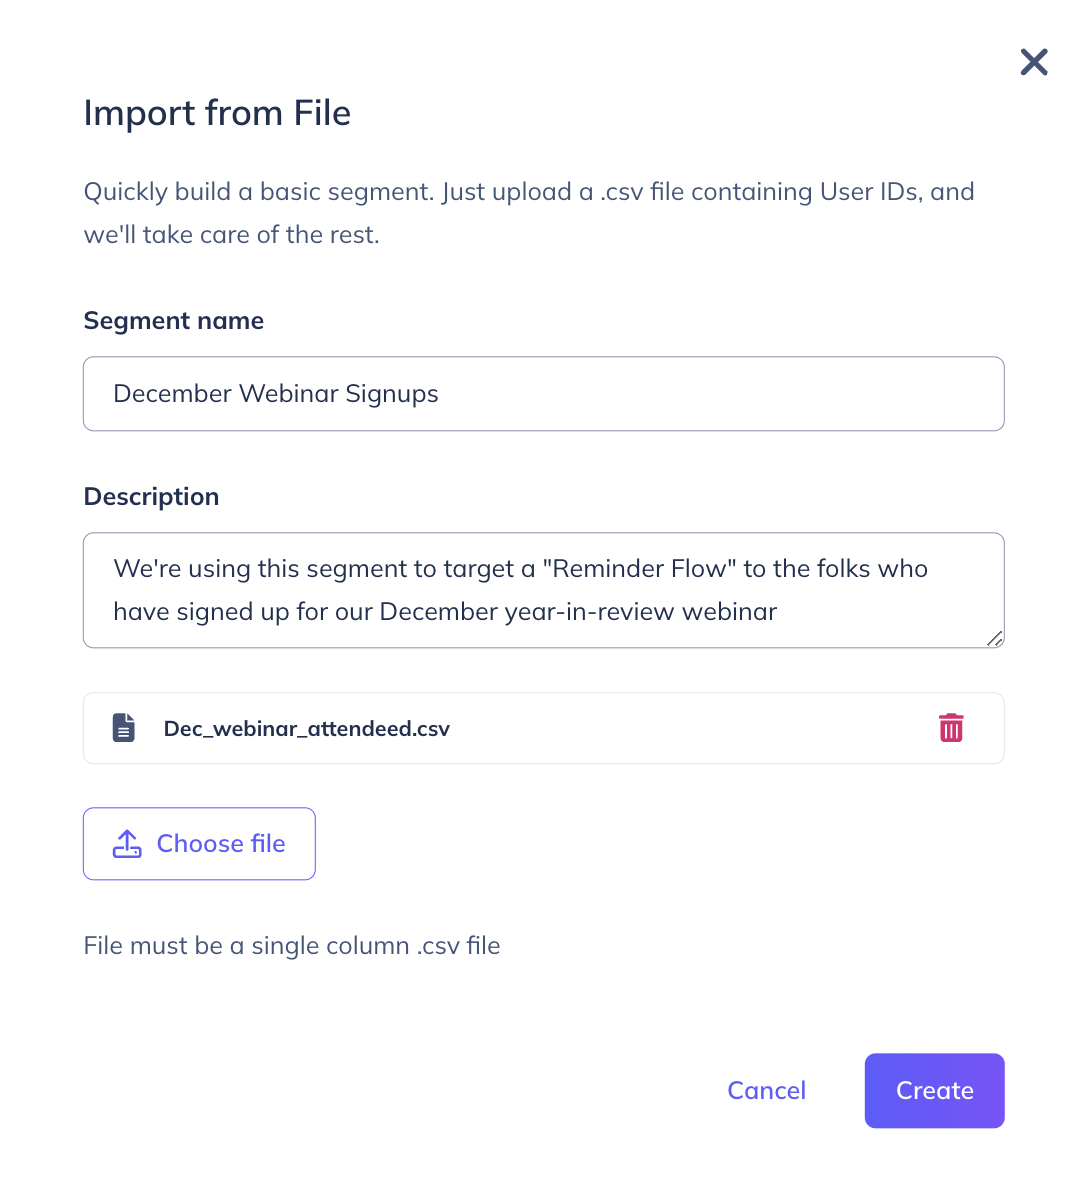
Create a segment via file upload
If you need to target a static list of hundreds or thousands of users, upload a CSV instead of listing them in conditions. This is faster for Appcues to process and easier for you to manage.
- On the Segments page, click Upload File.
- Name the segment, add an optional description, and choose your CSV file. The file must contain a single column of Appcues User IDs — no header row, no empty rows or columns.
- Click Create.
Important notes on file upload:
- Only Appcues User IDs are supported. Uploading email addresses will create new user records keyed by email, but those users won't be targetable. If your list uses a different identifier, map it to User IDs in your CRM first.
- Don't include a column header. The first row should be a User ID.
- Uploaded lists can't be edited after creation. To revise, delete the segment and create a new one, or create a second segment and combine them with an OR condition.
- Files can only be uploaded when creating a new segment, not when editing.
View users in a segment
The segment list page shows a real-time user count for each segment. Click into a segment and click Show Users to see the full list of matching users. You can customize which user properties appear as columns.

Common segment examples
Here are patterns that work well as saved segments.
New users
Target users first seen within the last 7 days using the auto-property First Seen At:
-
First Seen Atoccurred less than7days ago
Active users
Target users who visited recently using Last Seen At:
-
Last Seen Atoccurred less than30days ago
Users by language
Target users based on browser language for localized experiences:
-
Last Browser LanguageequalsFrench (all)
Users by role
Target users who can complete a specific action (like inviting teammates):
-
roleequalsadmin
Internal users (for testing)
Isolate your team's users by email domain:
-
emailcontains@yourcompany.com
Use this segment to exclude internal users from production experiences, or to test experiences before publishing.
Short list of specific users
For a one-time list of fewer than 1,000 values, use the is one of condition with your target property. For lists larger than 1,000, use file upload instead (see above).

Combine segments with other conditions
On an experience's settings page, you can layer additional conditions on top of a segment:
- Under Audience, select Users in a Segment and pick your segment.
- Click Add Criteria to open the Specific Users section.
- Add properties, events, or additional segments. Choose matches or doesn't match for each segment condition.
You can save this combined set as a new segment. Keep in mind that changes to any referenced segment will immediately affect all experiences that use it.
Use segments in targeting and analytics
For targeting: On your experience's settings page, choose Users in a Segment under Audience and select the segment. The experience shows only to users who match the segment's conditions.
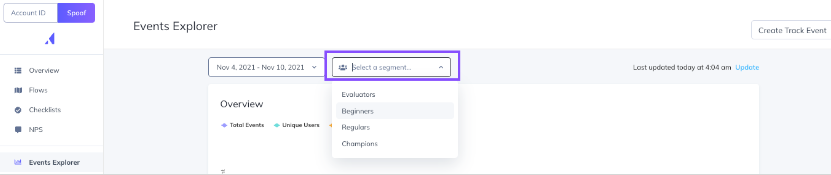
For analytics: In the Events Explorer, use the Segment filter at the top of the page to view data for a specific group.
Note on Events Explorer timing: The Events Explorer will now show data for only users currently in the specified Segment. It's important to note that Appcues only collects a trailing 7 days of data when Segments are created. Therefore, if you apply a newly created Segment to the Events Explorer and look at 90 days of data, Appcues will take users who were in the Segment over the last 7 days, and look back at 90 days of event data to see who achieved the event. As your segment matures in age, this gap in date coverage will close. For example, if a Segment is 23 days old and you look at a report for 30 days of event data, you will have full coverage for the time period selected (7 days of trailing data + 23 days of active tracking data = 30 days of historic data).
Manage and update segments
View all segments on the Segments page.
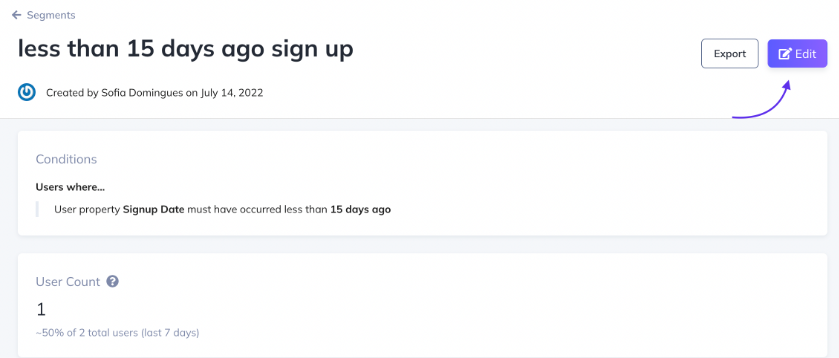
Edit a segment: Click it, update the name or conditions, and save. Updated rules apply immediately to all connected experiences — no republishing required. If Flows are connected, you'll see a warning listing which ones will be affected.
Delete a segment: Click the ••• menu and select Delete. You can't delete segments that are referenced by other segments, Flows, or Workflows. Remove those references first.
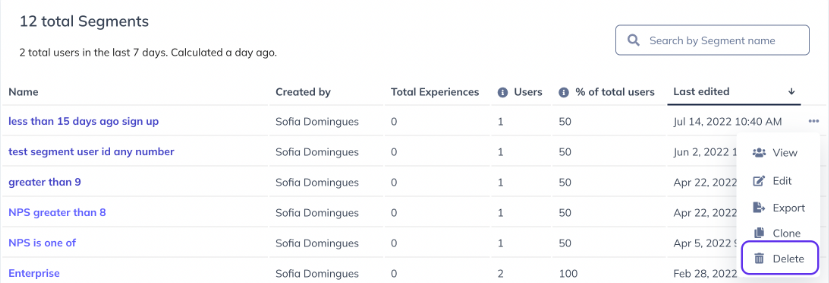
Export a segment: Click the ••• menu and select Export, or use the export button on the segment's page.

Exports include all users who currently match, looking back 2 years. You can choose which user properties to include as columns.

Segments can also be edited and deleted via the Public API.
Avoid performance issues with large lists
If your audience condition includes hundreds of User IDs in an "is one of" condition, Appcues may struggle to evaluate it. Symptoms include the segment not displaying a user count, Workflows failing to process, or experiences not appearing for qualifying users.
Fix: Replace large "is one of" lists with a file upload segment. Copy the User IDs into a CSV and upload them as a new segment (see "Create a segment via file upload" above). Then reference that segment in your experience's audience targeting instead of the inline list.
We recommend keeping "is one of" conditions to a few hundred items maximum. For anything larger, always use file upload.
Common questions
Can I use segments in Goals? Not currently. Goals do not support segment-based targeting.
Does adding new properties change an existing segment? No. Adding new properties to your installation doesn't affect existing segments unless you explicitly add those properties to the segment's conditions.
What happens when I change a segment used by other segments? Changes take effect immediately on everything that references it. If Segment A is used in Segment B, editing Segment A updates Segment B instantly.
Can I manage segments via API? Yes. Segments can be created, edited, and deleted via the Public API.