Send Appcues Survey Response to Google Sheets Using Webhooks
Learn how to send your Appcues survey responses to Google Sheets using Webhooks
Table of Contents
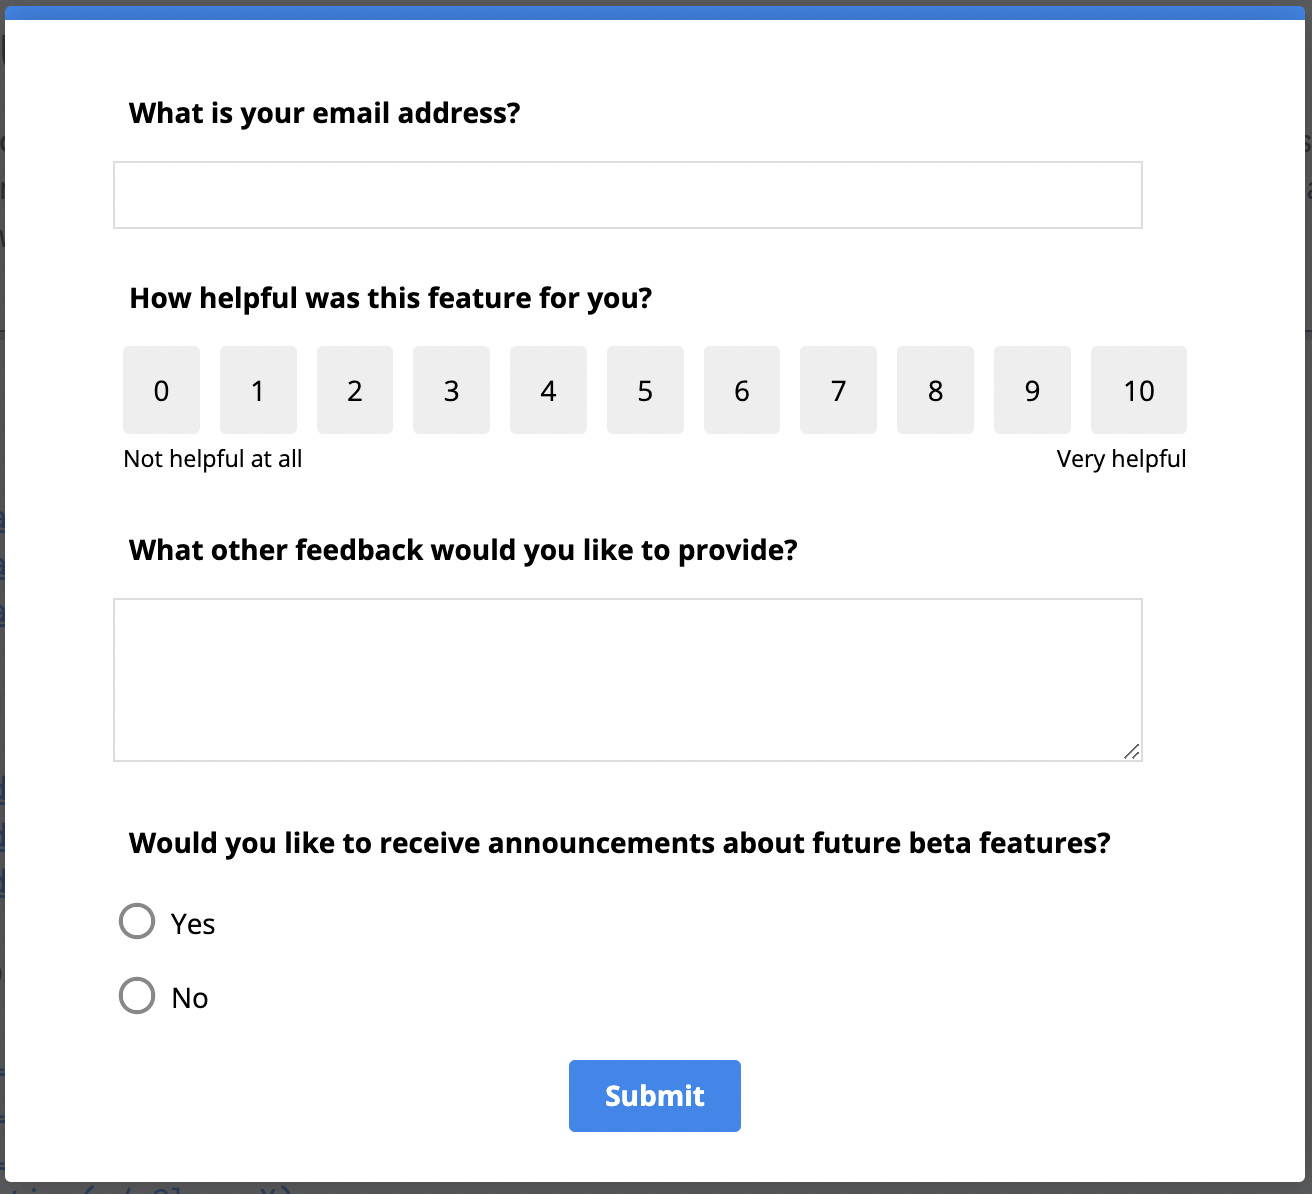
Imagine that you've just launched a new beta feature and you want to collect feedback from your users using an Appcues Flow. Maybe you launch this flow after someone clicks or interacts with your new feature, and you launch a survey asking beta users for their email address, rating, feedback, and if they'd like to be part of future beta groups.
While you could log into Appcues and export the survey results, maybe your whole team doesn't use Appcues every day, or you don't want to have to log in every day to get new results. Instead, you'd like survey results to go into a Google Sheet, so more of your team can have access!
How would you do this? Follow these two easy steps:
- Publish your Google Sheet as a web app using Google Apps Script
- Create a webhook in Appcues for the survey flow
Note: this doc goes over sending responses from a flow survey via webhook. If wanting to send responses from your NPS survey, instead, check out our other documentation here.
Build Guide
Step 1: Publish Your Google Sheet as a web app
A great feature that Google Sheets has is something called Google Apps Script. What that does is it actually publishes your Google sheet as a web app and provides you with a URL so you can send data into this spreadsheet.
Click Extensions > Apps Script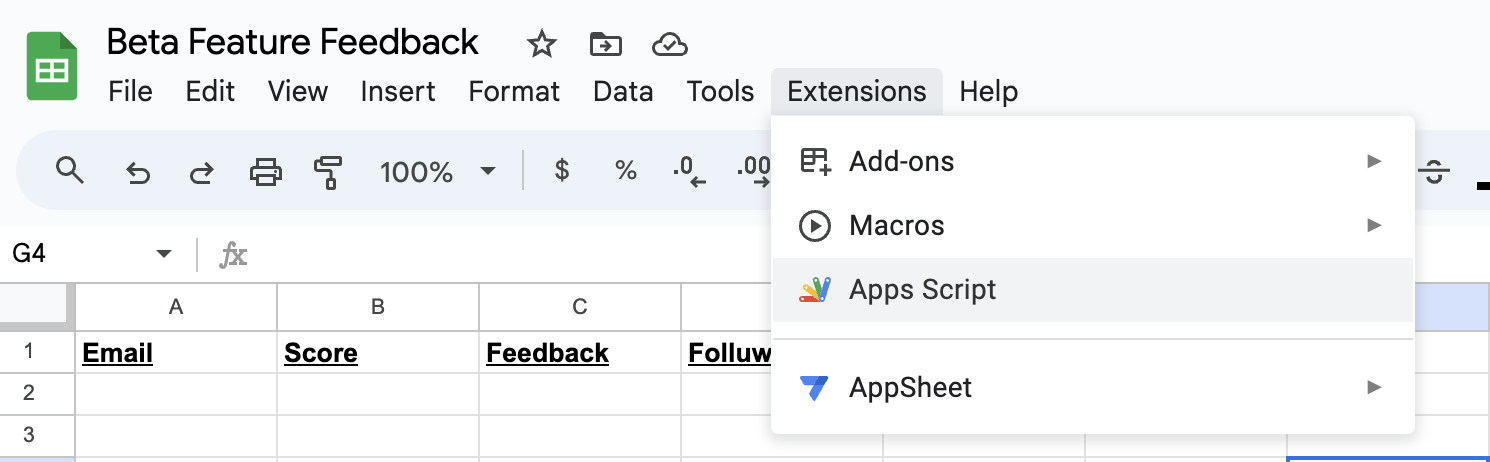
Next, you'll have to add a little bit of Javascript to define a Post function and tell your app what to do when data is provided. We provide an example that you can use below.
The event message sent by Appcues when this beta feedback flow is completed looks like this:
{
"user_profile": null,
"account_id": "94742",
"attributes": {
"flowId": "a6804622-59f1-4160-8dc6-e85fc99fc1f0",
"flowName": "Webinar Signup Form",
"flowType": "journey",
"flowVersion": 1691721689754,
"interaction": {
"category": "form",
"formId": null,
"response": [
{
"fieldId": "c3c2feed-7c31-439b-a8e4-d1b4d724dc22",
"fieldRequired": false,
"fieldType": "null",
"label": "What is your email address?",
"value": "joey@appcues.com"
},
{
"fieldId": "92a849cf-f5f2-4e60-9473-632e5db28242",
"fieldRequired": false,
"fieldType": null,
"label": "How helpful was this feature for you?",
"value": "10"
},
{
"fieldId": "c6d79806-4a64-4f54-9666-f00f3e5e5181",
"fieldRequired": false,
"fieldType": null,
"label": "What other feedback would you like to provide?",
"value": "What a great addition!"
},
{
"fieldId": "8f07f717-5233-4145-b357-76203d5a7d09",
"fieldRequired": false,
"fieldType": null,
"label": "Would you like to receive announcements about future beta features?",
"value": "Yes"
}
]
},
"interactionType": "submit",
"sessionId": 1691722525111,
"stepChildId": "aba51afe-aacc-43b3-8904-836c205a0f10",
"stepChildNumber": 0,
"stepId": "dd3e8516-a875-45c0-b515-132740e62f19",
"stepNumber": 0,
"stepType": "modal"
},
"group_id": null,
"id": "bc572fa1-20d1-4293-b61e-3d6a66455cd7",
"ingested_at": 1691722538477,
"name": "appcues:form_submitted",
"timestamp": 1691722538173,
"user_id": "anon:3304116f-aa29-41b7-b9df-7030a893fb5f"
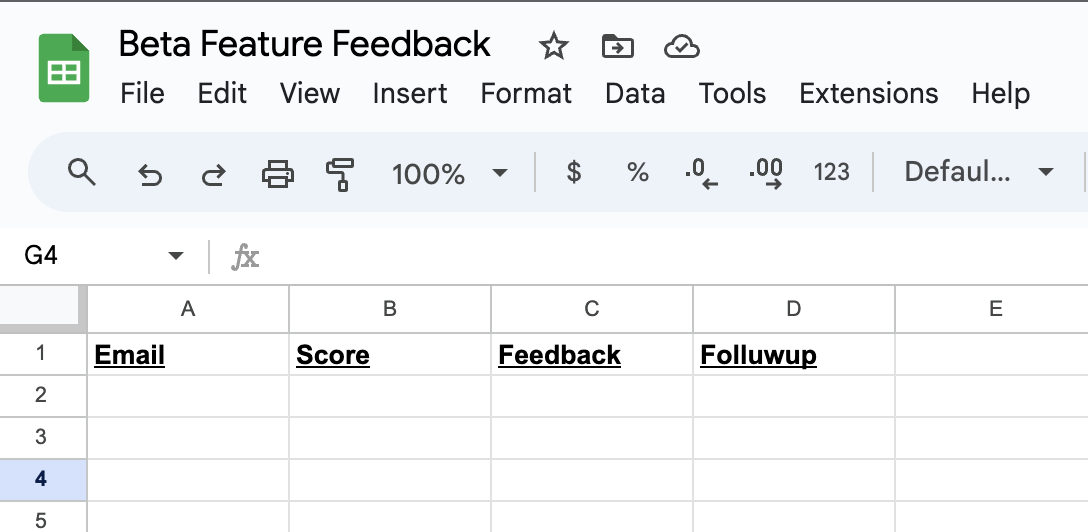
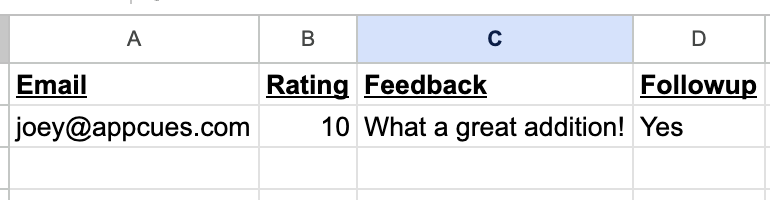
}We want to extract each of the value fields within attributes.interaction.response, add them to an array, and pass them into Google Sheets using sheet.appendRow.
Within the doPost() function required by Google to deploy this app, I can include the below. Depending on what information you want to pull from your Appcues events, you might have to tweak this function a bit. The following code snippet will grab each web form submission value and print them to a new row in your google sheet.
function doPost(e) {
    var sheet = SpreadsheetApp.getActiveSheet();

    //Parsing the request body
    var body = JSON.parse(e.postData.contents)

    //Adding a new row with content from the request body
    sheet.appendRow(body.attributes.interaction.response.map( item => item.value))
}
If you wanted to grab other fields from the JSON and also include them, such as user id and timestamp, you can use the following code as a launching point.
    function doPost(e) {
    var sheet = SpreadsheetApp.getActiveSheet();
    var body = JSON.parse(e.postData.contents)
    var itemValues = body.attributes.interaction.response.map( item => item.value)
    var userID = body.user_id
    var timestamp = body.timestamp
    var rowValues = [userID, timestamp]
    rowValues = rowValues.concat(itemValues)
    sheet.appendRow(rowValues)
}
Now it's time to deploy the app!
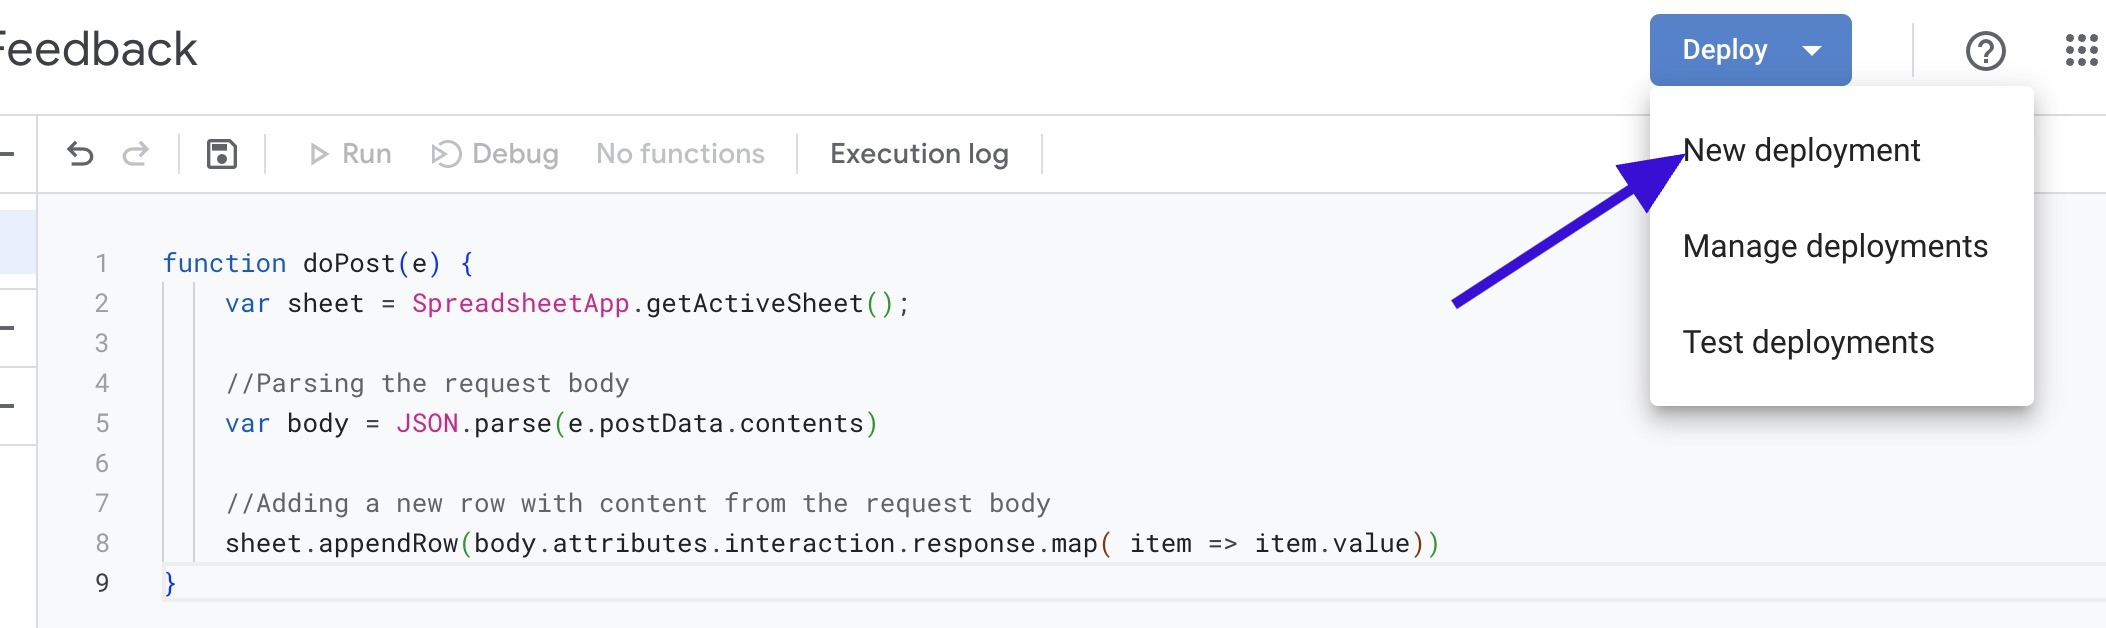
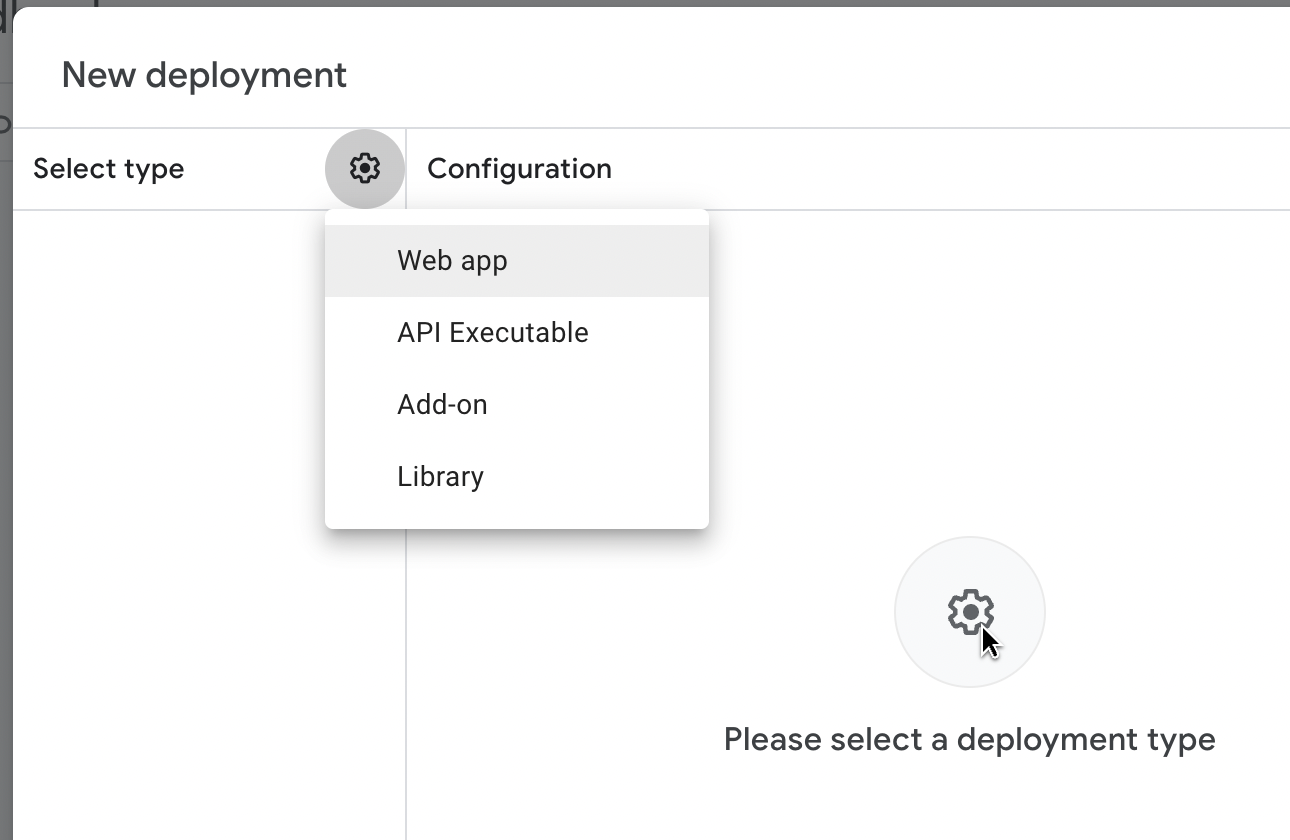
On the next screen, click “Select type” > “Web app”.
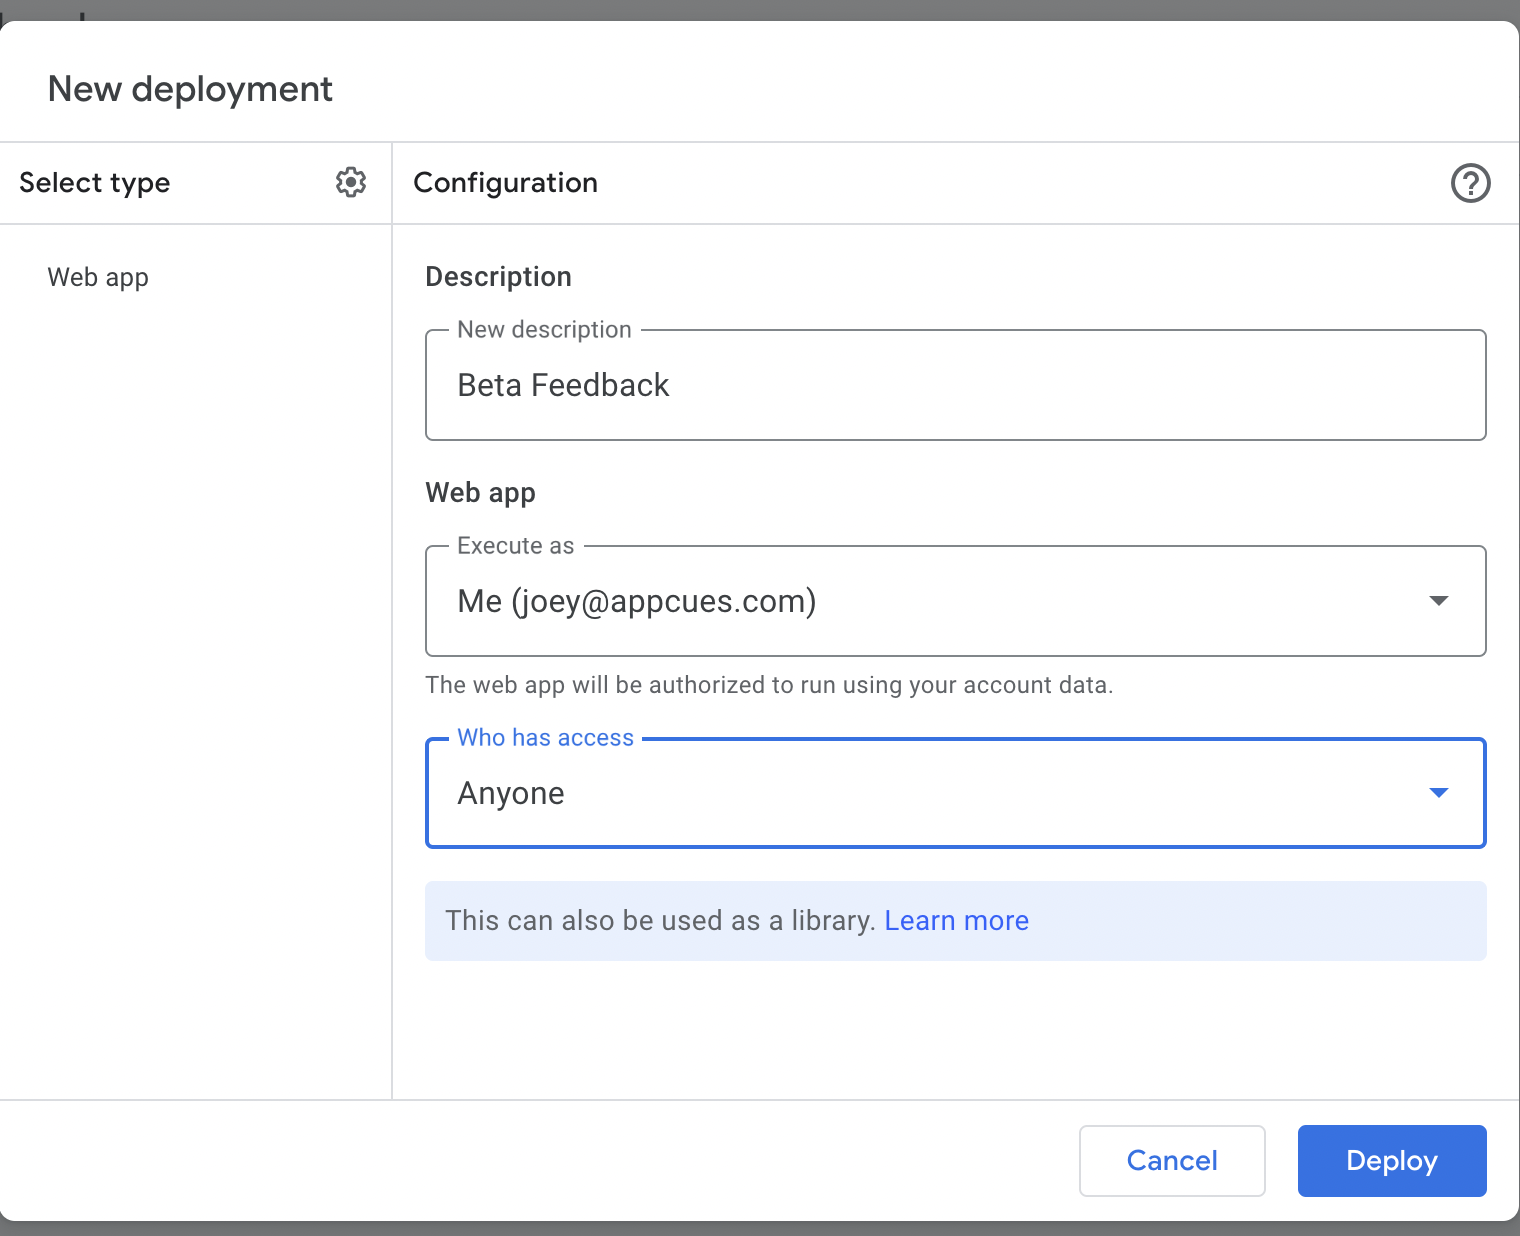
On the next screen, give the deployment a name, and make sure access is set to “Anyone”. Click Deploy, and your sheet will become a web app!
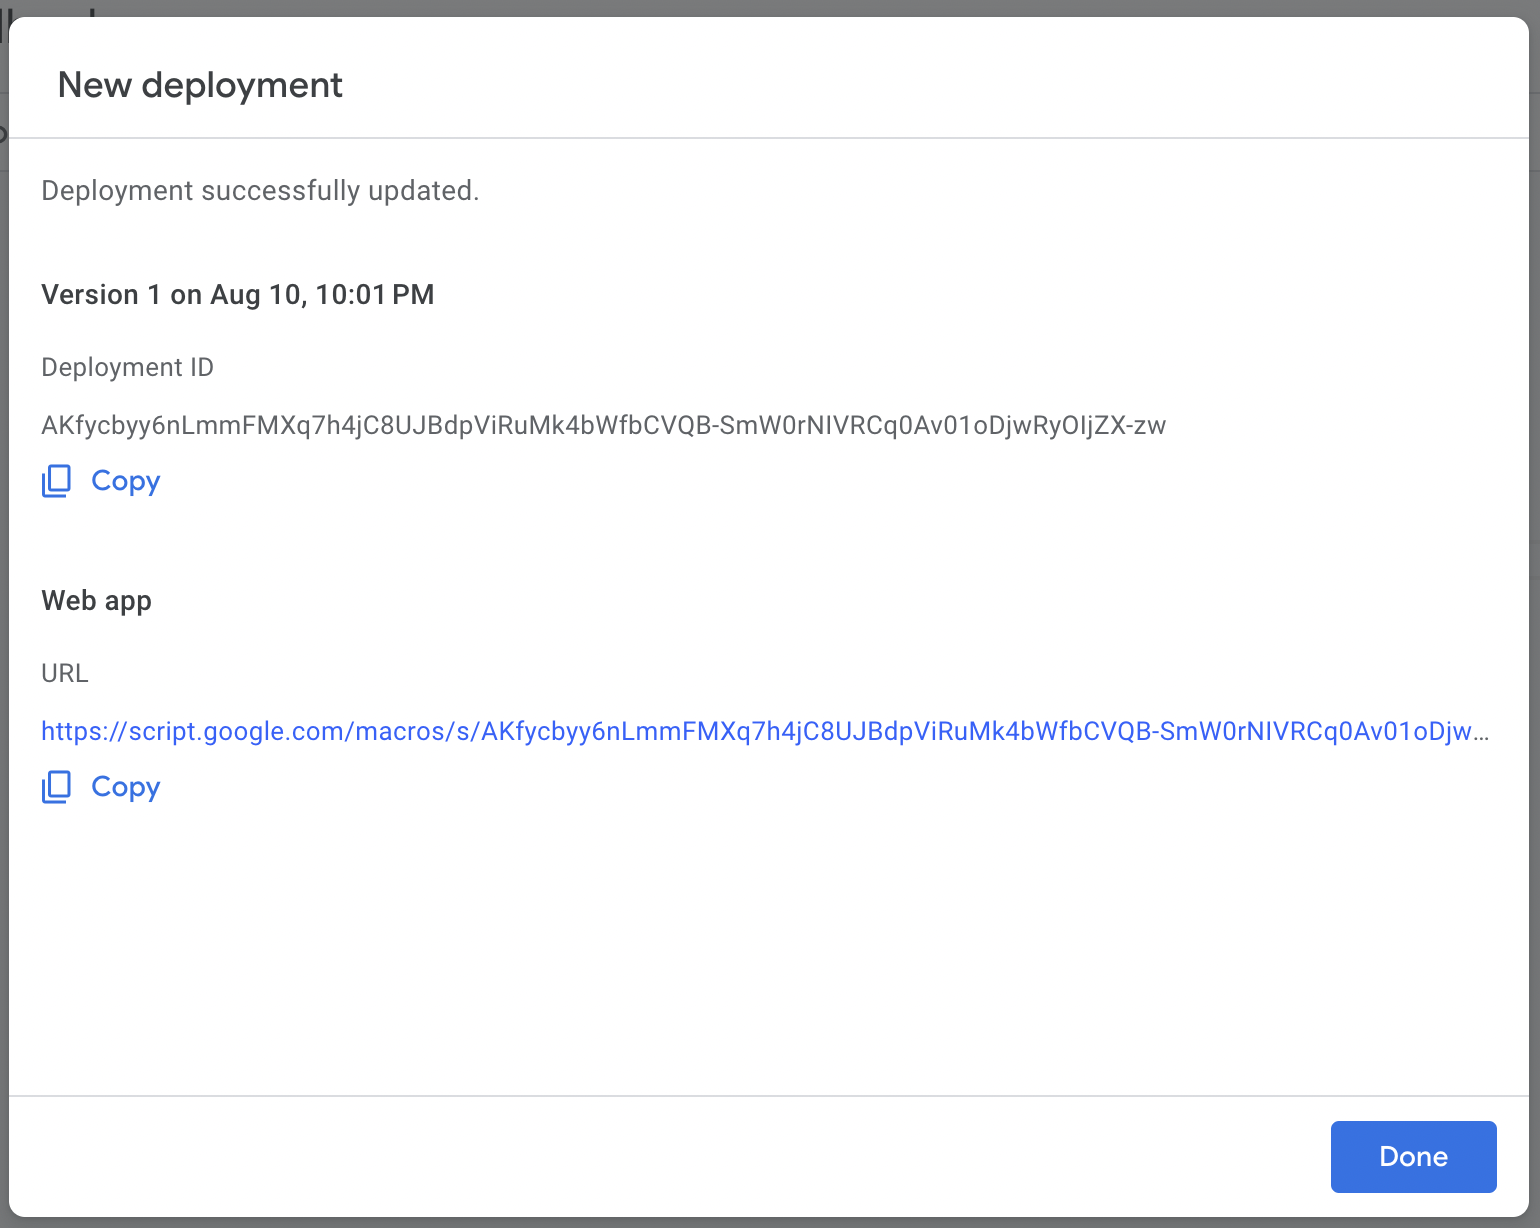
On the final screen, copy the Web app URL. You'll need it for the next step.
Step 2: Create a Webhook in Appcues
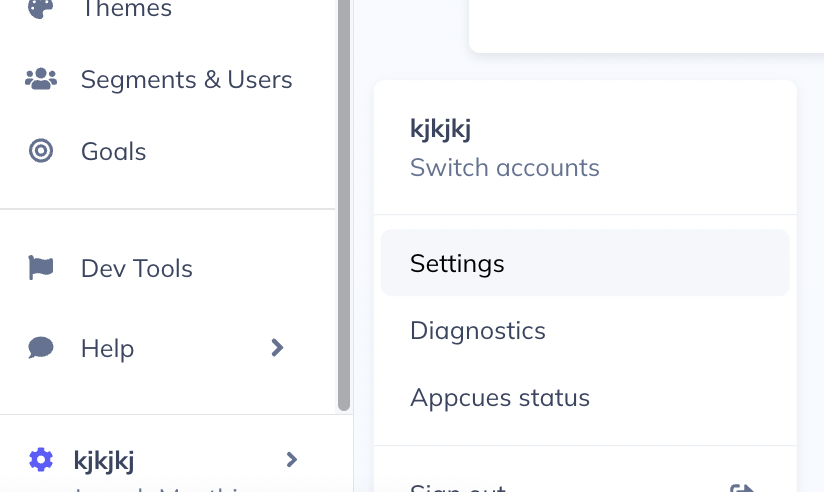
To access the Webhooks page, go to the Account Settings page first.
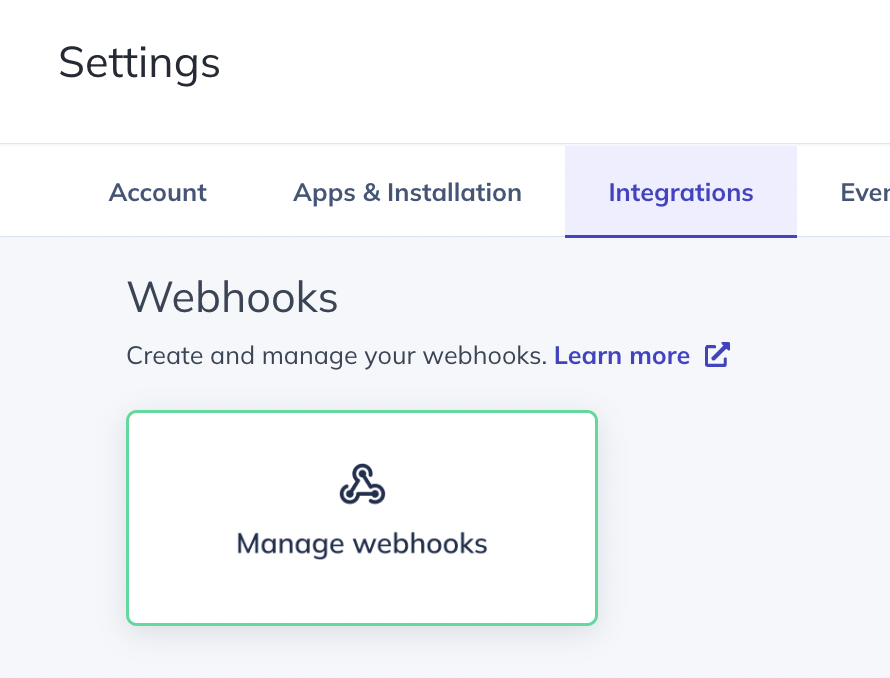
And then on the Integrations tab click the “Manage webhooks” card.
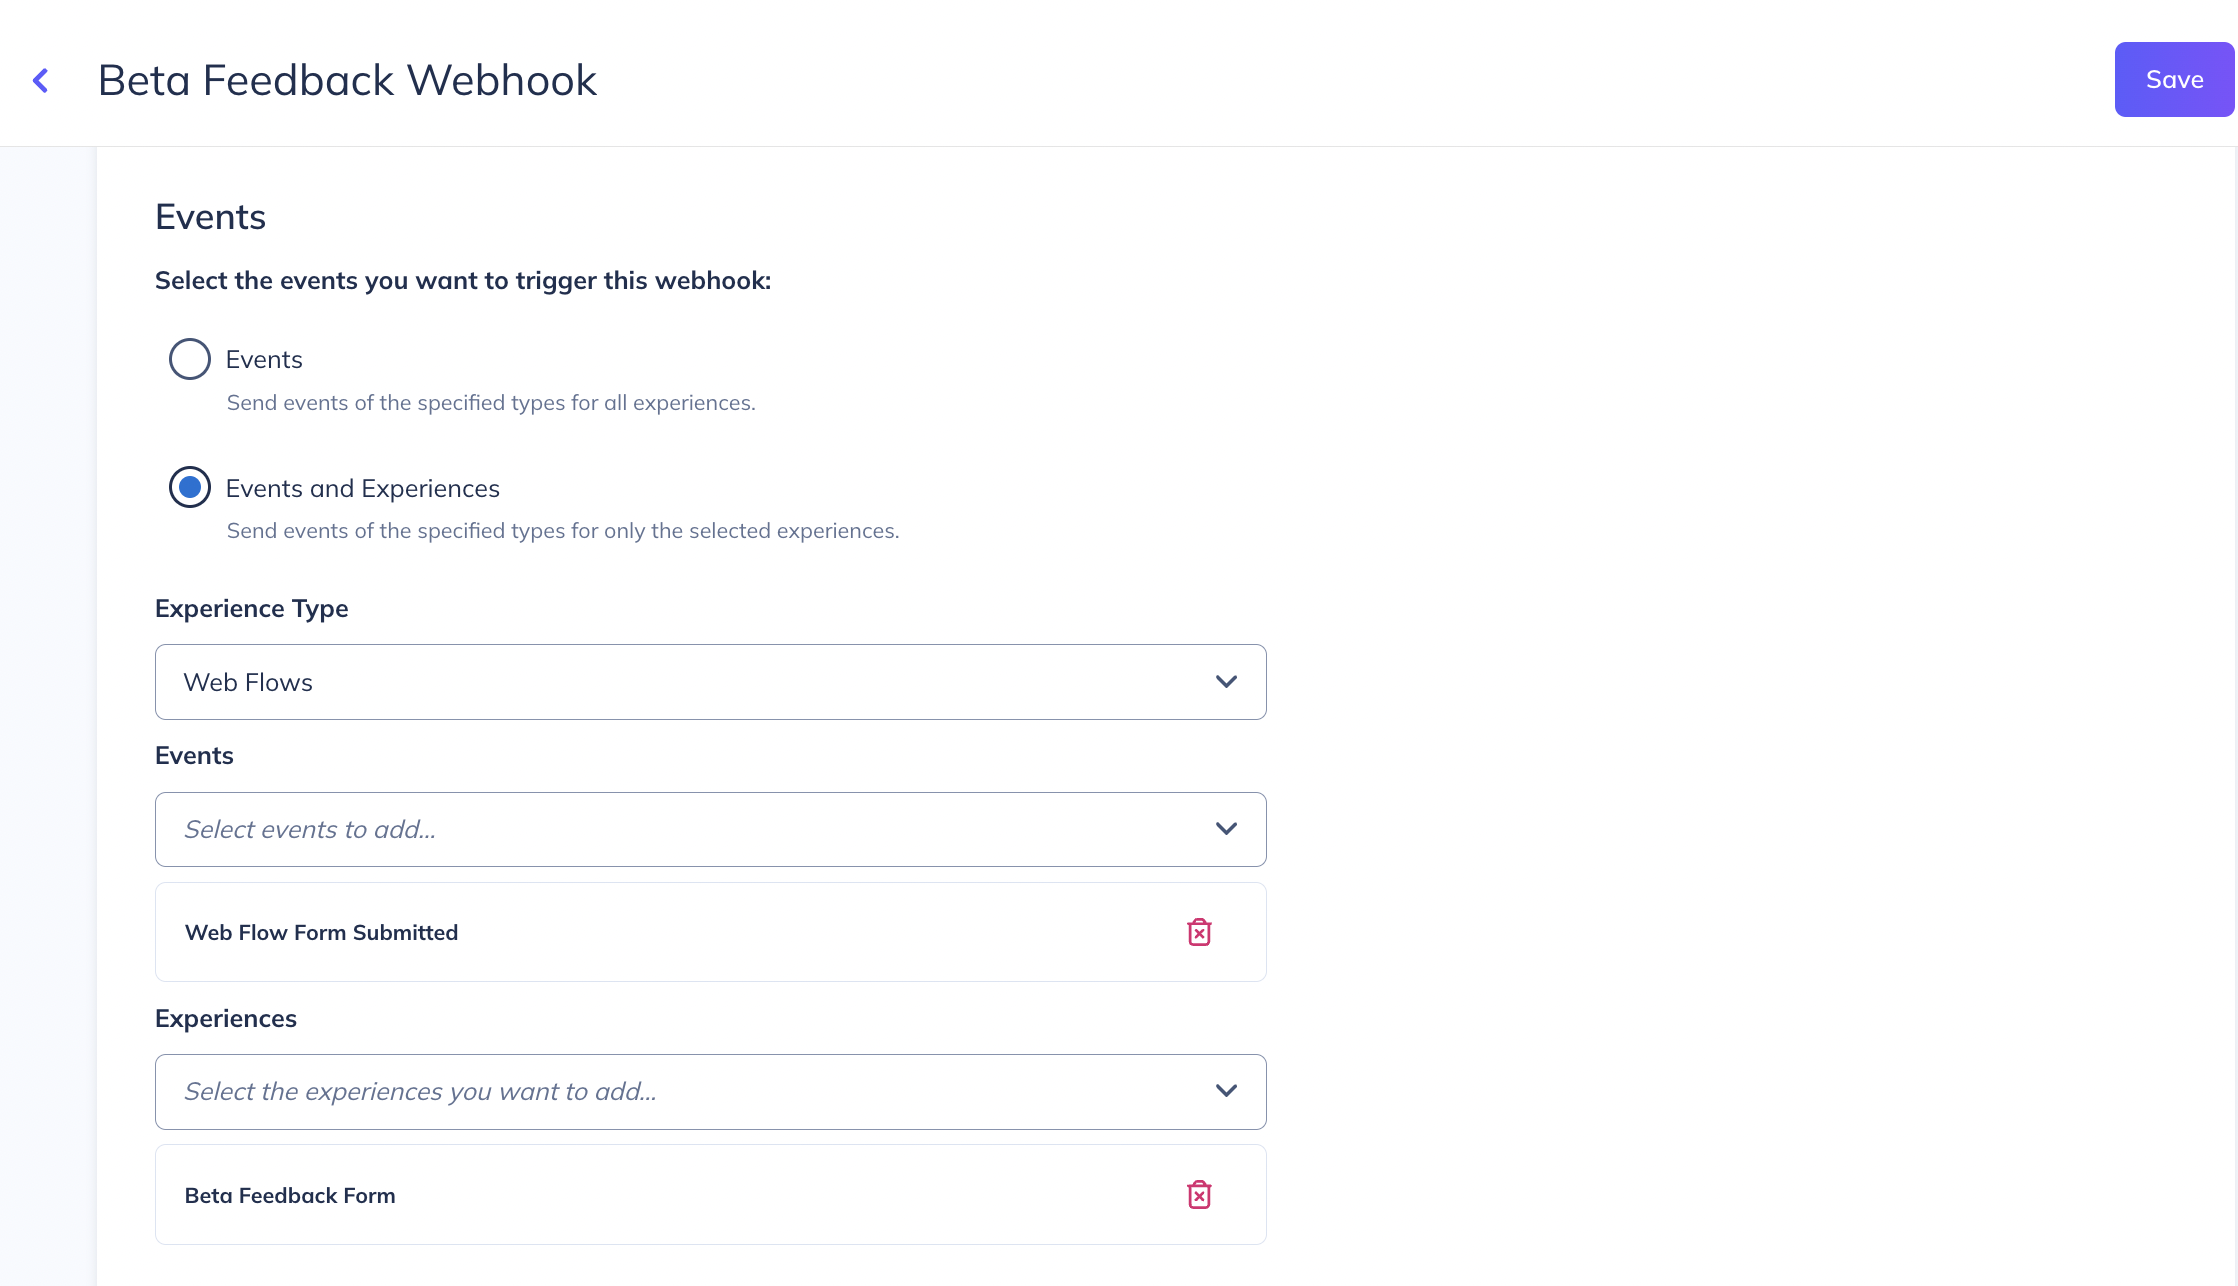
Click “New webhook”. On the next page, you'll give the webhook a name, an optional description, and most importantly the Endpoint URL, which you copied when you completed deploying your Google sheet as a web app.

Further down on the webhook creation page, you'll select Events and Experiences, “Web Flows”, “Web Flow Form Submitted”, and the name of your flow (in this case “Beta Feedback Form”.
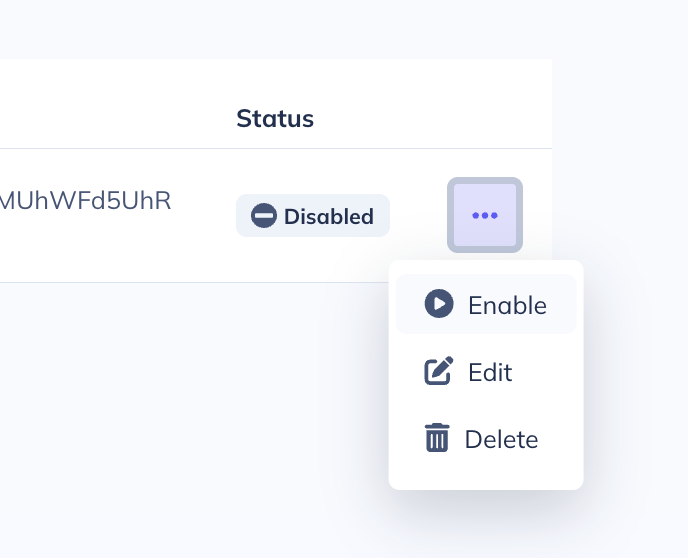
Lastly, enable the webhook and you're done!
From now on, each new survey response on your flow will populate as a new row in your Google sheet.
Happy Building!