Click-to-Track Events
Learn how to track activity in your application without any code.
Table of Contents
Click-to-Track brings insights into the platform that allows teams to effectively track and measure the success their flows are having toward customer activity. The feature aims to empower non-technical teams to create, control and manage the different events within their UI that they want to target and track. Some of the challenges that non-technical teams were having prior to Click-to-track were:
- Total dependency on development teams: This was very common among Appcues customers. They didn't have a dedicated development team focused on all things Appcues, making it challenging for events to be sent to Appcues.
- Not knowing if flows are driving the desired outcomes: If you don't track, you don't know. If teams are not tracking events, it becomes difficult to determine the success of a flow towards driving a desired behavior among end-users.
- Not being able to target based on user activity: Events can allow you to target flows based on the action users have/haven't taken, making events a powerful tool to use for targeting flows and building segments.
What can you do with Click-to-Track?
- You can create events by selecting elements on the page; these events are like the JavaScript SDK’s track call, but are created without writing any code.
- You can use these events for targeting, triggering, segments, goals, and view them in the Events Explorer.
- Send these events to Appcues Integrations via the Events Broadcaster add-on.
How To Access Click-to-track?
In order to access Click-to-track, you’ll want to open the URL that has the element you want to track, and then select the Appcues Chrome Extension.
Once you select the extension, you’ll be prompted to either Work on a Flow, Drop a Pin, Add a Banner, or Create a Track Event:

If you click Create Track Events, the Builder will open and you can start creating your event right away.

NOTE: For the best element selection results and to eliminate common issues, assign unique IDs to all elements you intend to select with Click-to-track.
You can also switch modes very easily from the Builder.

Defining An Event
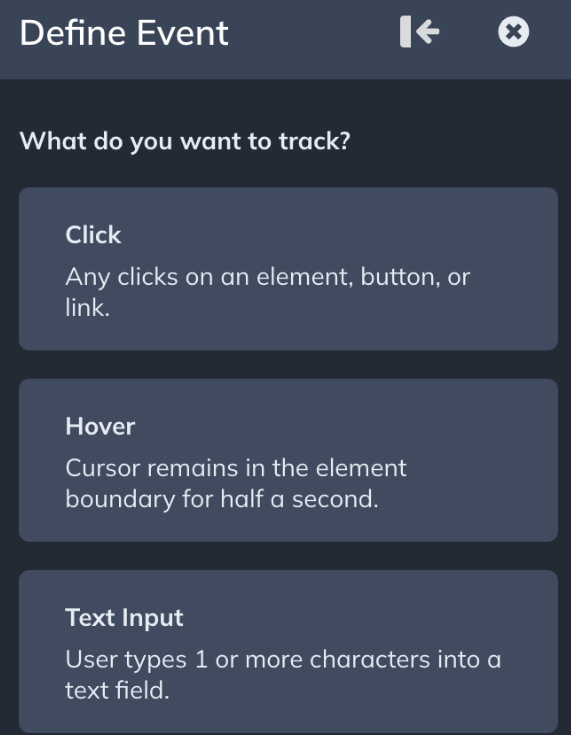
Once you've selected an element, you will be asked to pick which type of event you want to track.
- Click Events are events that will fire when someone clicks the element.
- Hover Events are events that will fire when someone keeps their cursor over your selected element for half a second. If they move the cursor before this occurs, the counter will reset and start fresh when they hover over the element again.
- Text Input Events are events that will fire when someone enters one or more characters into a text field. We will only track the event once, even if the person enters multiple characters. However, if someone types into the text box, focuses elsewhere, but then returns and continues typing in the field, this will count as a new firing of the event.
- NOTE: If the element you pick is not a text field, then Appcues will prevent you from selecting that Event Type
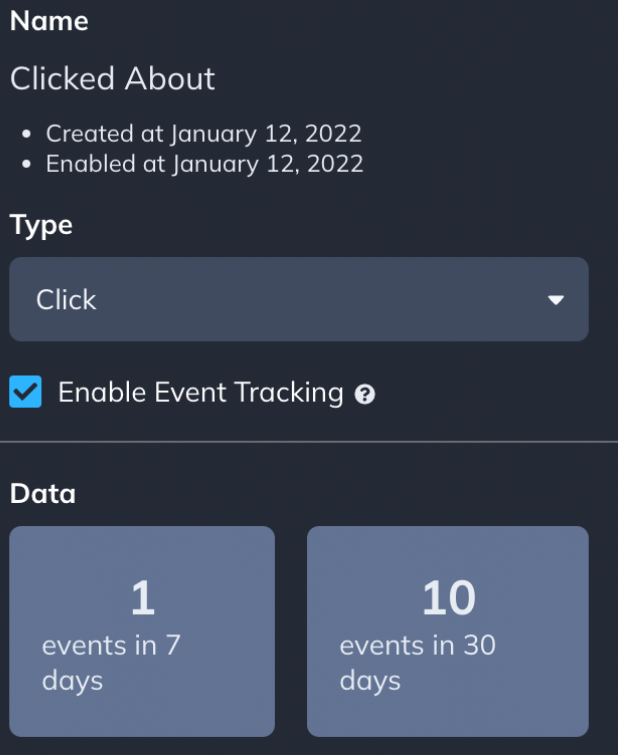
After you select an event type, you can finalize the event’s settings.
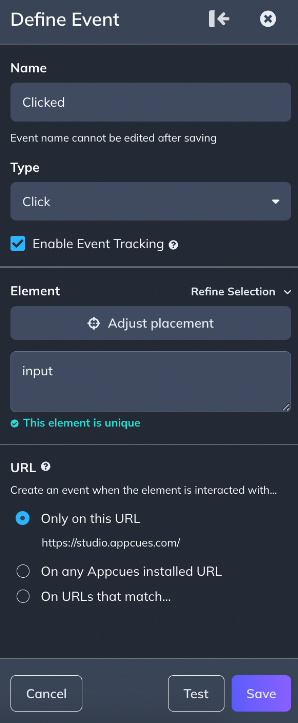
- Name The Event: It’s a best practice to create a naming convention so that you and your team will always know how to find and name events in the future.
NOTE: Names cannot be edited after being saved
-
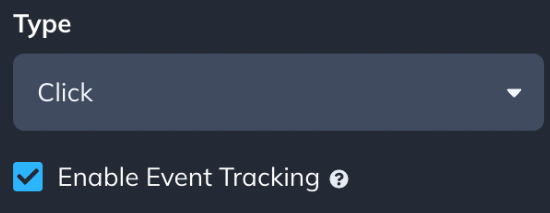
Enable/Disable the event: In order for an event to be tracked, it must be enabled. Events will not be tracked while they are disabled. You can enable/disable events as you need to.
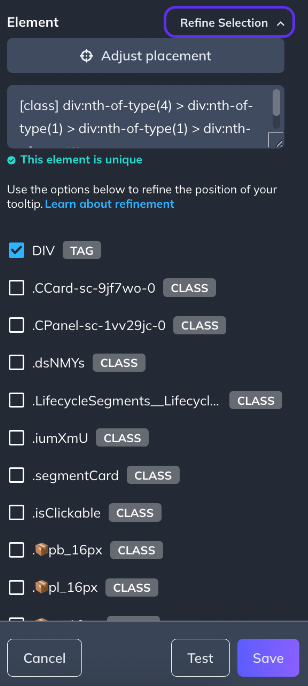
- Refine the Element: If you need to, you can adjust the element that you want to track by changing or refining the selector as necessary.
-
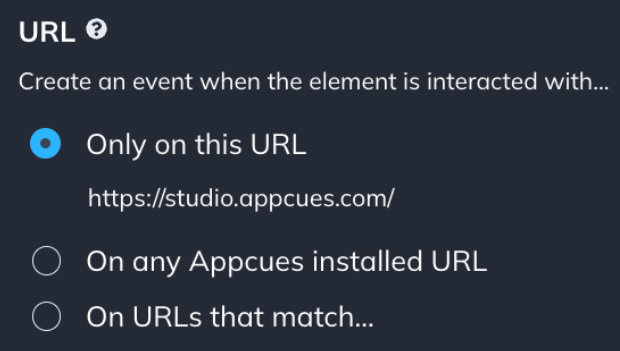
Set the URL settings for the event: The URL settings allow you to determine how you want to track this event.
- Only on this URL means that clicks will be only tracked on the URL that is specified in that selection.
- On any Appcues installed URL means that clicks will be tracked on any page that has the Appcues JavaScript snippet installed AND that the element exists. An example of when to use this option may be for a navigation menu item, because it's likely a link that exists on the majority of pages in your product.
-
On URLs that match... means that we’ll only track clicks of an element that occur on a specific set of URLs OR on a URL with a wildcard *. An example of when to use this option may be when the selected element exists on a page with a dynamic URL that is different for every user.
- For example, you selected an element that exists on all your user profile pages, but each user profile is slightly different because the URL may look something like website.com/profile/123 and website.com/profile/456, etc. For this option, you’ll put website.com/profile/* in the text box and then we’ll create an event anytime a user clicks the element on any profile
- For example, you selected an element that exists on all your user profile pages, but each user profile is slightly different because the URL may look something like website.com/profile/123 and website.com/profile/456, etc. For this option, you’ll put website.com/profile/* in the text box and then we’ll create an event anytime a user clicks the element on any profile
-
Test the event: Once you’ve set up the details of your event you can click the Test Button and then click the correct element to make sure the element gets recognized correctly so it will fire the event.

How Many Events Should You Define?
The number of events to be defined will depend on your product. It is best practice to only define those events that you're actively going to:
- Use for targeting and triggering flows
- Use for segmenting your users based on behavior in your platform
- Track for usage and adoption
The Event List
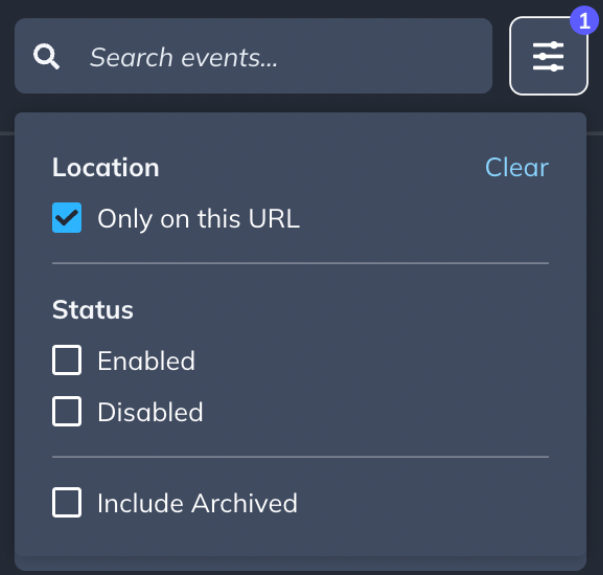
Once you save an event, it will show up in an event list sidebar. Depending on your filter settings, you will be able to view all the events across your entire Appcues account, or just the ones that match the URL you are currently on, as well as Enabled, Disabled, and Archived events.
When viewing the event list you’ll also be able to search for existing events, define a new event on that page, or select an existing event to make additional adjustments.
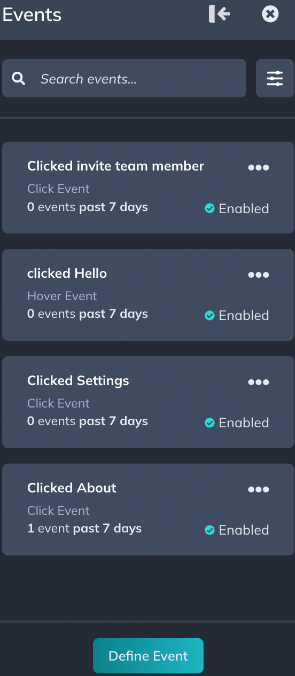
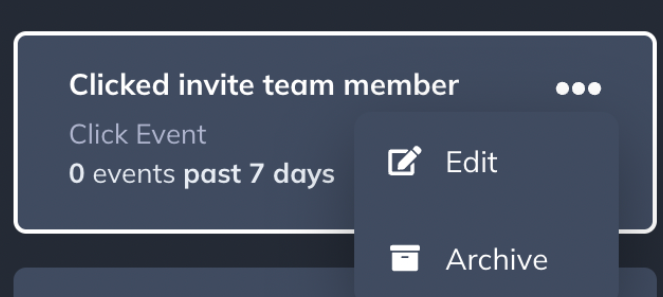
If you select an existing event, you will be able to see event counts for the past 7 and 30 days, as well as when the event was first created, and the last time it was enabled/disabled.
If at some point you determine you don't need to track an event anymore, you can archive it. This will remove the event from your event list, disable tracking of it, and remove it from the Events Explorer page in the Appcues Studio. To archive an event, click the ... menu of any event on the event list, and select Archive (or Restore if you want to re-enable an archived event).
What Can I Do With These Events?
Once these events are created, you’ll now be able to use them for targeting, triggering, segments, goals, and view them in the Events Explorer.
Additionally, all the events you created via the builder will be viewable under settings -> Events and Properties -> Events, and labeled as a “Track Event (Builder)”.
While the Event will appear almost immediately in the Event settings, it may take up to 5 minutes for data to start populating.
You can also send these events to Appcues Integrations via the Events Broadcaster add-on.
A Couple of Things To Note
- You can select an element within a dropdown menu by holding SHIFT while in define mode. While holding shift, you’ll be able to navigate and select elements that may appear within menus or dropdowns. This is the same processed used in attaching tooltips to dynamic elements.
- You have the ability to make your selector as granular as possible, but if the selector matches more than 10 elements on the screen, we will not let you save the event until it is more specific.
- For the best element selection results and to eliminate common issues, assign unique IDs to all elements you intend to select with Click-to-track.
- If you don't see all the things mentioned in this article, make sure your Appcues Chome Extension is up-to-date.